Inleiding
Hello all,
In my opinion it is not the best laptop from HP. actualy its a difficult laptop to work on.
a expensive laptop for (inside) parts that could be better parts.. certainly for a hp laptop
i made this guide during night so it is not my best guide that i've written so far.
I hope it helps you fixing your hp envy m6 ..
good luck
Wat je nodig hebt
-
-
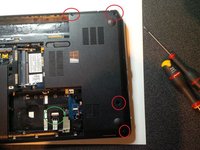
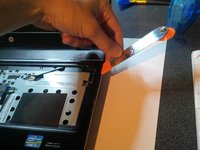
first of all we are going to remove the bottom plastic plates and the battery
-
I apologize for the bad light ( and my Englisch , my native language is dutch), i made this guide during night..
-
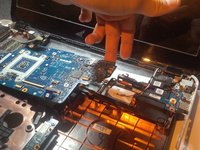
after removing the battery and plates you will see the HDD, wifi m-sata module and RAM. You will also see the bios battery ( next to the HDD).
 Vraag FixBot
-
-
-
now remove the hdd by loosen the connector.
-
mine was already broken when i bought the laptop.
-
after you removed the connector, lift the hdd to one side and pull ( gently) it out.
-
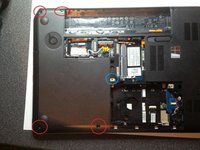
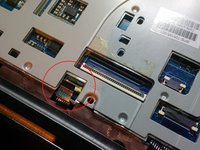
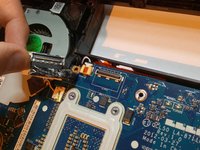
also remove the connector ( flex cable) attached to the mainboard. see green circle in second picture.
-
to loosen this connector use a spudger to lift the lid (lid of connector.) up. do it very gently.
-
-
-
now remove the RAM modules
-
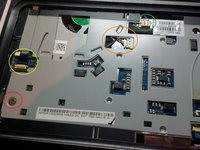
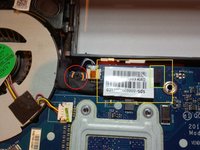
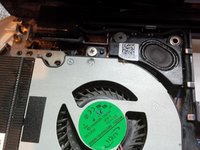
remove the two antenna's ( white and black) en remove the screw of the m-sata module. the module will come towards you when you remove the screw. the antenna's are in the green circle and the screw is in the red circle.
-
-
-
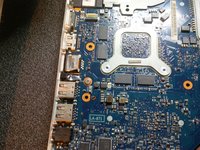
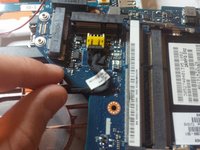
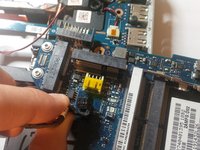
remove the 2 screws from the mainboard and the usb module.
-
-
-
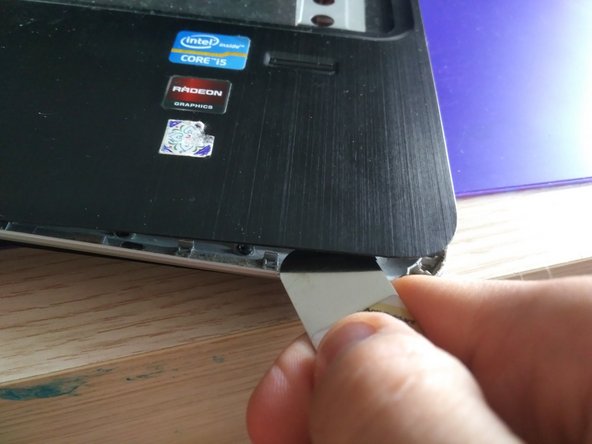
now we will remove the screws of the case...
-
remove the screws in the red circles.
-
remove the screw in the blue circle , this is the screw from the dvd bay. You can remove this by using a metal spudger or a isesamo iopener.
-
-
-
-
in the orange sqaure you'll see the place to put an SSD in. (m-sata)
-
in the red circle you'll see the connector of the DC jack.
-
if you remove the DC jack do this with an IC pliers.
-
-
-
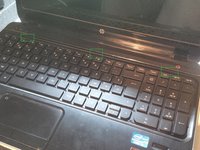
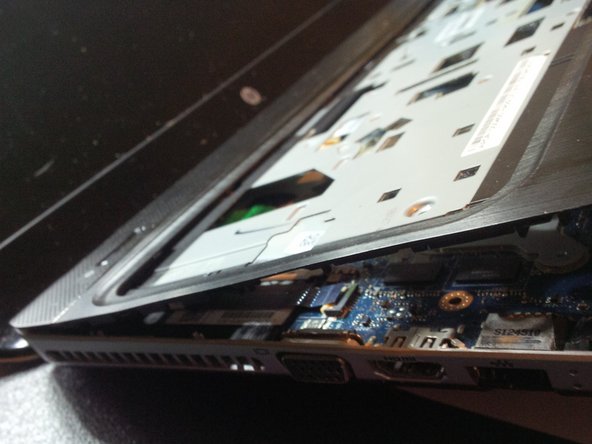
turn the laptop arround so you can open the lid.
-
use a screwdriver or a spudger to push the little black "fingers" from the keyboard away from the case. If you do it right you'll hear clicks.
-
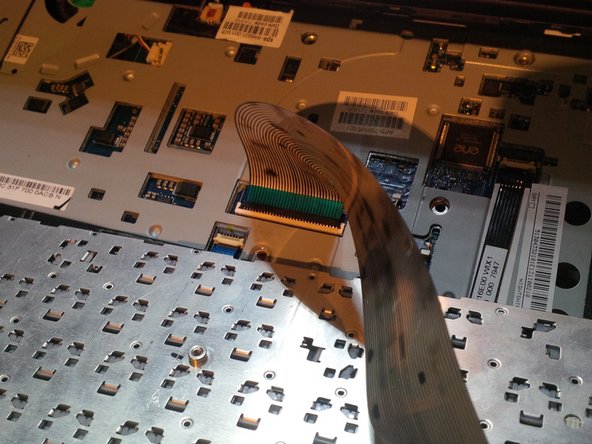
afterwards, lift the keyboard up and remove it from the mainboard connector. (lift up the little black lid (gently) en pull out the cable.)
-
-
-
after removing the keyboard you'll see the metal case with screws and connectors. again : be very gently with removing cables from connectors. especially if its your first repair..
-
picture 1 : red circle : connector remove it by gently pulling the little lid up and pull out the cable.
-
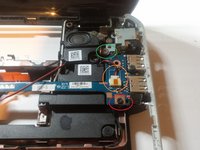
picture 2 :red circle : screw, remove it. Orange circle : audio connector , remove it with IC pliers. Lime circle : connector , remove like others. Blue circle: connector remove like others.
-
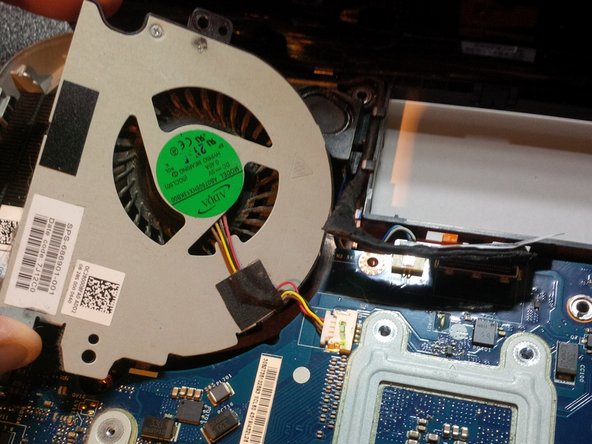
picture 3 : Green circle : audio, remove with IC pliers. Orange circle: power FAN connector , remove with IC pliers, Lime circle : power board connector , remove it very gently. Red circle : remove screw
-
there was one other screw at the metal case, it's at the right side just above the dvd bay player. I don't have a picture..
-
-
-
use a isesamo opener or a spudger to open the case .
-
slide your tool against the case , you will hear clicks.
-
gently remove the upper plate. afterwards you will se the mainboard.
-
-
-
remove the connector. this is the connector from the sata connector dvd player bay.
-
It is possible to replace the dvd bay with a HDD bay.
-
-
-
we will remove the mainboard in different steps.
-
first remove the screw(s) of the mainboard. i had only one screw left , the others were disapeared. the first owner tried to repair the laptop.. but we know now that it has not turned out well..
-
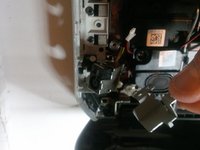
now we will remove the usb module .. Remove the screw in the red circle, the audio cable in the orange circle and remove the screw at the green circle. This is the screw from the DC jack metal plate.
-
-
-
lift the mainboard up and remove it from the case. the picture's are not in order so folow my explanation instead and see the picture's just as help.
-
after lifting up the mainboard tilt the motherboard so you can remove the DC connector.
-
-
-
now the mainboard is free.
-
in this case you can remove the CPU cooler. ( the copper tubes) In that case remove the screws simultaneous.
-
You can add ( after cleaning the cpu and the copper with isopropyl alcohol.) some new thermal paste at the cpu and graphic chip.
-
-
-
you can remove the screen or better sayed, replace the screen without tear down the laptop. just follow any other guide to replace a screen. normally speaking is it the same way.. thats why i didn't take pictures or guide you throuh this.
-
thanks for watching, if you have questions, cantact me and i will try to help you. or examine other guides that i wrote ( or other members) to learn about fixing laptops.
-


To reassemble your device, follow these instructions in reverse order.
Annuleren: ik heb deze handleiding niet afgemaakt.
4 andere personen hebben deze handleiding voltooid.

7Gids Commentaar
Hi there!
Thanks for the guide. I’m curious to repair mine, but have two questions
1) I have an envy m6 1201sg, but haven’t been able to figure out the differences between the different version numbers. Or are they actually the same?
2) How about removing the keys to clean them, is it possible?
C
Very nice, I have same laptop Model and laptop power switch is not working. How to check whether switch is bad or not form HP ENVY m6-1125dx ?
Salom menga hpni ustgi qopqogʻi kerak topiladimi
Iloji boʻlsa topib pochta qila olasizlarmi
Telfon nomerim +998991768069