Inleiding
You might need to replace the fan if your laptop overheats, or you hear loud grinding noises from inside the case. Alternatively, if you hear no noise from inside the case because the fan is broken.
Wat je nodig hebt
-
-
-
-
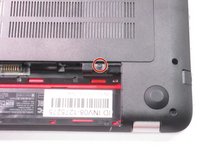
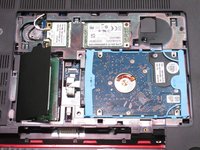
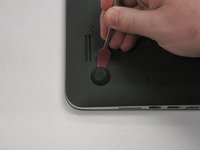
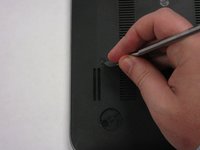
Remove the single screw holding the accessory plate. This is a PH0 2.0x2.5 screw.
-
-
-
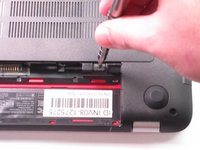
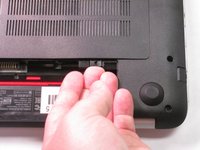
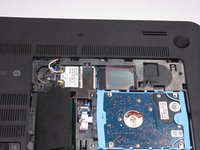
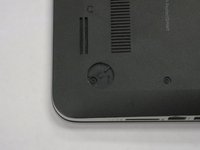
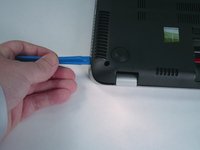
Pry the accessory plate up from the back of the laptop by applying force upwards where the screw was removed.
-
-
-
-
-
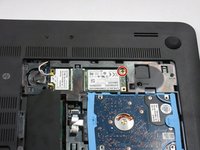
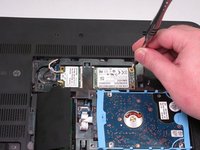
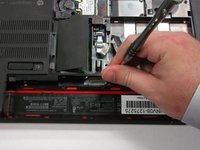
Remove the PM 2.0x2.5 screw with the PH#0 Screwdriver attachment that is shown at the corner of the Solid State Drive.
-
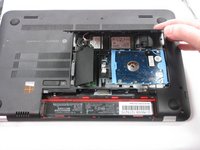
After you have removed the screw, the Solid State Drive should lift up.
-
-
-
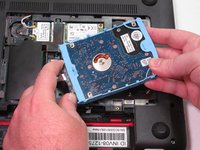
Very carefully, remove the SSD by gently pulling away from the SSD socket.
-
-
-
-
-
-
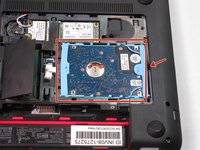
Use the plastic opening tool to pry the hard drive away from the board. Notice that there is a slit centered at the back of where the hard drive is sitting. This is where you'll insert the plastic opening tool as shown in the photo. Finally, pry with the plastic opening tool to remove the hard drive.
-
-
-
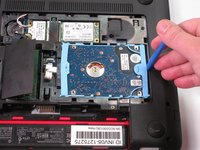
Firmly grasp the connector's base as shown and pull to remove from the hard drive.
-
-
-
-
-
Remove the highlighted rubber stoppers with a metal spudger as pictured. They should expose a screw that you will need to remove in a later step.
-
-
-
Remove plastic cover highlighted. It should expose a screw that you will need in a later step.
-
-
-
Remove all highlighted screws with PH 1 screwdriver. These screws are PM 2.0x2.5.
-
-
-
Remove all highlighted screws from the battery access area. These are PM 1.5x2.0 screws
-
-
-
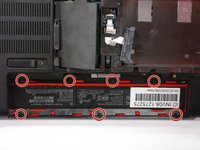
Remove screws highlighted with PH1 screwdriver from accessory plate area.These are PM 2.5x3.0 screws
-
Remove screws highlighted with PH1 screwdriver from accessory plate area. These are PM 2.5x4.5 screws
-
-
-
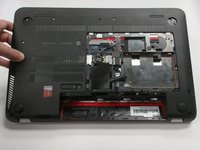
Pry open back plate area with plastic opening tool. The back plate should pry open with relative ease. If you feel some resistance at any point please refer to steps 2-5 because a screw has probably been missed.
-
-
-
-
-
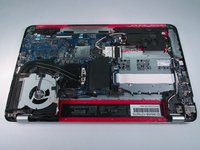
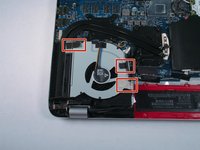
There are 3 screws holding the fan in place. These are PM 2.5x4.5 screws
-
-
-
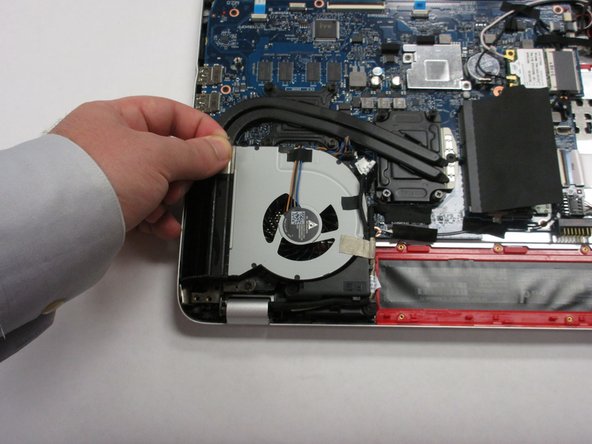
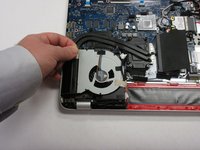
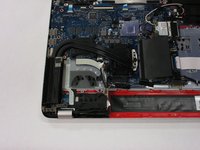
Remove the fan by sliding it out and pulling it upwards. Set the fan off to the side to reveal the connector.
-
-
-
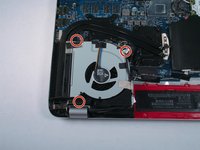
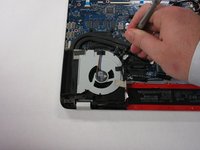
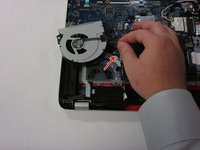
Remove the black connector from the white insert shown at the center of the picture just below the fingers pinching the black connector.
-
The connector will come out straight up.
-
-


To reassemble your device, follow these instructions in reverse order.
Annuleren: ik heb deze handleiding niet afgemaakt.
21 andere personen hebben deze handleiding voltooid.
Team

USF Tampa, Team 2-6, Sullivan Fall 2015 Lid van USF Tampa, Team 2-6, Sullivan Fall 2015
USFT-SULLIVAN-F15S2G6
4 Leden
10 handleidingen geschreven
13Gids Commentaar
TY. excellent write up =)
TY good write up I did not have an SSD drive . Some of the screw locations were slightly different [I suppose they very by configuration].
I meticulously followed your instructions. I did have trouble reconnecting the hard drive but it was my lack of experience and a good magnifying glass. Problem fixed. Fan working great.
Really appreciate your photos and explanation
Excellent directions. Great pictures. Everything was as specified in the instructions. Original fan had a piece of broken plastic in it Removed and reassembled, works great. Make sure flat lead for hard drive is correctly installed.
This was seriously better than any YouTube video ever. It worked like a charm period thank you so much.
Excellent walk thru... best I've ever seen!