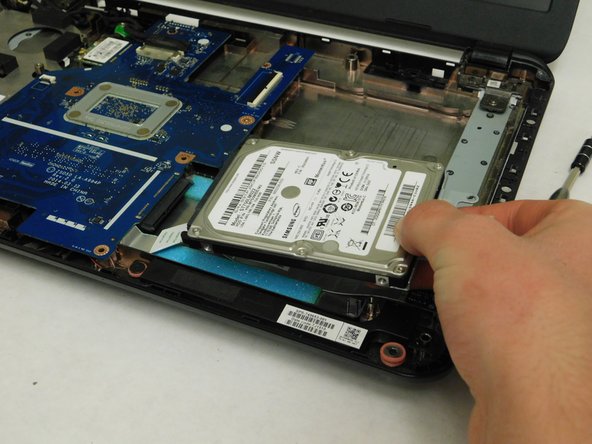
Ga door naar hoofdinhoud

HP 15-R263DX Hard Drive Replacement

Wat je nodig hebt

  1. HP 15-R263DX Hard Drive Replacement, Battery: stap 1, afbeelding 1 van 2 HP 15-R263DX Hard Drive Replacement, Battery: stap 1, afbeelding 2 van 2
    • Eject the battery from the computer by sliding the two clips on the bottom of the computer toward the center of the computer.

    • Slide the battery out as shown in the picture.

  2. HP 15-R263DX Hard Drive Replacement, Optical Drive: stap 2, afbeelding 1 van 2 HP 15-R263DX Hard Drive Replacement, Optical Drive: stap 2, afbeelding 2 van 2
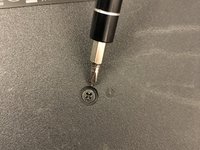
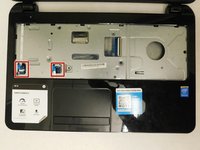
    • Using a Phillips #1 screwdriver, remove the small screw next to the disc engraving shown in the picture.

  3. HP 15-R263DX Hard Drive Replacement: stap 3, afbeelding 1 van 1
    • Gently slide the optical drive out of the side of the computer.

  4. HP 15-R263DX Hard Drive Replacement, HP 15-R263DX Disassembly: stap 4, afbeelding 1 van 2 HP 15-R263DX Hard Drive Replacement, HP 15-R263DX Disassembly: stap 4, afbeelding 2 van 2
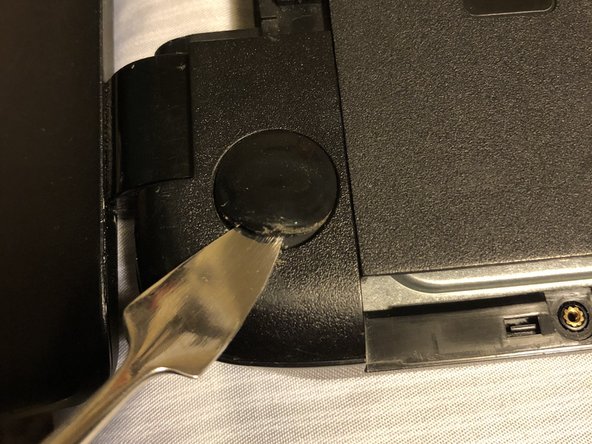
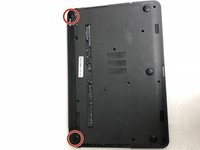
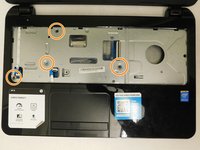
    • Locate the two corner grips on the hinge side of the computer.

    • Using a metal spudger, remove the two corner grips to reveal the screws.

  5. HP 15-R263DX Hard Drive Replacement: stap 5, afbeelding 1 van 1
    • Remove the 11 small screws on the bottom of the computer that are shown in the picture.

  6. HP 15-R263DX Hard Drive Replacement: stap 6, afbeelding 1 van 1
    • Remove the 2 small screws that are on the bottom side of the disc tray slot.

    • These screws are shorter and wider than the others.

  7. HP 15-R263DX Hard Drive Replacement: stap 7, afbeelding 1 van 2 HP 15-R263DX Hard Drive Replacement: stap 7, afbeelding 2 van 2
    • Once the keyboard is loose, do not immediately pull away from computer. It is attached by the ribbon connector.

    • Using a spudger, pry around the edges of the keyboard until all clips are disengaged and the keyboard is loose from the computer.

    • To disconnect the ribbon connector, flip up the black clip shown in the picture.

    • Gently pull the ribbon until disconnected.

  8. HP 15-R263DX Hard Drive Replacement: stap 8, afbeelding 1 van 2 HP 15-R263DX Hard Drive Replacement: stap 8, afbeelding 2 van 2
    • Disconnect the other two ribbon connectors underneath the keyboard by fliping up the black clips.

    • Remove the 4 small screws shown in the picture.

  9. HP 15-R263DX Hard Drive Replacement: stap 9, afbeelding 1 van 1
    • Disengage the face plate clips by prying the case away from around the outer edge of the face plate with a metal wedge.

    • The face plate can then be lifted away from the computer.

  10. HP 15-R263DX Hard Drive Replacement, Hard Drive: stap 10, afbeelding 1 van 1
    • Remove the 2 black screws holding the hard drive to the computer frame.

  11. HP 15-R263DX Hard Drive Replacement: stap 11, afbeelding 1 van 2 HP 15-R263DX Hard Drive Replacement: stap 11, afbeelding 2 van 2
    • Gently slide the hard drive away from the motherboard to disconnect it.

    • After it's disconnected, lift the hard drive up to remove it from the computer.

Conclusie

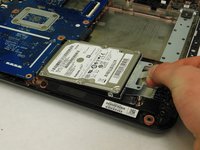
To reassemble your device, follow these instructions in reverse order.

2 andere personen hebben deze handleiding voltooid.

Drake Hort

Lid sinds: 03/05/18

463 Reputatie

3 handleidingen geschreven

Team

0 opmerkingen

Voeg opmerking toe

Weergavestatistieken:

Afgelopen 24 uren: 0

Afgelopen 7 dagen: 0

Afgelopen 30 dagen: 5

Altijd: 1,458