Ga door naar hoofdinhoud
Word lid van de reparatiegemeenschap - Account aanmaken

Gateway NE52203u Wireless Card Replacement

Wat je nodig hebt

  1. Gateway NE52203u Wireless Card Replacement, Battery: stap 1, afbeelding 1 van 1
    • Flip the device over onto its backside in order to access the battery.

    Vraag FixBot
  2. Gateway NE52203u Wireless Card Replacement: stap 2, afbeelding 1 van 2 Gateway NE52203u Wireless Card Replacement: stap 2, afbeelding 2 van 2
    • Locate the battery release latch and slide it over to the other side.

    • A small tool like a pen or screwdriver may be helpful in sliding the latch to release the battery.

    Vraag FixBot
  3. Gateway NE52203u Wireless Card Replacement: stap 3, afbeelding 1 van 1
    • Grab the newly ejected battery from the device to completely remove it.

    • When reinserting the new battery, make sure the prongs on the battery are aligned with the corresponding holes on the laptop.

    Vraag FixBot
  4. Gateway NE52203u Wireless Card Replacement, Touchpad Assembly: stap 4, afbeelding 1 van 2 Gateway NE52203u Wireless Card Replacement, Touchpad Assembly: stap 4, afbeelding 2 van 2
    • Remove 18 6.0 mm Phillips #00 screws from the bottom of the laptop.

    • Remove 5 6.0 mm Phillip #00 screws from under cover.

    Vraag FixBot
  5. Gateway NE52203u Wireless Card Replacement: stap 5, afbeelding 1 van 1
    • Remove three 2.9 mm Phillips #00 screws from the battery compartment.

    Vraag FixBot
  6. Gateway NE52203u Wireless Card Replacement: stap 6, afbeelding 1 van 2 Gateway NE52203u Wireless Card Replacement: stap 6, afbeelding 2 van 2
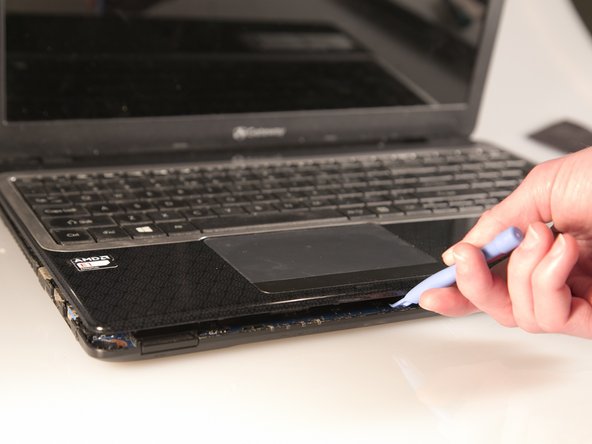
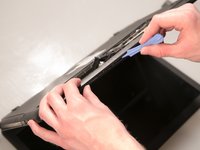
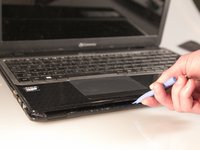
    • Separate the bottom panel from the touchpad assembly by inserting a plastic opening tool between them on all four sides.

    Vraag FixBot
  7. Gateway NE52203u Wireless Card Replacement: stap 7, afbeelding 1 van 1
    Gereedschap gebruikt in deze stap:
    Tweezers
    $4.99
    • Pull black ribbon wire from port using tweezers in order to completely separate touchpad assembly from bottom assembly.

    Vraag FixBot
  8. Gateway NE52203u Wireless Card Replacement: stap 8, afbeelding 1 van 3 Gateway NE52203u Wireless Card Replacement: stap 8, afbeelding 2 van 3 Gateway NE52203u Wireless Card Replacement: stap 8, afbeelding 3 van 3
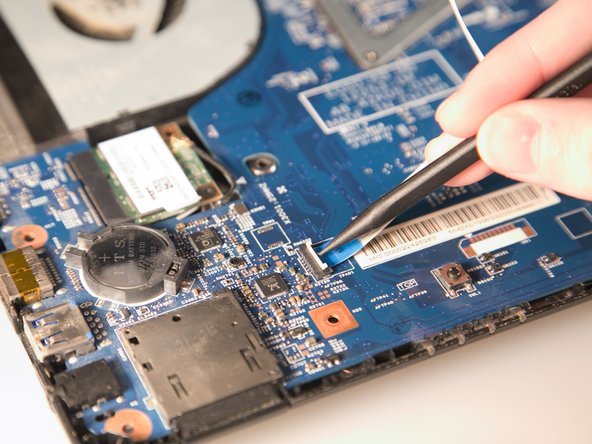
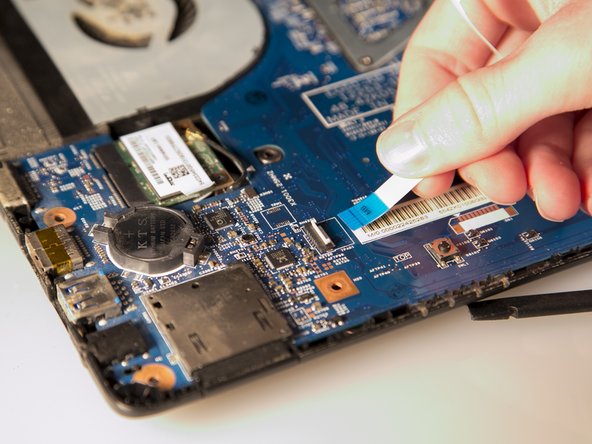
    • Disconnect the two ZIF ports that attach the touchpad assembly to the motherboard.

    • First flip open the flap covering the ribbon using a spudger or fingernail.

    • Second gently pull the ribbon away from the port.

    Vraag FixBot
  9. Gateway NE52203u Wireless Card Replacement, Wireless Card: stap 9, afbeelding 1 van 2 Gateway NE52203u Wireless Card Replacement, Wireless Card: stap 9, afbeelding 2 van 2
    Gereedschap gebruikt in deze stap:
    Tweezers
    $4.99
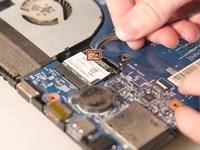
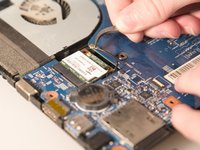
    • Grab the antenna cable with tweezers and lift up to pull it off.

    • The antenna is the small black cable with the golden head

    Vraag FixBot
  10. Gateway NE52203u Wireless Card Replacement: stap 10, afbeelding 1 van 1
    • Remove the one 2.9 mm Phillips #00 screw holding down the wireless card in place.

    Vraag FixBot
  11. Gateway NE52203u Wireless Card Replacement: stap 11, afbeelding 1 van 1
    • After the screw is removed, the card will spring upwards slightly. Pull out the old wireless card from its port.

    Vraag FixBot
Conclusie

To reassemble your device, follow these instructions in reverse order.

Stephen Spees

Lid sinds: 03/20/15

542 Reputatie

4 handleidingen geschreven

Team

Baylor, Team 2-1, Grigsby Spring 2015 Lid van Baylor, Team 2-1, Grigsby Spring 2015

BU-GRIGSBY-S15S2G1

4 Leden

10 handleidingen geschreven

0Gids Commentaar

Voeg opmerking toe

Weergavestatistieken:

Afgelopen 24 uren: 2

Afgelopen 7 dagen: 9

Afgelopen 30 dagen: 53

Altijd: 829