Inleiding
Flipper Zero is a versatile multi-tool device that is widely used for hardware hacking, electronics prototyping, and security testing. One of its most useful features is the NFC RFID board, which enables users to interact with RFID devices such as access control systems, NFC tags, and smart cards. However, over time, the NFC RFID board of your Flipper Zero can become damaged or wear out, leading to issues with RFID functionality.
If you're experiencing issues with your Flipper Zero's NFC RFID board, don't worry. Replacing the NFC RFID board is a simple process that can be done with just a few tools and some basic knowledge. In this guide, we'll take you through the steps involved in replacing the NFC RFID board of your Flipper Zero, so you can continue to enjoy using this powerful device for all your RFID-related needs.
Wat je nodig hebt
-
-
Go to Main Menu > Settings > Power.
-
Select Power OFF.
-
Confirm by pressing the Right-button.
-
-
-
Use a PH1 screwdriver to unscrew the four long screws holding the back cover.
-
-
-
-
Press the middle of the top cover on both sides, one by one, to release the latches that hold the back cover in place.
-
Once the latches are released, you can remove the bottom cover.
-
-
-
Use a PH0 screwdriver to unscrew the two short screws that are holding the chassis and top cover together.
-
Once the screws are removed, separate the chassis from the top cover.
-
-
-
Disconnect the battery by carefully prying the connector with a Spudger and pulling it out.
-
-
-
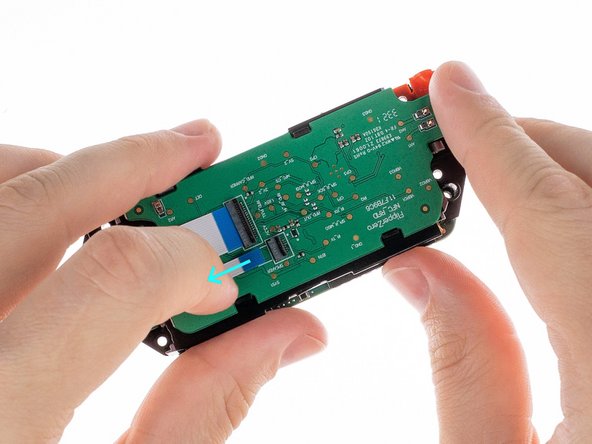
Disconnect the large ribbon cable from the board. Use a plastic pick to lift the latch up to release the locks.
-
Once the connectors are unlocked, carefully pull out the ribbon cables.
-
-
-
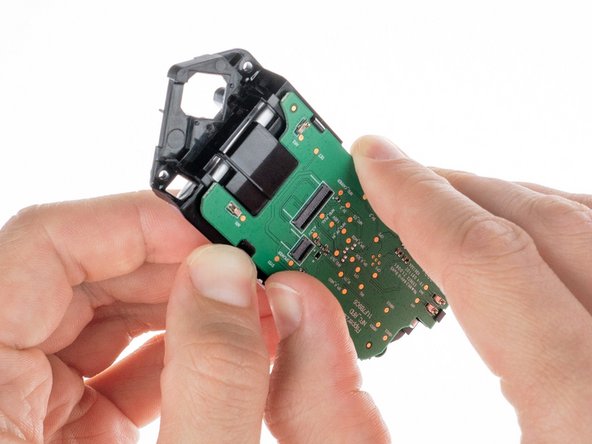
To remove the NFC RFID board, release it from the latches in the sequence shown by pressing on the edge of the chassis near each latch.
-
Gently lift the NFC RFID board out of the chassis once all latches are released.
-
To reassemble your device, follow these instructions in reverse order.
Take your e-waste to an R2 or e-Stewards certified recycler.
To reassemble your device, follow these instructions in reverse order.
Take your e-waste to an R2 or e-Stewards certified recycler.


