Inleiding
This is a simple tear down & repair tutorial for the Fitbit Charge HR. Illustrated is the replacing of a weak or dead battery.
Wat je nodig hebt
-
-
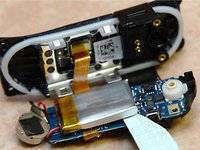
Inside your Fitbit Charge HR
 Vraag FixBot
-
-
-
You'll need some plastic bits to separate the band, plus a torx T3 driver, new battery and a soldering iron.
-
-
-
This repair only works on the Fitbit Charge HR model, not the older Charge without heart rate. The batteries are different.
-
-
-
-
Start by removing the 4 torx screws
-
-
-
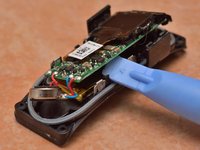
The assembly is briskly snapped into place. You'll need to separate the sides of the housing with a small plastic tool and your finger nail (or two plastics). Be careful, as the housing can fracture with too much force.
-
-
-
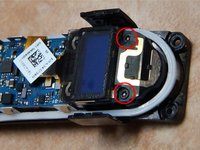
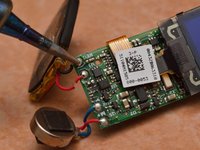
Once removed, there are 2 torx screws holding the circuit board in place. Remove these, and carefully pry the board out
-
-
-
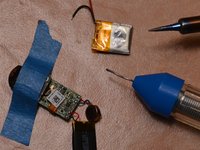
The Fitbit is very light and hard to hold, so it is recommended to tape the board in place when soldering.
-
-
-
Note: You can permanently damage your device. Be careful with the assembly, and splice one or both wires before removing the old battery to prevent a short. Do not mistake the round buzzer for a battery. It is not !
-
-
-
After replacing the bad battery, plug in the charger for at least 20 minutes. Then remove the charger to confirm you have a working replacement.
-


To reassemble your device, follow these instructions in reverse order.
Annuleren: ik heb deze handleiding niet afgemaakt.
33 andere personen hebben deze handleiding voltooid.

23Gids Commentaar
The battery on the original Fitbit tracker is different than the newer Fitbit HR. If you can find a battery that fits, it would work.
Where can I buy a replacement battery for my charge hr? Fitbit wants me to buy a new Fitbit which is inexcusable since the watch is only 16 months old
They sell them on Amazon for $10.95. Has only one review for 2 stars. Trying to decide if I should order one. Caveat emptor!
Can you give me the size of the battery?