Ga door naar hoofdinhoud

Dewalt Nailers DCN680D1 2018 Driver Blade Replacement

Wat je nodig hebt

  1. Dewalt Nailers DCN680D1 2018 Driver Blade Replacement, Remove the battery: stap 1, afbeelding 1 van 3 Dewalt Nailers DCN680D1 2018 Driver Blade Replacement, Remove the battery: stap 1, afbeelding 2 van 3 Dewalt Nailers DCN680D1 2018 Driver Blade Replacement, Remove the battery: stap 1, afbeelding 3 van 3
    • Before you begin the repair, remove the battery from the device.

  2. Dewalt Nailers DCN680D1 2018 Driver Blade Replacement, Loosen the outer housing: stap 2, afbeelding 1 van 1
    • Remove the following screws securing the outer housing:

    • Twelve T10 screws

    • One 2.5 mm hex screw

    • Some of these screws are deeply recessed. You can use a flathead screwdriver to loosen these screws.

  3. Dewalt Nailers DCN680D1 2018 Driver Blade Replacement, Remove the right housing: stap 3, afbeelding 1 van 2 Dewalt Nailers DCN680D1 2018 Driver Blade Replacement, Remove the right housing: stap 3, afbeelding 2 van 2
    • Lift and remove the right housing from the device.

  4. Dewalt Nailers DCN680D1 2018 Driver Blade Replacement, Loosen the internal parts: stap 4, afbeelding 1 van 2 Dewalt Nailers DCN680D1 2018 Driver Blade Replacement, Loosen the internal parts: stap 4, afbeelding 2 van 2
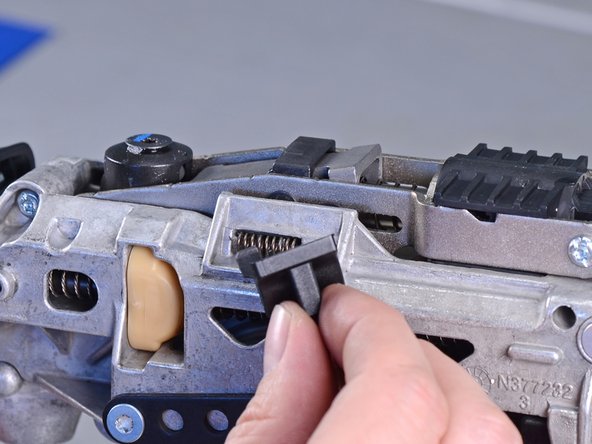
    • Remove the lock button from its recess.

    • During reassembly, make sure that the button is properly seated and engages the trigger.

  5. Dewalt Nailers DCN680D1 2018 Driver Blade Replacement: stap 5, afbeelding 1 van 2 Dewalt Nailers DCN680D1 2018 Driver Blade Replacement: stap 5, afbeelding 2 van 2
    • Slide the battery connector out of its recess.

  6. Dewalt Nailers DCN680D1 2018 Driver Blade Replacement: stap 6, afbeelding 1 van 3 Dewalt Nailers DCN680D1 2018 Driver Blade Replacement: stap 6, afbeelding 2 van 3 Dewalt Nailers DCN680D1 2018 Driver Blade Replacement: stap 6, afbeelding 3 van 3
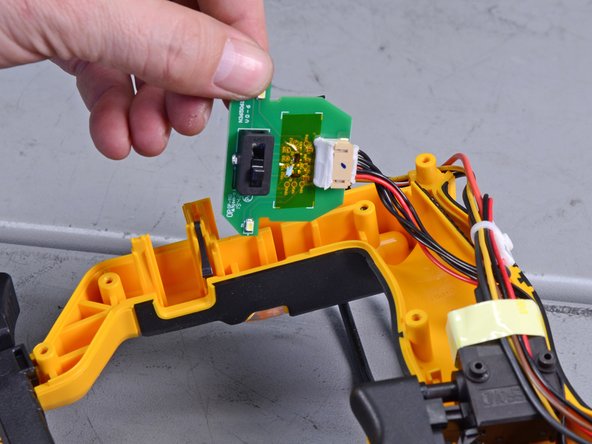
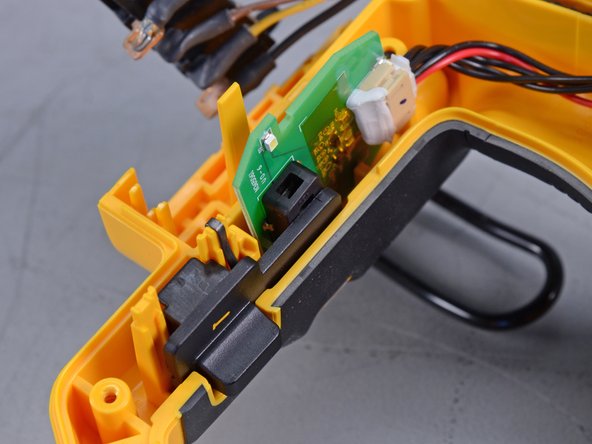
    • Remove the switch board, switch, and spring from its housing recess.

    • During reassembly, use the third photo as a reference to help you set the components back in the housing.

  7. Dewalt Nailers DCN680D1 2018 Driver Blade Replacement, Remove the left housing: stap 7, afbeelding 1 van 3 Dewalt Nailers DCN680D1 2018 Driver Blade Replacement, Remove the left housing: stap 7, afbeelding 2 van 3 Dewalt Nailers DCN680D1 2018 Driver Blade Replacement, Remove the left housing: stap 7, afbeelding 3 van 3
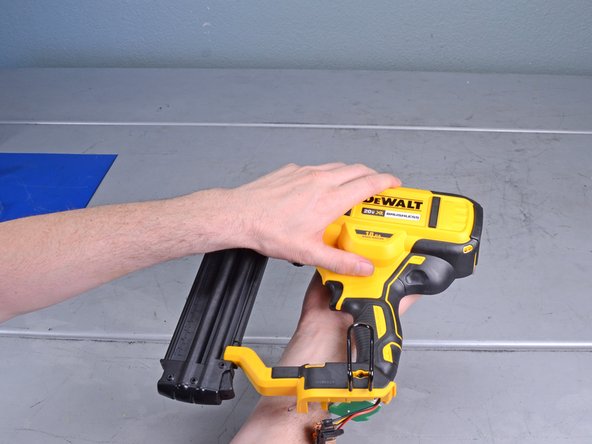
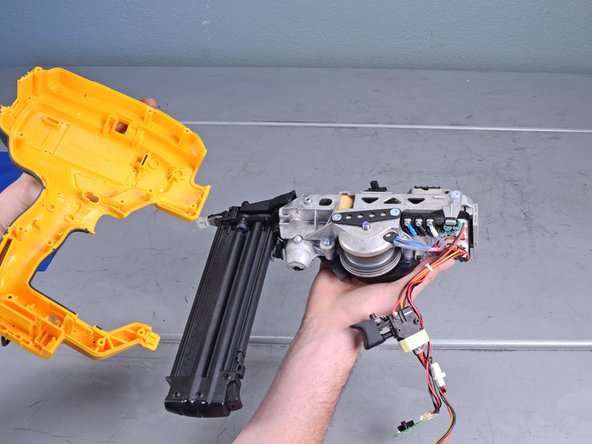
    • Carefully flip the device over.

    • Remove the left housing from the device.

  8. Dewalt Nailers DCN680D1 2018 Driver Blade Replacement: stap 8, afbeelding 1 van 3 Dewalt Nailers DCN680D1 2018 Driver Blade Replacement: stap 8, afbeelding 2 van 3 Dewalt Nailers DCN680D1 2018 Driver Blade Replacement: stap 8, afbeelding 3 van 3
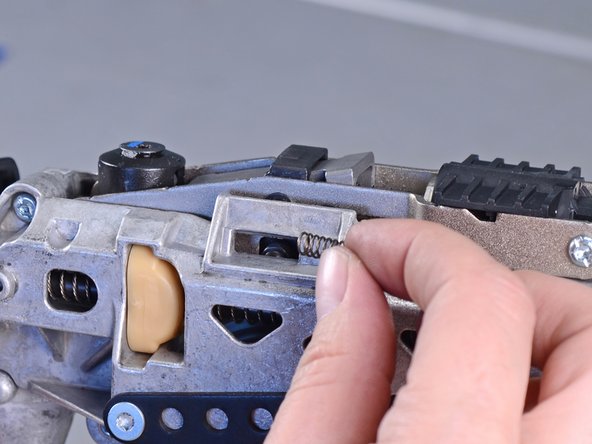
    • The spring under the release button has a tendency to fly out. Be careful not to lose the spring.

    • Carefully remove the release button from the device.

    • Remove the button spring from the device.

  9. Dewalt Nailers DCN680D1 2018 Driver Blade Replacement, Remove the back support: stap 9, afbeelding 1 van 2 Dewalt Nailers DCN680D1 2018 Driver Blade Replacement, Remove the back support: stap 9, afbeelding 2 van 2
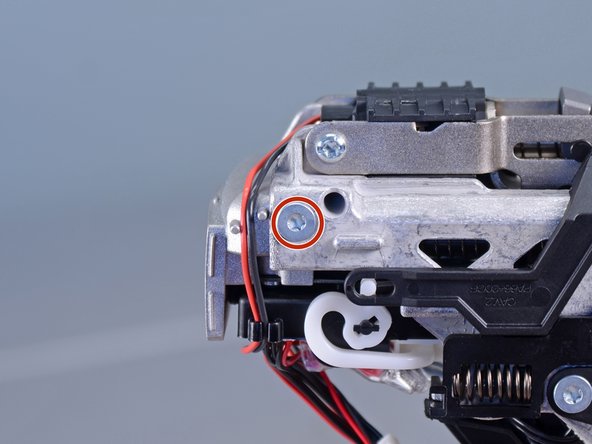
    • Use a T20 driver to remove the two screws (one on either side) securing the back support .

  10. Dewalt Nailers DCN680D1 2018 Driver Blade Replacement: stap 10, afbeelding 1 van 2 Dewalt Nailers DCN680D1 2018 Driver Blade Replacement: stap 10, afbeelding 2 van 2
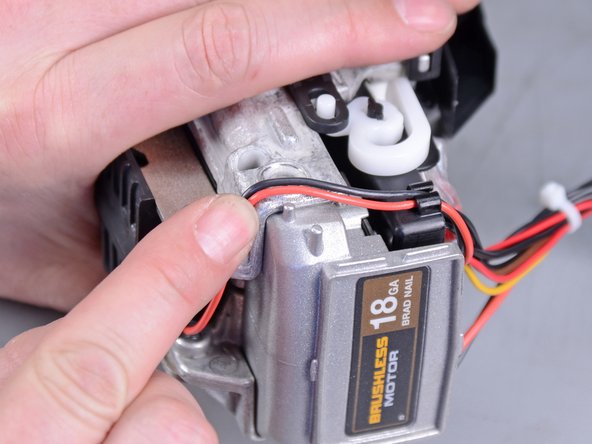
    • Loosen the two solenoid wires from the back support.

  11. Dewalt Nailers DCN680D1 2018 Driver Blade Replacement: stap 11, afbeelding 1 van 2 Dewalt Nailers DCN680D1 2018 Driver Blade Replacement: stap 11, afbeelding 2 van 2
    • Pull the back support straight out of the device.

  12. Dewalt Nailers DCN680D1 2018 Driver Blade Replacement, Remove the driver assembly: stap 12, afbeelding 1 van 3 Dewalt Nailers DCN680D1 2018 Driver Blade Replacement, Remove the driver assembly: stap 12, afbeelding 2 van 3 Dewalt Nailers DCN680D1 2018 Driver Blade Replacement, Remove the driver assembly: stap 12, afbeelding 3 van 3
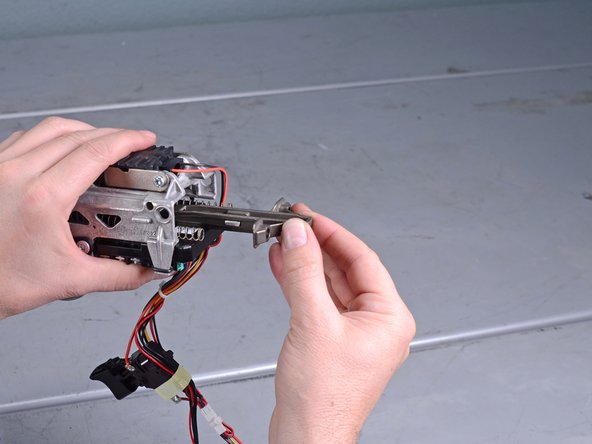
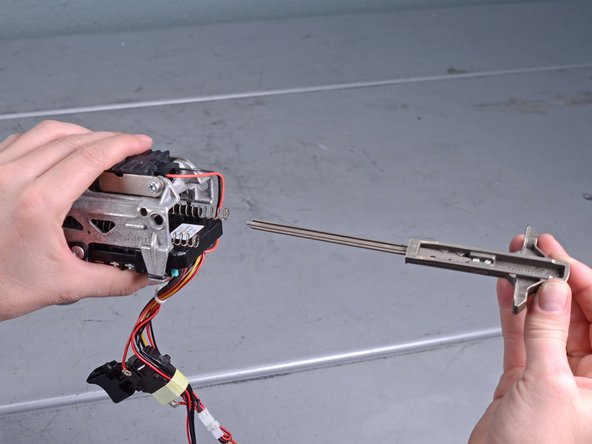
    • Grasp the driver assembly by its back and pull it straight out of the device.

  13. Dewalt Nailers DCN680D1 2018 Driver Blade Replacement, Remove the blade: stap 13, afbeelding 1 van 3 Dewalt Nailers DCN680D1 2018 Driver Blade Replacement, Remove the blade: stap 13, afbeelding 2 van 3 Dewalt Nailers DCN680D1 2018 Driver Blade Replacement, Remove the blade: stap 13, afbeelding 3 van 3
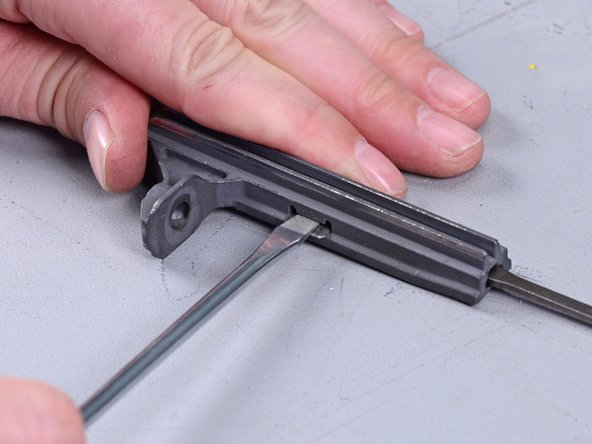
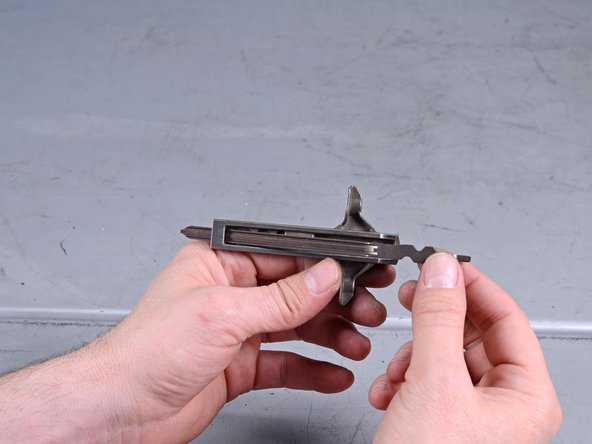
    • Use pliers or a flathead screwdriver to straighten the retaining clip securing the blade.

  14. Dewalt Nailers DCN680D1 2018 Driver Blade Replacement: stap 14, afbeelding 1 van 2 Dewalt Nailers DCN680D1 2018 Driver Blade Replacement: stap 14, afbeelding 2 van 2
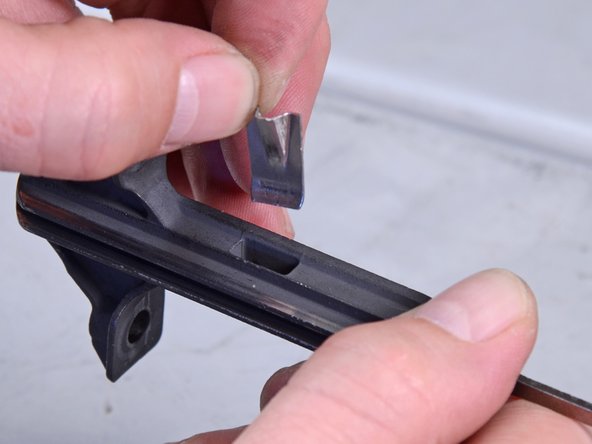
    • Remove the retaining clip from the driver assembly.

  15. Dewalt Nailers DCN680D1 2018 Driver Blade Replacement: stap 15, afbeelding 1 van 3 Dewalt Nailers DCN680D1 2018 Driver Blade Replacement: stap 15, afbeelding 2 van 3 Dewalt Nailers DCN680D1 2018 Driver Blade Replacement: stap 15, afbeelding 3 van 3
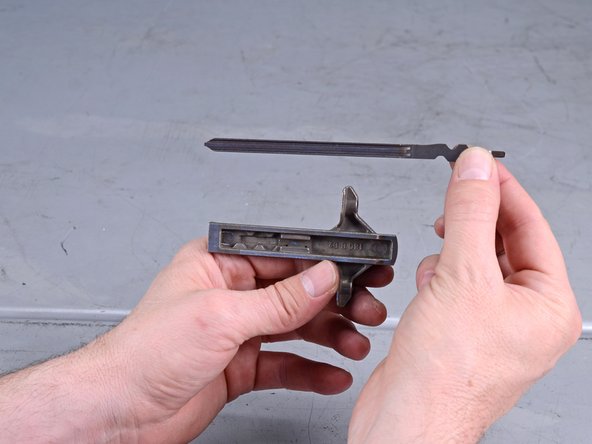
    • Slide the blade out of the driver assembly's slot, and remove it from the assembly.

  16. Dewalt Nailers DCN680D1 2018 Driver Blade Replacement, Install a replacement blade: stap 16, afbeelding 1 van 3 Dewalt Nailers DCN680D1 2018 Driver Blade Replacement, Install a replacement blade: stap 16, afbeelding 2 van 3 Dewalt Nailers DCN680D1 2018 Driver Blade Replacement, Install a replacement blade: stap 16, afbeelding 3 van 3
    • The next two steps show how to install a replacement blade into the driver assembly.

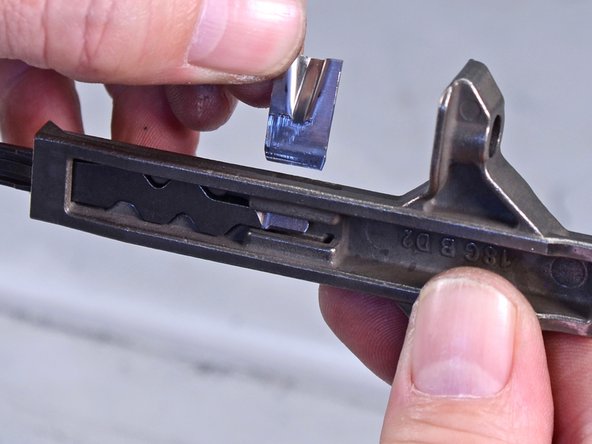
    • Slide the blade through the slot in the driver assembly and set it into the wavy groove.

    • If the blade does not sit snugly in the groove, flip the blade over and try again.

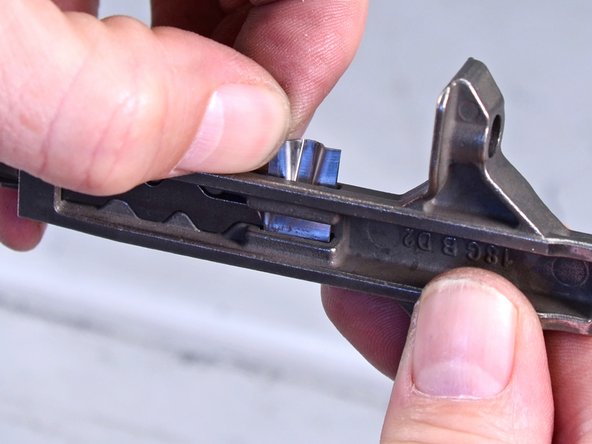
    • Insert the retaining clip oriented as shown in the photos into the driver assembly.

  17. Dewalt Nailers DCN680D1 2018 Driver Blade Replacement: stap 17, afbeelding 1 van 2 Dewalt Nailers DCN680D1 2018 Driver Blade Replacement: stap 17, afbeelding 2 van 2
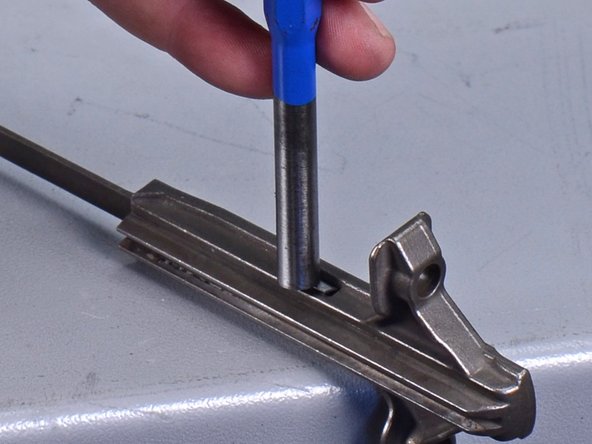
    • Use pliers or a hammer and punch to bend the protruding end of the clip over in order to secure the blade.

Conclusie

To reassemble your device, follow these instructions in reverse order.

5 andere personen hebben deze handleiding voltooid.

Arthur Shi

Lid sinds: 01/03/18

253.422 Reputatie

526 handleidingen geschreven

Team

iFixit Lid van iFixit

Staff

135 Leden

17.198 handleidingen geschreven

3 opmerkingen

Thank you for this video, replacing the drive blade would not have been possible without it. I had my brad nailer for 10 months & used it twice and it failed. DeWalt suggested I bring it in for warranty service. The warranty service center told me that it wasn’t under warranty & I’d have to pay a minimum of $250.00 to have the blade replaced. Dewalt then offered to send me the drive blade as a courtesy, I had already ordered the part I & said no, the brad nailer should have been covered under warranty. I repaired my brad nailer myself with your help and this is the last DeWalt product I’ll ever buy. Thanks again.

andysage - Antwoord

I'm going to attempt this myself and am so glad I found this page. Thank you! Dewalt was going to charge me $200. I found a local repair guy who said he wouldn't touch it because there's an air chamber that you have to pressurize to do the repair. But it doesn't look like that's the case according to these instructions. Do you know anything about that?

Matt Dunckel - Antwoord

Your tutorial was excellent. I replaced the driver blade with zero confusion or errors thanks to clear, logical text beautifully augmented with clarifying pictures.

Thank you.

dorian.fulton - Antwoord

Voeg opmerking toe

Weergavestatistieken:

Afgelopen 24 uren: 0

Afgelopen 7 dagen: 7

Afgelopen 30 dagen: 58

Altijd: 3,269