Ga door naar hoofdinhoud
Word lid van de reparatiegemeenschap - Account aanmaken

Dell Studio 1737 Keyboard Replacement

Wat je nodig hebt

  1. Dell Studio 1737 Keyboard Replacement, Battery: stap 1, afbeelding 1 van 2 Dell Studio 1737 Keyboard Replacement, Battery: stap 1, afbeelding 2 van 2
    • Slide the battery release slider all the way to the right and push the battery straight out of the back of the computer

    Vraag FixBot

    Voeg opmerking toe

  2. Dell Studio 1737 Keyboard Replacement, Keyboard: stap 2, afbeelding 1 van 1
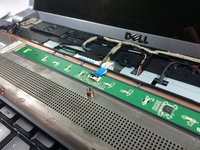
    • Use a plastic opening tool to detach the internal clips (marked with red boxes in photo) and release the small plastic panel above the keyboard

    • This panel doesn't come off just yet, this step is just to make it easier when it comes time to remove it

    Vraag FixBot

    Voeg opmerking toe

  3. Dell Studio 1737 Keyboard Replacement: stap 3, afbeelding 1 van 1
    • Remove the 4mm ph1 screw under the battery

    Vraag FixBot

    Voeg opmerking toe

  4. Dell Studio 1737 Keyboard Replacement: stap 4, afbeelding 1 van 3 Dell Studio 1737 Keyboard Replacement: stap 4, afbeelding 2 van 3 Dell Studio 1737 Keyboard Replacement: stap 4, afbeelding 3 van 3
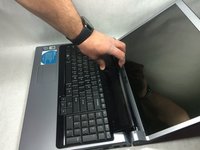
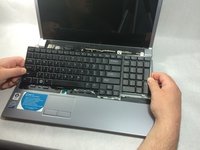
    • Pry black panel away from laptop body starting at the base of the screen

    • Be careful when flipping the panel over, as the panel is still attached by the fragile ribbon cable

    • Flip the panel over onto the keyboard

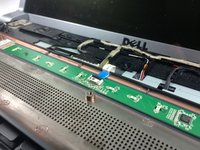
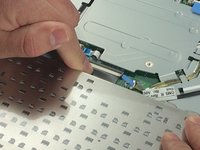
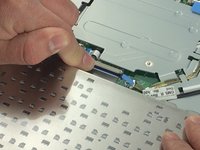
    • Detach the ribbon cable from the motherboard as shown

    Vraag FixBot

    Voeg opmerking toe

  5. Dell Studio 1737 Keyboard Replacement: stap 5, afbeelding 1 van 1
    • Starting at the top where you just removed the black panel, pry the black bezel away from the outside of the keyboard

    Vraag FixBot

    Voeg opmerking toe

  6. Dell Studio 1737 Keyboard Replacement: stap 6, afbeelding 1 van 2 Dell Studio 1737 Keyboard Replacement: stap 6, afbeelding 2 van 2
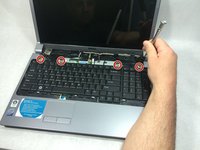
    • Use a small screwdriver to take out the 4 4mm ph1 screws along the top of the keyboard

    • Lift from the top of the keyboard and flip it over onto the palmrest

    • Again, be very careful of the ribbon cable attaching it, as these are easily damaged

    Vraag FixBot

    Voeg opmerking toe

  7. Dell Studio 1737 Keyboard Replacement: stap 7, afbeelding 1 van 2 Dell Studio 1737 Keyboard Replacement: stap 7, afbeelding 2 van 2
    • Remove the ribbon cable as shown

    Vraag FixBot

    Voeg opmerking toe

Conclusie

To reassemble your device, follow these instructions in reverse order.

Annuleren: ik heb deze handleiding niet afgemaakt.

2 andere personen hebben deze handleiding voltooid.

Joseph Jacavone

Lid sinds: 03/10/17

785 Reputatie

6 handleidingen geschreven

Team

UMass Dartmouth, Team S8-G4, Catania Spring 2017 Lid van UMass Dartmouth, Team S8-G4, Catania Spring 2017

UMASSD-CATANIA-S17S8G4

3 Leden

8 handleidingen geschreven

0Gids Commentaar

Voeg opmerking toe

Weergavestatistieken:

Afgelopen 24 uren: 0

Afgelopen 7 dagen: 1

Afgelopen 30 dagen: 14

Altijd: 927