Ga door naar hoofdinhoud
Word lid van de reparatiegemeenschap - Account aanmaken

Dell Streak 7 Battery Replacement

Wat je nodig hebt

    1. Dell Streak 7 Battery Replacement, Front Panel Assembly: stap 1, afbeelding 1 van 1
      • Insert the spudger under the capacitive button panel, and slide the spudger all the way around.

      • You will want to heat up the screen edges with the iOpener to help facilitate removal.

      Vraag FixBot

      Voeg opmerking toe

    2. Dell Streak 7 Battery Replacement: stap 2, afbeelding 1 van 1
      • Remove the button cover by lifting the cover away from the tablet.

      Vraag FixBot

      Voeg opmerking toe

    3. Dell Streak 7 Battery Replacement: stap 3, afbeelding 1 van 1
      • Using the Torx screwdriver, remove the 4mm screws.

      Vraag FixBot

      Voeg opmerking toe

    4. Dell Streak 7 Battery Replacement: stap 4, afbeelding 1 van 1
      • With the Torx screwdriver, remove the two 5mm screws.

      Vraag FixBot

      Voeg opmerking toe

    5. Dell Streak 7 Battery Replacement: stap 5, afbeelding 1 van 2 Dell Streak 7 Battery Replacement: stap 5, afbeelding 2 van 2
      • Using the spudger, insert it under the black side panel. Slide the spudger all the way around until the cover piece comes off.

      • With the Torx screwdriver, remove the two 4mm screws.

      Vraag FixBot

      Voeg opmerking toe

    6. Dell Streak 7 Battery Replacement: stap 6, afbeelding 1 van 1
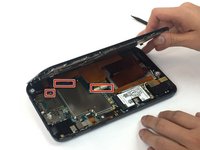
      • Use the spudger to go along the edges of the device and pop out the latches securing the display to the case.

      Vraag FixBot

      Voeg opmerking toe

    7. Dell Streak 7 Battery Replacement: stap 7, afbeelding 1 van 2 Dell Streak 7 Battery Replacement: stap 7, afbeelding 2 van 2
      • Ribbon cables are very sensitive and prone to breaking

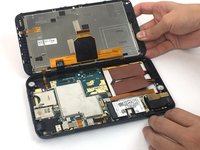
      • Disconnect the ribbon cables by unlocking the connector and pulling the cable out slowly.

      • Make sure all the cables are unplugged before opening the device completely. Failure to do so might lead to broken or torn cables.

      Vraag FixBot

      Voeg opmerking toe

    1. Dell Streak 7 Battery Replacement, Headphone Jack: stap 8, afbeelding 1 van 1
      • Using the spudger, disconnect the ribbon cable by lifting up on the connector.

      • Ribbon cables are fragile and easily broken.

      Vraag FixBot

      Voeg opmerking toe

    2. Dell Streak 7 Battery Replacement: stap 9, afbeelding 1 van 2 Dell Streak 7 Battery Replacement: stap 9, afbeelding 2 van 2
      • Pull the headphone jack up, away from the case.

      Vraag FixBot

      Voeg opmerking toe

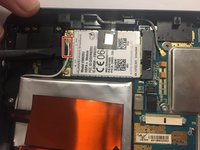
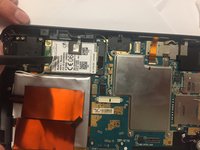
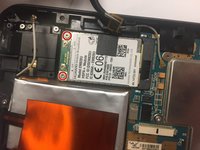
    1. Dell Streak 7 Battery Replacement, GSM Module: stap 10, afbeelding 1 van 2 Dell Streak 7 Battery Replacement, GSM Module: stap 10, afbeelding 2 van 2
      • With the spudger, disconnect the antenna cable located on the module.

      Vraag FixBot

      Voeg opmerking toe

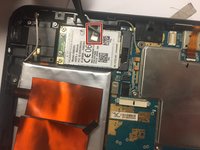
    2. Dell Streak 7 Battery Replacement: stap 11, afbeelding 1 van 2 Dell Streak 7 Battery Replacement: stap 11, afbeelding 2 van 2
      Gereedschap gebruikt in deze stap:
      Tweezers
      $4.99
      • Using tweezers, remove the tape connected to the GSM module.

      Vraag FixBot

      Voeg opmerking toe

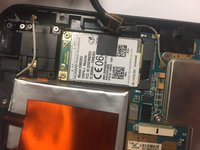
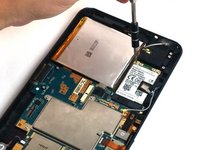
    3. Dell Streak 7 Battery Replacement: stap 12, afbeelding 1 van 2 Dell Streak 7 Battery Replacement: stap 12, afbeelding 2 van 2
      • Remove the two 3mm screws securing the GSM module. Use the Torx screwdriver.

      Vraag FixBot

      Voeg opmerking toe

    4. Dell Streak 7 Battery Replacement: stap 13, afbeelding 1 van 1
      • Disconnect the GSM module by lifting the module up, out of the case.

      Vraag FixBot

      Voeg opmerking toe

    1. Dell Streak 7 Battery Replacement, Motherboard: stap 14, afbeelding 1 van 3 Dell Streak 7 Battery Replacement, Motherboard: stap 14, afbeelding 2 van 3 Dell Streak 7 Battery Replacement, Motherboard: stap 14, afbeelding 3 van 3
      • Using the spudger, disconnect the front camera by lifting up on the connector.

      Vraag FixBot

      Voeg opmerking toe

    2. Dell Streak 7 Battery Replacement: stap 15, afbeelding 1 van 1
      • Using the Torx screwdriver, remove the six 3mm screws .

      Vraag FixBot

      Voeg opmerking toe

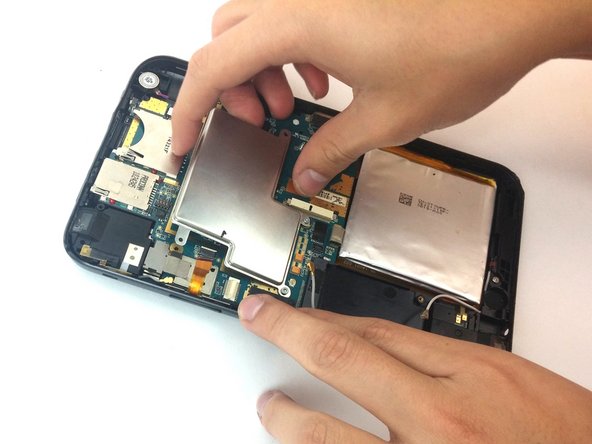
    3. Dell Streak 7 Battery Replacement: stap 16, afbeelding 1 van 2 Dell Streak 7 Battery Replacement: stap 16, afbeelding 2 van 2
      • Lift up the metal cover.

      Vraag FixBot

      Voeg opmerking toe

    4. Dell Streak 7 Battery Replacement: stap 17, afbeelding 1 van 1
      • Use the spudger to lift the vibration motor out of the case.

      Vraag FixBot

      Voeg opmerking toe

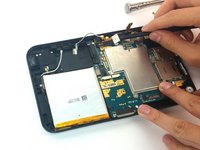
    5. Dell Streak 7 Battery Replacement: stap 18, afbeelding 1 van 1
      • Pull out the motherboard and the battery.

      Vraag FixBot

      Voeg opmerking toe

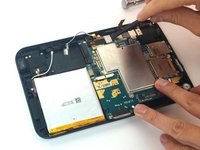
    1. Dell Streak 7 Battery Replacement, Battery: stap 19, afbeelding 1 van 2 Dell Streak 7 Battery Replacement, Battery: stap 19, afbeelding 2 van 2
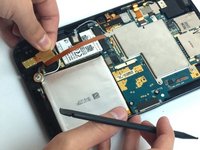
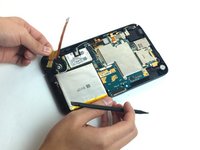
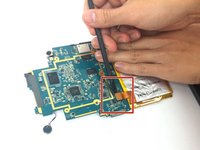
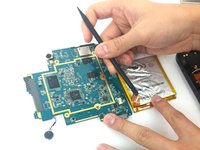
      • Use the spudger to lift up and detach the cable connecting the battery to the motherboard.

      Vraag FixBot

      Voeg opmerking toe

Conclusie

To reassemble your device, follow these instructions in reverse order.

Annuleren: ik heb deze handleiding niet afgemaakt.

4 andere personen hebben deze handleiding voltooid.

Jair Garcia Varela

Lid sinds: 09/29/16

337 Reputatie

2 handleidingen geschreven

Team

USF Tampa, Team 4-6, Passmore Fall 2016 Lid van USF Tampa, Team 4-6, Passmore Fall 2016

USFT-PASSMORE-F16S4G6

3 Leden

12 handleidingen geschreven

0Gids Commentaar

Voeg opmerking toe

Weergavestatistieken:

Afgelopen 24 uren: 0

Afgelopen 7 dagen: 5

Afgelopen 30 dagen: 25

Altijd: 1,533