Deze vertaling is door een computer gegenereerd en is nog niet door iemand nagekeken. Spreek je deze taal? Bekijk het hier.
Inleiding
Deze gids geeft stapsgewijze instructies voor het vervangen van de geheugenkaart in je apparaat.
Wat je nodig hebt
-
-
-
Schuif de ontgrendelingshendels naar buiten richting de randen om de accu te ontgrendelen.
 Vraag FixBot
-
-
-
-
-
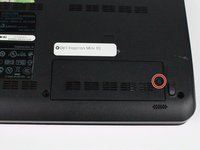
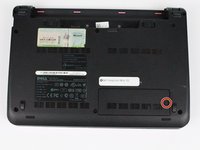
Zoek aan de onderkant van de laptop het verwijderbare paneel en de schroef die het op zijn plek houdt. Draai de schroef los en verwijder de klep.
-
-
Gereedschap gebruikt in deze stap:Tweezers$4.99
-
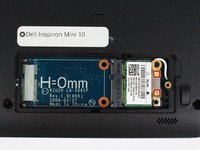
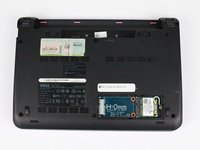
Verwijder de zwarte en witte antennekabel van de wifi-adapter door de gouden contactpunten met je vingertoppen samen te knijpen, of gebruik een pincet, en trek ze recht van de adapter af.
-
Draai de enkele 5 mm kruiskopschroef rechtsboven op de adapter los. De adapter zou uit zichzelf een hoek moeten maken ten opzichte van de behuizing van de computer. Zodra de schroef volledig is verwijderd, trek je de adapter uit de datapoort.
-
-
-
-
-
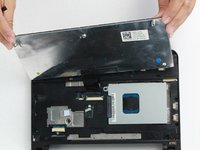
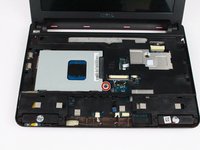
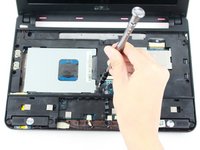
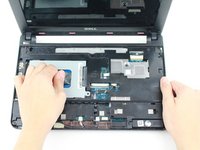
Gebruik een wrikgereedschap om de palmsteun voorzichtig van de palmsteunbeugel los te wrikken. Begin aan één kant en werk langzaam rondom.
-
-
-
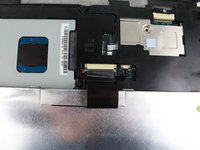
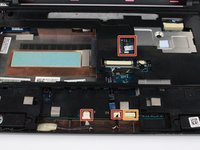
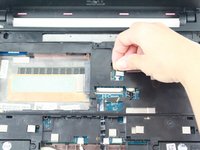
Trek de touchpadkabel voorzichtig van de steunbeugel van de polssteun af.
-
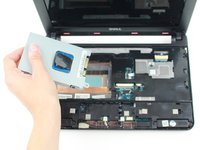
Til de rest van de polssteun van de computerbasis af.
-
-
-
-
-
-
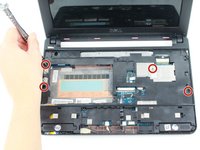
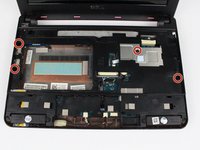
Verwijder de drie 8 mm Philips 0-schroeven waarmee het toetsenbord is bevestigd.
-
-
-
Draai het apparaat om en open het display.
-
Wrik voorzichtig het toetsenbord open met het plastic Openingsgereedschap en werk onder de randen door om de clips los te maken.
-
-
-
Duw de klemmen aan beide kanten van de lintkabel naar buiten om deze los te maken.
-
Koppel de lintkabel voorzichtig los door aan de transparante treklip te trekken.
-
Verwijder het toetsenbord.
-
-
-
-
-
Sluit het apparaat en draai het om.
-
Verwijder de vijf 8 mm Phillips-kruiskopschroeven.
-
-
-
Draai het apparaat om en open het beeldscherm.
-
Verwijder de enkele 8 mm kruiskopschroef waarmee de harde-schijfhouder aan de behuizing van het apparaat is bevestigd.
-
-
-
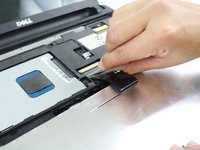
Trek aan de zwarte treklip en schuif de harde-schijfhouder richting de USB-poort aan de linkerkant van het apparaat totdat deze vrijkomt en til hem voorzichtig uit het apparaat.
-
-
-
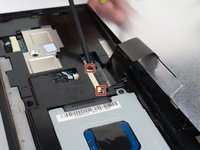
Koppel het volgende los:
-
Kabel van de aan-/uitknop
-
Luidsprekerkabel
-
Kabel van het aan-/uit-statuslampje
-
Bluetooth-kabel (indien geïnstalleerd)
-
-
-
-
-
Verwijder het volgende:
-
Twee 4mm kruiskopschroeven die het moederbord vastzetten
-
AC-adapterkabel
-
USB- en simkaartkabelaansluiting
-
Schermkabelaansluiting
-
Til het moederbord voorzichtig naar buiten.
-
-
-
-
-
Draai het moederbord om.
-
Duw de clips aan weerszijden van de geheugenkaart naar buiten totdat deze omhoog komt.
-
Verwijder de geheugenkaart.
-
-
















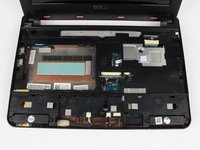


Volg deze instructies in omgekeerde volgorde om je apparaat weer in elkaar te zetten.
Annuleren: ik heb deze handleiding niet afgemaakt.
3 andere personen hebben deze handleiding voltooid.

Team

UW Tacoma, Team 1-4, Rose Fall 2016 Lid van UW Tacoma, Team 1-4, Rose Fall 2016
UWT-ROSE-F16S1G4
4 Leden
120 handleidingen geschreven
4Gids Commentaar
It is possible to upgrade the memory by simply (!) cutting aq hole in the bottom of the computer case. I used the pictures and Vulcan logic to determine the location and dimensions of the required hole. I used a vibrating saw to cut the hole. You need to be careful not to cut too deep. Once you have a square panel cut out, you need to snip through the copper shield covering the memory card. Then it is a simple in and out replacement. I used a leftover 2 Gig memory card from my MacBook Pro.
Mucheasier than taking out all those screws and connectors!
Here’s an easier-but riskier- technique. Cut a rectangular hole in the bottom of your Mini 10V. I did it and it worked. Needles to say, you must be careful not to cut too deep! Measure in from the left side (computer shut, upside down and the empty battery compartment away from you) 3/4 inch, and 4.5 inch (from the edge. the lines you draw will be 3.75 inches apart. measure up from the keyboard edge 2.5 inches and 4.75 inches and draw horizontal lines. The ‘box’ you drew is your cutting template. Once inside you need to cut a copper shield to get to the memory card. From that point on it’s easy. I used the 2 gig memory card from my MacBook Pro. When you’re done, glue the panel you cut out back in place and reinsert battery and you’re ready to go. (For cutting the hole, I used a vibrating multi tool with a saw blade)
Disclaimer: Your mileage may vary. If you brick your Mini 10V, you can buy another on Ebay for ~$75.
Good Luck.
Excellent step-by-step graphical explanation makes it look easy by following the instructions congratulations.
Not all Mini 10's have upgradable RAM. When I tore mine down, I found there was nothing of interest on the back of the board where the guide says there's a SODIMM slot. Then again, my board seems to be quite different from the one used in this guide: my wireless module was not accessible from the outside but was found underneath the keyboard; my board did not extend all the way to the SD card slot, as that was a separate board connected to the main board by a ribbon cable; and what looked to be a heatsink covering a SODIMM slot turned out to be a daughter board containing the CPU and the RAM together. Mind you, this guide served its purpose in getting my netbook torn all the way down; it simply didn't serve its final intention. The model number for my Mini 10 is PP19S, which happens to have a very colorful shell on the top. If your model number matches mine, save yourself the trouble: the RAM cannot be upgraded conventionally. Then again, if you're comfortable installing surface-mount RAM... :p
