Inleiding
Let op: verwijder altijd eerst de stekker uit het stopcontact voordat je gaat demonteren.
Wees voorzichtig bij het demonteren van de slangetjes en aansluitingen. Ze kunnen stevig aan de machine vastzitten en het kan enige moeite kosten om ze te verwijderen.
Wat je nodig hebt
-
-
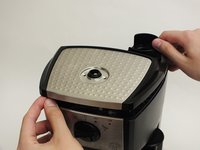
Klap de deksel open om bij het waterreservoir te kunnen komen.
-
Pak het waterreservoir vast bij de hendel en til het eruit.
-
-
-
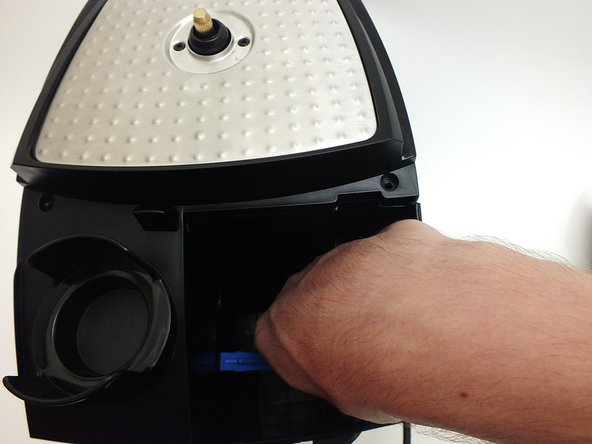
Verwijder eerst de losse delen zoals het waterreservoir. Zet daarna de machine op zijn kop.
-
Draai met de Phillips #2 schroevendraaier de vier 12 mm schroeven los die zich op elke hoek van de bodem bevinden.
-
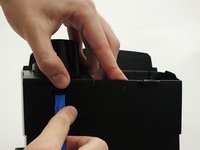
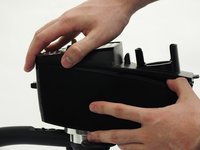
Til het paneel eraf deze kan wat klemmen.
At least on my unit, those screws weren't Phillips, but Torx Tamperproof T20! Shame on you, De'Longhi!
I also had the Tamperproof Torx on mine - I used a Dremel tool with a small round metal bit and just carefully plunged down on the little nub in the center that makes it tamperproof. Only need to grind it down a millimeter or so, as there isn't much torque on these screws and the torx bit needs just a little depth to grab on it good enough. If you have the tools handy it saves having to buy the tamperproof bits online.
-
-
-
Draai het apparaat op zijn kop, met de voorkant naar u toe.
-
Draai met de Phillips #2 de twee 52 mm schroeven los die zich onder het bovenste gedeelte van het apparaat bevinden.
-
-
-
-
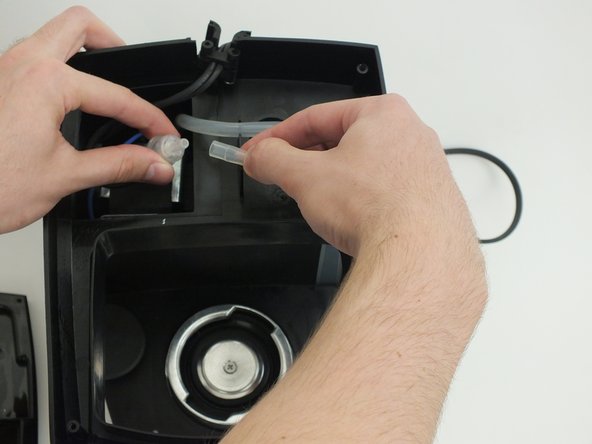
Draai het apparaat om en verwijder een uiteinde van de slang uit de opening van het waterreservoir.
There are two tubes connected to the water reservoir hole. The one in the first pic is the one that goes to the water valve, which is the one that you pull through to the top. The one in the second pic is the short one from the bottom of the pump that can detached from the water hole and left in place, to be transferred later to the new pump. Detaching it from the from the filter as shown adds to the impression that this is the tube to the water valve to be pulled through to the top in the next step, which the user quickly finds is impossible, it’s too short.
-
-
-
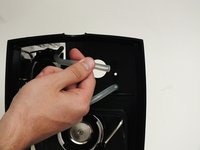
Draai het stoompijpje met de klok mee en trek er voorzichtig aan.
-
-
Gereedschap gebruikt in deze stap:Tweezers$3.99
-
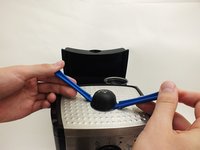
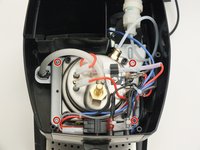
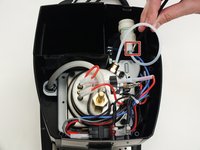
Verwijder elke clip van alle slangaansluitingen met behulp van de hoek precisiepincet..
My deLonghi failed by leaking from this connection (after years of operation). After a failed attempt with what I was told was an OEM o-ring, I successfully repaired it with a "Silicone O-Ring, 7mm OD, 3mm ID, 2mm Width, VMQ Seal Rings Gasket" from Amazon. (I used a dental pick to pull out the old ring.)
This is the standard o-ring, as used e.g. in Jura devices.
VauWeh -
-
-
-
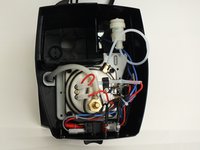
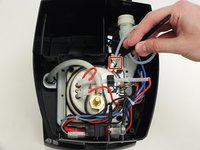
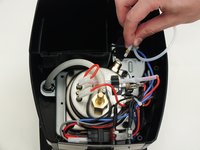
Trek elke LED er voorzichtig in één keer uit.
-
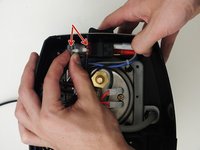
Maak de steekverbindingen los en verwijder de kabels.
It’s better to keep the wires in place and remove the whole setter switch by prying off the knob, then removing the two screws exposed I was unable to remove the core your way because of the difficulty of getting past the setter switch, especially since at the same time you have to wrangle with getting the steamer wand out, even with the frother removed.
Also, your pic shows four wires to disconnect, there are actually five, and there’s no view of which of them go where—another reason for keeping them connected.
-
-
-
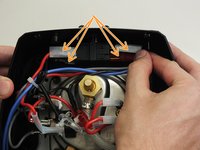
Kantel de kern naar voren terwijl je hem van achteren optilt.
Pushing to the front is impossible at first if the settings switch is still in place (see earlier comment).
Also, it’s worth mentioning that the steaming wand *will* come out with the right twisting and turning of the core. I got stuck her trying to figure out how to detach it from its hose. But the attachment is permanent. This is what led me to buy more maneuvering room by removing the settings switch with wires still attached.
-
-
-
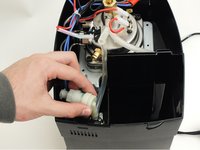
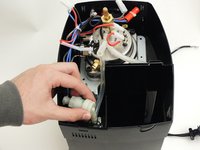
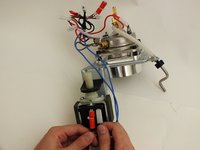
Verwijder beide sets draden uit het zwarte body van de waterpomp.
-
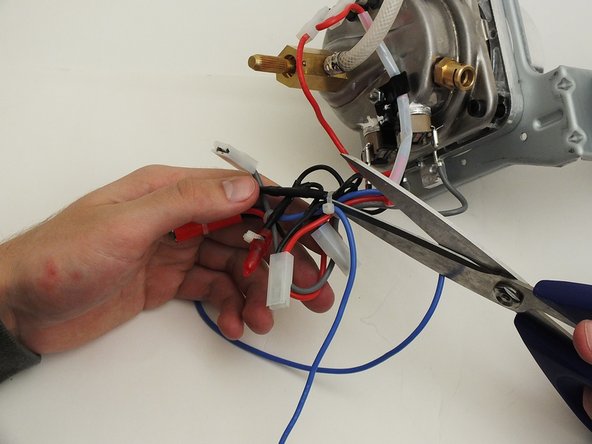
Knip de kabelbinder af die alle draden bij elkaar houdt.
-
Isoleer de blauwe draden van de rest en verwijder ze indien nodig uit de kern.
-


Voer de stappen in omgekeerde volgorde uit om de machine weer in elkaar te zetten.
Voer de stappen in omgekeerde volgorde uit om de machine weer in elkaar te zetten.
Annuleren: ik heb deze handleiding niet afgemaakt.
4 andere personen hebben deze handleiding voltooid.
Met dank aan deze vertalers:
100%
Martin helpt ons de wereld te herstellen! Wil je bijdragen?
Begin met vertalen ›
Team

Cal Poly, Team 4-2, Maness Fall 2015 Lid van Cal Poly, Team 4-2, Maness Fall 2015
CPSU-MANESS-F15S4G2
4 Leden
36 handleidingen geschreven
My model EC155, serial #43222 requires a Security Torx vs. a #2 Phillips to remove the 12mm screws at each corner of the bottom panel
Mike Hines - Antwoord