Deze vertaling is door een computer gegenereerd en is nog niet door iemand nagekeken. Spreek je deze taal? Bekijk het hier.
Inleiding
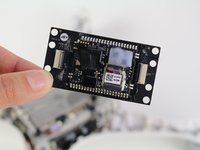
De Flight Controller bevat sensoren en firmware die cruciaal zijn voor de functionaliteit van de drone. Als je drone tijdens de vlucht afwijkt of fouten vertoont met de IMU na de kalibratie, moet de connectorplaat van je Flight Controller mogelijk worden vervangen. Om de plaat te vervangen, heb je een JIS #000 schroevendraaier, een 2mm inbusbitje, een 1.5mm inbusbitje en een metalen wrikgereedschap nodig. Wees uiterst voorzichtig bij het verwijderen en installeren van de U.FL-kabelaansluiting.
Wat je nodig hebt
-
-
-
Gebruik je vingertoppen om de beschadigde propeller vast te pakken.
-
Draai de propeller tegen de klok in en trek omhoog om deze te verwijderen.
 Vraag FixBot
-
-
-
-
-
Verwijder de acht 7 mm inbusschroeven door ze tegen de klok in los te draaien met een 2 mm inbusbit.
-
-
-
Verwijder de twaalf 8,7 mm inbusschroeven van de motorvoeten met een 2 mm inbusbit.
-
-
-
-
Draai de drone op zijn rug.
-
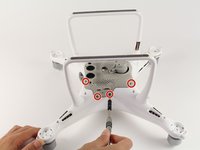
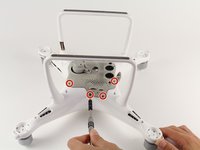
Verwijder de acht 4,5 mm inbusschroeven door ze tegen de klok in los te draaien met een 1,5 mm inbussleutel.
-
Maak het gaas los van de drone door voorzichtig omhoog te trekken en heen en weer te wiebelen.
-
-
-
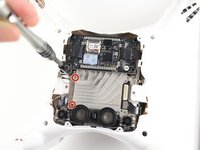
Verwijder twee 1,2 mm schroeven van de bevestigingsbeugel van de camerakabel met behulp van de JIS #000-bit.
-
-
-
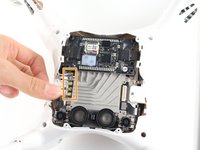
Til de camera(kabel)aansluiting aan één kant met uw hand op en verwijder het gaasje.
-
-
-
Verwijder de twee 1,2 mm schroeven uit de antennebeugel met een JIS #000 bit.
-
Trek de vier U.FL-antennes omhoog.
-
Verwijder de twee 4 mm schroeven met een JIS #000 bit.
-
-
-
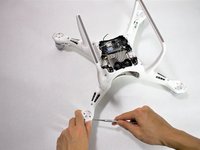
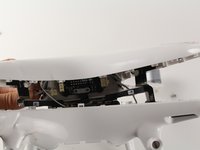
Wrik de behuizing aan de motorzijde uit elkaar.
-
Haal de behuizing uit elkaar.
-
-
-
Druk op de lipjes van de (kabel)aansluiting met een spudger en trek tegelijkertijd aan de bedrading.
-
Verwijder de behuizing van de rest van de drone.
-
-
-
-
Gereedschap gebruikt in deze stap:Tweezers$4.99
-
Verwijder de elektrische tape.
-
Ontgrendel de (kabel)aansluiting door het zwarte vergrendelingsklepje omhoog te wippen.
-
Trek de lintkabel eruit met een pincet.
-
-
-
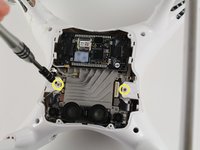
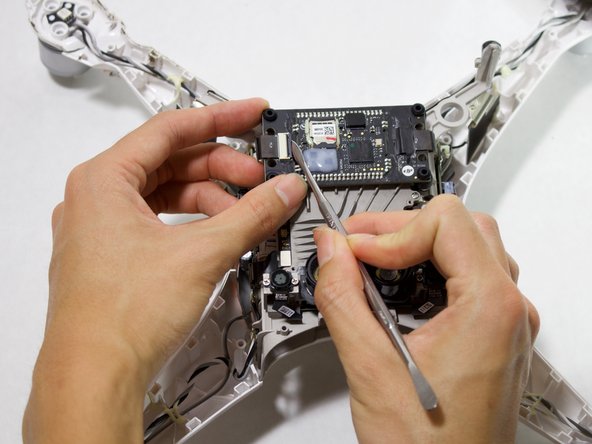
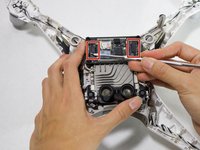
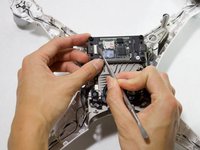
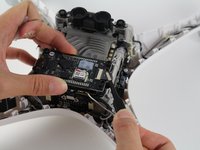
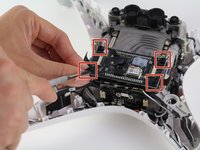
Verwijder de trillingsdempers van de flight controller door de dempers met de spudger in de houders te duwen.
-
-












Volg deze instructies in omgekeerde volgorde om je apparaat weer in elkaar te zetten.
Annuleren: ik heb deze handleiding niet afgemaakt.
8 andere personen hebben deze handleiding voltooid.

Team

Cal Poly, Team S15-G6, White Fall 2018 Lid van Cal Poly, Team S15-G6, White Fall 2018
CPSU-WHITE-F18S15G6
4 Leden
72 handleidingen geschreven
4Gids Commentaar
Great guide but there should have been step 14 to show how to put the control board back on top of the isolators.
Also I found it was not necessary to remove the bottom shell to remove and replace the control board. There is enough room to remove and replace with the shell in place and this will greatly decrease the time required to do the repair. I used the rounded edge of a small flat screw driver.
The replacement of the board is a challenge and that is where I got stuck. I used monofilament fishing line. Make a loop in the line and insert the loop through the mounting hole in the board. Pass the loop over the isolator ball and into the groove around it. Bring the mounting board into contact with the isolator ball and gently pull the fishing line loop and pull the isolator ball up into the mounting hole. If you are lucky, the ball will come through and flatten itself out as is is supposed to. If not, use tweezers to grab the ball and gently pull it up through the hole.
Excellent guide. This helped so much for me to replace my failed flight control board. I dropped one of the small screws and could not find it! I bought a DJI Phantom 4 fastener pack that has alot of these specialty screws. I only needed one screw, but now have lots of backups for future. An improvement to the instructions would be reassembly steps. It could help with some of the wire routing that I figured out the routing, but callouts would help. As a contribution to a possible update, I figured out a simple, reliable technique to push the dampener boots through the flight control board corners. Essentially use needle-nose pliers to squeeze the wide part of the dampener and push one end of the squished profile through the board hole. Use your other hand to pinch or roll the rest of the dampener through the hole. If allowed here is a link to a video showing how I did this: https://youtu.be/QHvy0n_iorE
Thanks for this. The visuals helped out a ton in knowing what to do. Like comments above mentioned, there is just enough room to do this without removing the entire shell. The dampeners were the hardest part to reinstall. I tried the fishing line trick commented above with no success so I brute forced it. I lined up the board with the dampeners, pushed down on the board to compress them and then took my tweezers and really forcefully grabbed them. Once one side was up, I dug my tweezers down into it to grab the opposite side through the hole. I got the rest of them done within 5 min doing it this way.
