Inleiding
If your kettle's handle has become warped or breaks, use this guide to replace it.
Wat je nodig hebt
-
-
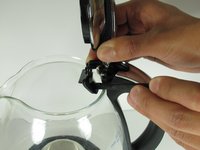
Lift the lid of the Perfectea
-
Remove the two 12mm Phillips #2 screws located at the brim of the pot.
 Vraag FixBot
-
-
-
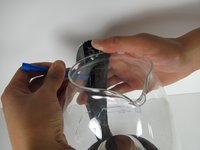
With one hand, firmly grip the lid while designating your other hand to wedge the spudger between the lid and the glass pot.
-
Working from the outside to the inside, gently pry the adhesive tape from the glass pot, detaching the lid.
-
-
-
-
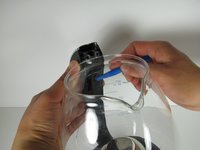
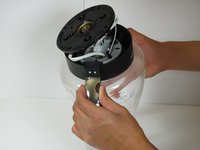
Firmly grip the glass pot with one hand while using the other to slip the flat end of the plastic opening tool between the glass pot and the adhesive tape holding the handle to the glass pot.
-
Gently pry the adhesive tape from the glass pot. Work your way around the handle until the handle is loose and not attached to the pot anymore.
-
-
-
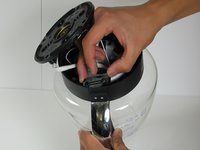
Once the handle is loose, locate the four 10 mm Phillips #2 screws from the base of the Perfectea and remove them.
-
Remove the base.
-
-
-
Locate the two 10 mm Phillips #2 screws at the bottom of the handle and remove them.
-
-
-
In order to free the bottom of the handle, remove the plastic piece that was held by the two screws
-
While firmly holding the glass pot, gently slide the bottom of the handle up and out of the base of the pot.
-


To reassemble your device, follow these instructions in reverse order.
Annuleren: ik heb deze handleiding niet afgemaakt.
Één andere persoon heeft deze handleiding voltooid.
Team

Cal Poly, Team 6-17, Maness Spring 2015 Lid van Cal Poly, Team 6-17, Maness Spring 2015
CPSU-MANESS-S15S6G17
4 Leden
12 handleidingen geschreven
1Gids Commentaar
This guide applies to the Capresso H2O kettle too. Thanks for the guide.