Ga door naar hoofdinhoud
Word lid van de reparatiegemeenschap - Account aanmaken

Canon PowerShot S400 Battery Replacement

Wat je nodig hebt

    1. Canon PowerShot S400 Battery Replacement, LCD Screen: stap 1, afbeelding 1 van 2 Canon PowerShot S400 Battery Replacement, LCD Screen: stap 1, afbeelding 2 van 2
      • Unless stated otherwise, use a Phillips #00 screwdriver to remove all screws.

      • On the backside of the camera, remove the 4.75 mm screw that sits at the top right corner.

      • Remove the four 4.75 mm screws that sit at the bottom of the camera.

      Vraag FixBot

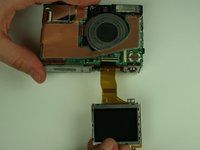
      Voeg opmerking toe

    2. Canon PowerShot S400 Battery Replacement: stap 2, afbeelding 1 van 1
      • On the side of the camera, remove the two 4.75 mm screws that sit near the USB digital terminal.

      Vraag FixBot

      Voeg opmerking toe

    3. Canon PowerShot S400 Battery Replacement: stap 3, afbeelding 1 van 3 Canon PowerShot S400 Battery Replacement: stap 3, afbeelding 2 van 3 Canon PowerShot S400 Battery Replacement: stap 3, afbeelding 3 van 3
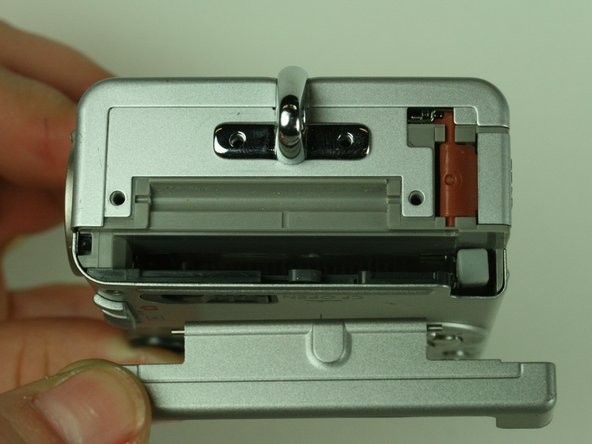
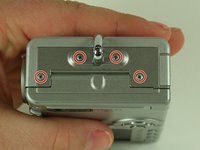
      • On the side of the camera, remove the four 4.75 mm screws that sit near the wrist strap mount.

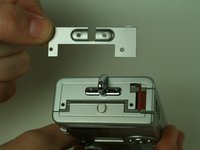
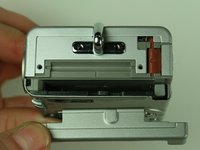
      • Remove the two small metal plates, which the four screws hold in place.

      Vraag FixBot

      Voeg opmerking toe

    4. Canon PowerShot S400 Battery Replacement: stap 4, afbeelding 1 van 2 Canon PowerShot S400 Battery Replacement: stap 4, afbeelding 2 van 2
      Gereedschap gebruikt in deze stap:
      Tweezers
      $4.99
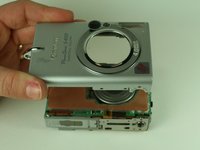
      • When removing the casing, do not drop the small black plastic piece. This piece sits in a small gap above the lens, to the left of the flash, and underneath the camera case.

      • Remove the small black plastic piece and set it aside. If necessary, use tweezers to remove the small black plastic piece.

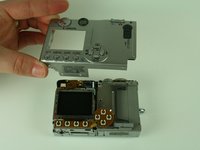
      • Detach the front case and back case.

      Vraag FixBot

      Voeg opmerking toe

    5. Canon PowerShot S400 Battery Replacement: stap 5, afbeelding 1 van 1
      • Do not remove the metal plate this step refers to. Removal at this step may damage the ribbon cable. Wait until the next step to remove the plate.

      • Remove the 3.5 mm screw that sits on the metal plate at the bottom of the camera.

      • Remove the two other 3.5 mm screws that sit on the side, to the left of the screw you just removed.

      • In the image, we have already removed some of the screws.

      Vraag FixBot

      Voeg opmerking toe

    6. Canon PowerShot S400 Battery Replacement: stap 6, afbeelding 1 van 3 Canon PowerShot S400 Battery Replacement: stap 6, afbeelding 2 van 3 Canon PowerShot S400 Battery Replacement: stap 6, afbeelding 3 van 3
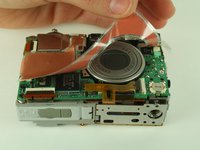
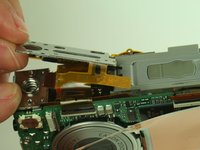
      • A ribbon cable attaches to the metal plate and to the main circuit board, on the front of the camera.

      • Gently release the black latch.

      • Remove the ribbon cable and metal plate assembly.

      Vraag FixBot

      Voeg opmerking toe

    7. Canon PowerShot S400 Battery Replacement: stap 7, afbeelding 1 van 2 Canon PowerShot S400 Battery Replacement: stap 7, afbeelding 2 van 2
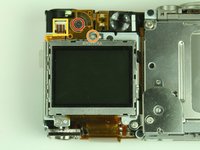
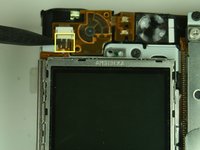
      • On the backside of the camera, remove the 3.5 mm screw that sits to the left of the viewfinder and above the LCD screen.

      • Remove the second 3.5 mm screw that sits directly above the LCD screen.

      • Gently detach the ribbon cable.

      Vraag FixBot

      Voeg opmerking toe

    8. Canon PowerShot S400 Battery Replacement: stap 8, afbeelding 1 van 1
      • Locate the ribbon cable on the main circuit board, which sits below the lens.

      • Gently release the black latch on the ribbon cable connector and detach the ribbon cable.

      Vraag FixBot

      Voeg opmerking toe

    9. Canon PowerShot S400 Battery Replacement: stap 9, afbeelding 1 van 2 Canon PowerShot S400 Battery Replacement: stap 9, afbeelding 2 van 2
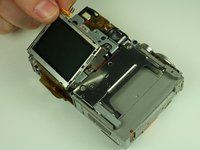
      • Remove the LCD screen and set it aside.

      Vraag FixBot

      Voeg opmerking toe

    1. Canon PowerShot S400 Battery Replacement, Battery: stap 10, afbeelding 1 van 1
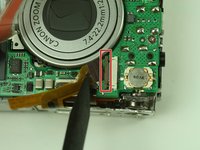
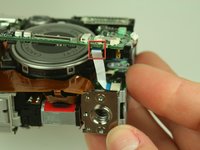
      • Locate the ribbon cable connection to the left of the lens on the main circuit board.

      • Gently flip open the black latch on the connector and detach the ribbon cable.

      Vraag FixBot

      Voeg opmerking toe

    2. Canon PowerShot S400 Battery Replacement: stap 11, afbeelding 1 van 1
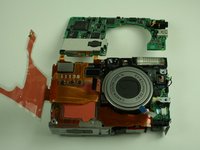
      • Locate the three ribbon cables on the main circuit board. Gently flip open these black latches.

      • Gently disconnect the ribbon cables.

      Vraag FixBot

      Voeg opmerking toe

    3. Canon PowerShot S400 Battery Replacement: stap 12, afbeelding 1 van 2 Canon PowerShot S400 Battery Replacement: stap 12, afbeelding 2 van 2
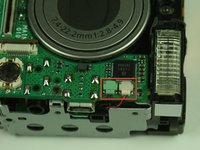
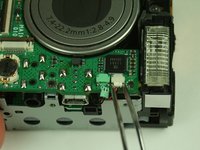
      • Locate the white and green connectors underneath the flash.

      • Gently disconnect these connectors.

      Vraag FixBot

      Voeg opmerking toe

    4. Canon PowerShot S400 Battery Replacement: stap 13, afbeelding 1 van 1
      • Using a spudger, carefully pry the shutter button assembly from the camera.

      Vraag FixBot

      Voeg opmerking toe

    5. Canon PowerShot S400 Battery Replacement: stap 14, afbeelding 1 van 1
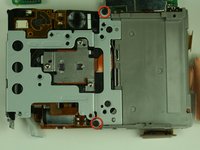
      • Remove the four screws securing the main circuit board to the rest of the camera. (In the image, some of the screws have already been removed)

      • Do not remove the main circuit board yet.

      Vraag FixBot

      Voeg opmerking toe

    6. Canon PowerShot S400 Battery Replacement: stap 15, afbeelding 1 van 3 Canon PowerShot S400 Battery Replacement: stap 15, afbeelding 2 van 3 Canon PowerShot S400 Battery Replacement: stap 15, afbeelding 3 van 3
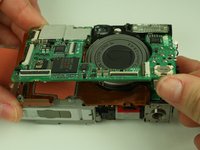
      • Do not completely lift the circuit board off the camera. The circuit board is attached to the top of the camera by a soldered ribbon cable. Lifting the main circuit board off the camera will break these soldering points.

      • Gently lift the bottom of the main circuit board, the side without the soldered attachment points, like a hinge.

      • Locate the white ribbon cable attached to the underside of the main circuit board.

      • Gently remove the white ribbon cable from the connector.

      Vraag FixBot

      Voeg opmerking toe

    7. Canon PowerShot S400 Battery Replacement: stap 16, afbeelding 1 van 2 Canon PowerShot S400 Battery Replacement: stap 16, afbeelding 2 van 2
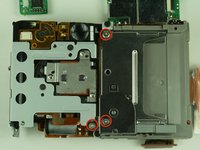
      • Locate and remove the three 3.45mm screws on the backside of the camera that secure the CF card slot.

      • Make note of the orientation of the ribbon cable connected to the CF card slot. You will need this for re-assembly.

      • Gently remove the CF card slot.

      Vraag FixBot

      Voeg opmerking toe

    8. Canon PowerShot S400 Battery Replacement: stap 17, afbeelding 1 van 1
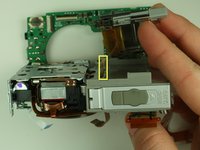
      • Orient the camera so you are looking at the top.

      • Locate the white connector that attaches the flex circuit to the capacitor.

      • You may have to pull the connector out of a small space behind the flash bulb in order to access it.

      • Disconnect the connector.

      Vraag FixBot

      Voeg opmerking toe

    9. Canon PowerShot S400 Battery Replacement: stap 18, afbeelding 1 van 1
      • Adhesive tape attaches the flex circuit to the top of the camera. Gently un-stick the flex circuit from the tape, but do not completely remove the flex circuit.

      Vraag FixBot

      Voeg opmerking toe

    10. Canon PowerShot S400 Battery Replacement: stap 19, afbeelding 1 van 2 Canon PowerShot S400 Battery Replacement: stap 19, afbeelding 2 van 2
      • Remove the two 3.45mm screws located on the backside of the camera.

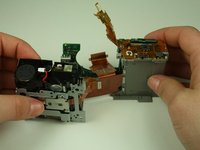
      • Separate the battery compartment and the lens-flash assembly.

      Vraag FixBot

      Voeg opmerking toe

    11. Canon PowerShot S400 Battery Replacement: stap 20, afbeelding 1 van 1
      • Set the lens-flash assembly aside.

      • The next step requires the use of a soldering iron. Do not perform this step if you do not have experience soldering, you could permanently damage the mother board

      • De-solder the two soldered ribbon cables attached to the motherboard.

      • Separate the motherboard and battery case.

      Vraag FixBot

      Voeg opmerking toe

    12. Canon PowerShot S400 Battery Replacement: stap 21, afbeelding 1 van 1
      • Replace battery casing

      Vraag FixBot

      Voeg opmerking toe

Conclusie

To reassemble your device, follow these instructions in reverse order.

Annuleren: ik heb deze handleiding niet afgemaakt.

Adam Grijalva

Lid sinds: 01/20/11

202 Reputatie

2 handleidingen geschreven

Team

Cal Poly, Team 5-19, Amido Winter 2011 Lid van Cal Poly, Team 5-19, Amido Winter 2011

CPSU-AMIDO-W11S5G19

4 Leden

6 handleidingen geschreven

0Gids Commentaar

Voeg opmerking toe

Weergavestatistieken:

Afgelopen 24 uren: 4

Afgelopen 7 dagen: 16

Afgelopen 30 dagen: 43

Altijd: 3,812