Ga door naar hoofdinhoud

Canon PowerShot G11 Rear Dial Replacement

Wat je nodig hebt

  1. Canon PowerShot G11 Rear Dial Replacement, Rear Cover: stap 1, afbeelding 1 van 1
    • Remove the three screws on the bottom of the camera using the 00 sized phillips head screw driver.

  2. Canon PowerShot G11 Rear Dial Replacement: stap 2, afbeelding 1 van 1
    • Remove the four screws on the left side of the camera.

  3. Canon PowerShot G11 Rear Dial Replacement: stap 3, afbeelding 1 van 1
    • Remove the screw on the right side of the camera.

  4. Canon PowerShot G11 Rear Dial Replacement: stap 4, afbeelding 1 van 1
    • Open up the HDMI port on the right side of the camera. Then remove the screw in the HDMI port.

  5. Canon PowerShot G11 Rear Dial Replacement: stap 5, afbeelding 1 van 1
    • Remove the screw to the right of the view finder on the rear of the camera.

  6. Canon PowerShot G11 Rear Dial Replacement: stap 6, afbeelding 1 van 1
    • Use the spudger to crack open the case.

  7. Canon PowerShot G11 Rear Dial Replacement: stap 7, afbeelding 1 van 1
    Gereedschap gebruikt in deze stap:
    Tweezers
    $4.99
    Koop
    • The rear case is still attached to the camera with a ribbon cable. The socket has a flip up lid that must be flipped up before the cable can be removed. Use the tweezers to flip the cable attachment up.

  8. Canon PowerShot G11 Rear Dial Replacement: stap 8, afbeelding 1 van 1
    • The rear cover is now unattached from the camera.

  9. Canon PowerShot G11 Rear Dial Replacement, Rear Dial: stap 9, afbeelding 1 van 1
    • Remove the plastic covering of the left side of the rear case interior.

  10. Canon PowerShot G11 Rear Dial Replacement: stap 10, afbeelding 1 van 1
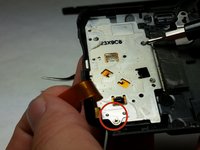
    • Remove the four screws that are now accessible with the removal of the plastic covering them.

  11. Canon PowerShot G11 Rear Dial Replacement: stap 11, afbeelding 1 van 2 Canon PowerShot G11 Rear Dial Replacement: stap 11, afbeelding 2 van 2
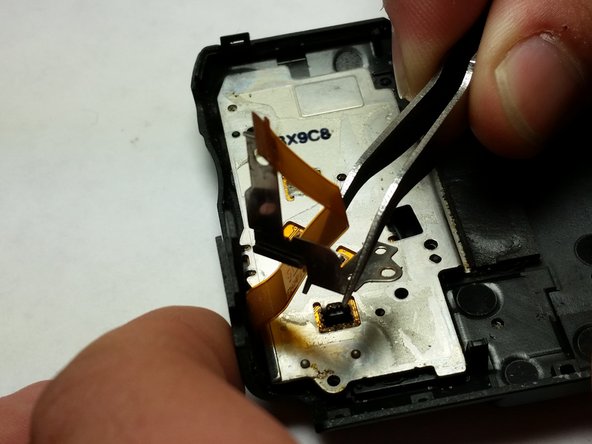
    • After the screws are removed, pull the metal bracket out of the camera.

  12. Canon PowerShot G11 Rear Dial Replacement: stap 12, afbeelding 1 van 1
    • Push the dial out from the other side of the cover.

  13. Canon PowerShot G11 Rear Dial Replacement: stap 13, afbeelding 1 van 1
    • Remove the dial from the case completely.

Conclusie

To reassemble your device, follow these instructions in reverse order.

2 andere personen hebben deze handleiding voltooid.

Dustin Brinegar

Lid sinds: 01/21/15

688 Reputatie

4 handleidingen geschreven

Team

USF Tampa, Team 5-6, Brown Winter 2015 Lid van USF Tampa, Team 5-6, Brown Winter 2015

USFT-BROWN-W15S5G6

3 Leden

6 handleidingen geschreven

0 opmerkingen

Voeg opmerking toe

Weergavestatistieken:

Afgelopen 24 uren: 1

Afgelopen 7 dagen: 4

Afgelopen 30 dagen: 29

Altijd: 2,142