Inleiding
If the LCD screen of your Canon PowerShot G11 LCD is cracked or has stopped working you will need to replace it.
Wat je nodig hebt
-
-
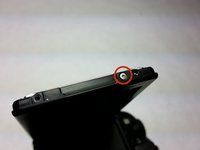
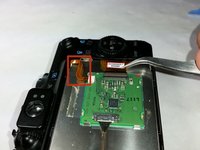
Open the LCD screen and turn it so the screen is facing the bottom of the camera, the screw is on the bottom of the LCD screen.
-
Remove the 3.10mm Philips #00 screw from the bottom end of the LCD screen.
-
-
-
Turn the LCD so that the screen is facing the top of the camera, the screw you need is on the bottom of the LCD screen.
-
Remove the 3.10mm Philips #00 screw.
-
-
-
-
Use the plastic opening tool on the indent at the top of the LCD screen to pop off the LCD case.
-
-
-
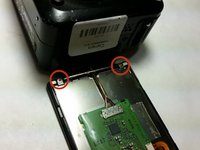
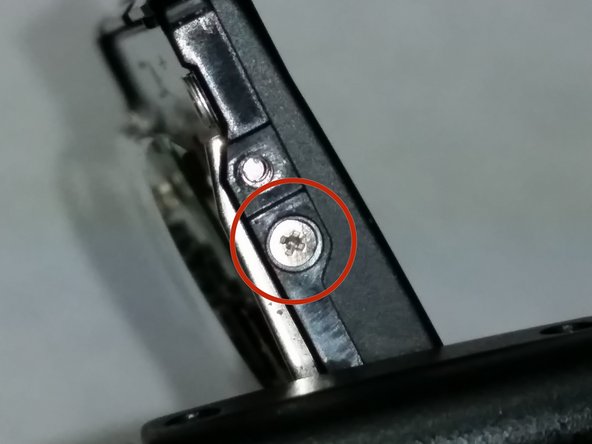
Remove the 2.22mm Phillips #00 screw that is located next to the indent handle.
-
-
-
On the bottom of the LCD screen carefully turn it so the screen is facing the top of the camera and remove the 2.22mm Phillips #00 screw.
-
-
-
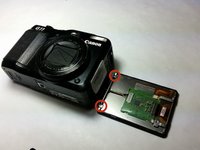
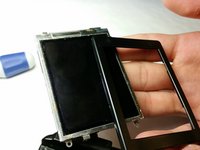
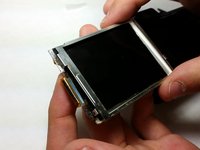
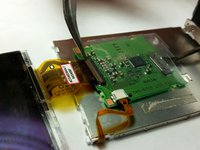
Remove the screen from the base of the LCD.
-
Do not remove this wire, it is not needed when replacing the screen.
-
-
Gereedschap gebruikt in deze stap:Tweezers$4.99
-
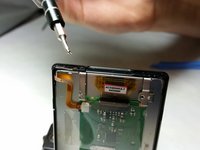
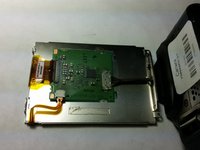
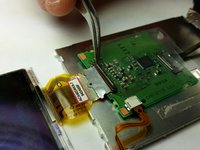
Use the tweezers to lift the small brown plastic snap before you remove the wire.
-


To reassemble your device, follow these instructions in reverse order.
Annuleren: ik heb deze handleiding niet afgemaakt.
2 andere personen hebben deze handleiding voltooid.
Team

USF Tampa, Team 5-6, Brown Winter 2015 Lid van USF Tampa, Team 5-6, Brown Winter 2015
USFT-BROWN-W15S5G6
3 Leden
6 handleidingen geschreven
4Gids Commentaar
Did this. The first time i put it ack together it did not work , Had totake apart and adjust wires okay after put bake together again.
Followed these instructions and the result is excellent. Well done, and thanks very much. Saved me buying another camera!
How do you get a new screen on there?
Faltan planos. Por arte de magia el lcd aparece a la izquierda de varias fotos cuando debería estar debajo de la placa verde. Perdonen, muy mal explicado.