Ga door naar hoofdinhoud
Word lid van de reparatiegemeenschap - Account aanmaken

Canon PowerShot A2200 LCD Screen Replacement

Wat je nodig hebt

  1. Canon PowerShot A2200 LCD Screen Replacement, Back Cover: stap 1, afbeelding 1 van 1
    • First, remove the batteries and memory card.

    • Remove the 5.0 mm black screw with a Phillips #00 screwdriver.

    • Remove the 5.0 mm silver screw with a Phillips #00 screwdriver.

    Vraag FixBot

    Voeg opmerking toe

  2. Canon PowerShot A2200 LCD Screen Replacement: stap 2, afbeelding 1 van 1
    • Remove the 5.0 mm black screw on the right with a Phillips #00 screwdriver.

    Vraag FixBot

    Voeg opmerking toe

  3. Canon PowerShot A2200 LCD Screen Replacement: stap 3, afbeelding 1 van 1
    • Remove the 5.0 mm screw on the left with a Phillips #00 screwdriver.

    Vraag FixBot

    Voeg opmerking toe

  4. Canon PowerShot A2200 LCD Screen Replacement: stap 4, afbeelding 1 van 3 Canon PowerShot A2200 LCD Screen Replacement: stap 4, afbeelding 2 van 3 Canon PowerShot A2200 LCD Screen Replacement: stap 4, afbeelding 3 van 3
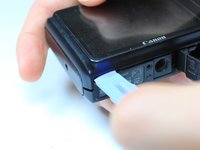
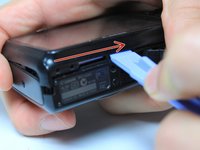
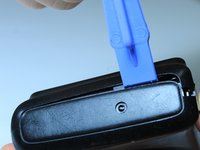
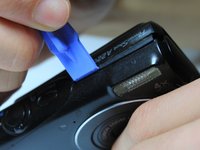
    • Begin taking off the back cover with a plastic opening tool.

    • Begin by wedging the plastic opening tool behind the bottom left corner of the LCD screen as shown.

    • Slide the plastic opening tool to the right, along the mating edge, to pry off the back cover.

    • Continue taking off the back cover along the left side of the camera as seen in the third picture.

    Vraag FixBot

    Voeg opmerking toe

  5. Canon PowerShot A2200 LCD Screen Replacement: stap 5, afbeelding 1 van 3 Canon PowerShot A2200 LCD Screen Replacement: stap 5, afbeelding 2 van 3 Canon PowerShot A2200 LCD Screen Replacement: stap 5, afbeelding 3 van 3
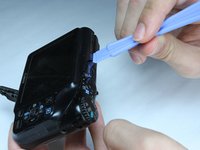
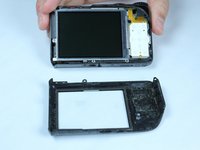
    • Use the plastic opening tool to separate the top section of the back cover from the frame.

    • Once there is enough separation between the back cover and the frame, remove the back cover for replacement.

    Vraag FixBot

    Voeg opmerking toe

  6. Canon PowerShot A2200 LCD Screen Replacement, Button Assembly: stap 6, afbeelding 1 van 2 Canon PowerShot A2200 LCD Screen Replacement, Button Assembly: stap 6, afbeelding 2 van 2
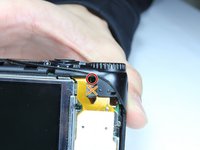
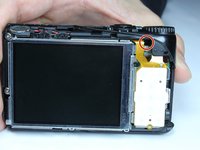
    • Remove the internal 4.4mm screw with a Phillips 00 screwdriver.

    • Make sure you're removing the screw circled in red, not the screw crossed out in orange.

    Vraag FixBot

    Voeg opmerking toe

  7. Canon PowerShot A2200 LCD Screen Replacement: stap 7, afbeelding 1 van 1
    • Gently lift of the buttons for replacement. They should come off without excessive force.

    • If the buttons do not lift off easily, you may have unscrewed the wrong screw. Revert to previous step.

    Vraag FixBot

    Voeg opmerking toe

  8. Canon PowerShot A2200 LCD Screen Replacement, LCD Screen: stap 8, afbeelding 1 van 1
    • Lift up the electrical ribbon shown to access the next screw.

    • Remove the 3.9 mm screw with a Phillips #00 screwdriver.

    Vraag FixBot

    Voeg opmerking toe

  9. Canon PowerShot A2200 LCD Screen Replacement: stap 9, afbeelding 1 van 1
    • Remove the 3.9 mm screw with a Phillips #00 screwdriver.

    Vraag FixBot

    Voeg opmerking toe

  10. Canon PowerShot A2200 LCD Screen Replacement: stap 10, afbeelding 1 van 1
    • Remove the two 3.9 mm screws shown with a Phillips #00 screwdriver.

    Vraag FixBot

    Voeg opmerking toe

  11. Canon PowerShot A2200 LCD Screen Replacement: stap 11, afbeelding 1 van 2 Canon PowerShot A2200 LCD Screen Replacement: stap 11, afbeelding 2 van 2
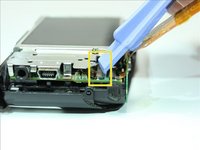
    • There is an electrical flap that holds the LCD ribbon down. Note the flap in is closed position.

    • Lift up the flap with a plastic opening tool.

    Vraag FixBot

    Voeg opmerking toe

  12. Canon PowerShot A2200 LCD Screen Replacement: stap 12, afbeelding 1 van 1
    • Holding the outer frame of the LCD screen, gently lift the LCD screen for replacement.

    Vraag FixBot

    Voeg opmerking toe

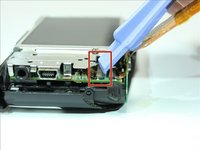
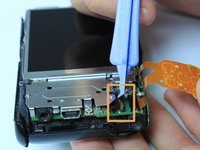
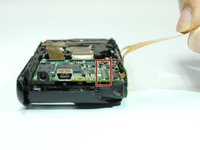
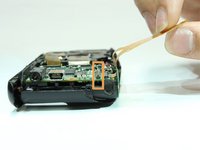
  13. Canon PowerShot A2200 LCD Screen Replacement: stap 13, afbeelding 1 van 3 Canon PowerShot A2200 LCD Screen Replacement: stap 13, afbeelding 2 van 3 Canon PowerShot A2200 LCD Screen Replacement: stap 13, afbeelding 3 van 3
    • This step is only for replacement. If you are not replacing the LCD screen, skip this step.

    • Locate ribbon flap, enclosed in red. (picture 1)

    • Using a plastic opening tool, lift up the ribbon flap to allow insertion of the LCD ribbon. (picture 2)

    • Place the LCD screen on the camera and align the ribbon underneath the open ribbon flap. Close the ribbon flap onto the ribbon. (picture 3)

    Vraag FixBot

    Voeg opmerking toe

Conclusie

To reassemble your device, follow these instructions in reverse order, starting with the last guide step.

Annuleren: ik heb deze handleiding niet afgemaakt.

Één andere persoon heeft deze handleiding voltooid.

Benjamin Gee

Lid sinds: 03/31/15

983 Reputatie

5 handleidingen geschreven

Team

Baylor, Team 4-5, Williams Spring 2015 Lid van Baylor, Team 4-5, Williams Spring 2015

BU-WILLIAMS-S15S4G5

4 Leden

13 handleidingen geschreven

2Gids Commentaar

Step 11, “lift up the flap” did the trick - thanks !!

Mine got wet with seawater, I cleaned the electronics wih alcohol and it works again.

Chris W - Antwoord Deel

My problem is after taking a photo and seeing the preview instead of going back to “live” display for the next photo the screen goes black but the camera settings still show.  Would changing the screen solve this problem?

Ken Short - Antwoord Deel

Voeg opmerking toe

Weergavestatistieken:

Afgelopen 24 uren: 3

Afgelopen 7 dagen: 12

Afgelopen 30 dagen: 60

Altijd: 2,305