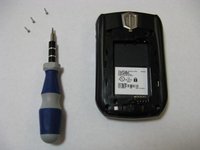
Wat je nodig hebt
-
-
Position your phone like the first image so that the highlighted button is on your left.
-
Slide the battery cover to the left while pressing the button with one hand and applying pressure on the center of the phone with your other hand.
-
Remove the cover completely and set it aside.
-
-
-
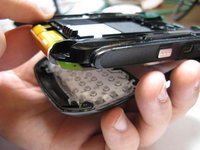
Position your phone like the image to the left, then locate the rectangular battery in the middle of the phone.
-
Locate the notch on the top right of the battery compartment.
-
Slide your fingernail or the flat end of a Spudger in the notch, then lift upwards on the top of the battery to remove it from the phone.
-
Set the battery aside and out of the way.
-
-
-
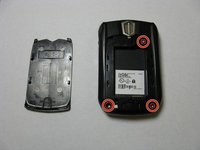
Make sure the back of the phone is facing upwards like the image on the left.
-
Remove all three screws highlighted in the image by turning them counter-clockwise using the T6 Torx Screwdriver.
-
-
-
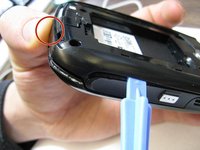
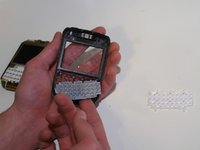
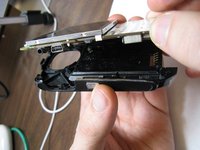
Locate the notch in the back of the phone.
-
Use your thumb to push up on the notch, separating the back half of the phone from the keyboard and screen in the front.
-
Slide the opening tool in between the two halves of the phone.
-
Continually apply upward pressure with the opening tool to pop the back casing off of the main body.
-
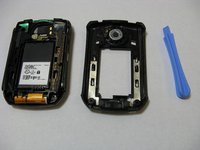
Set the back casing aside and out of the way.
-
-
-
-
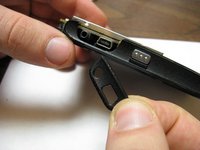
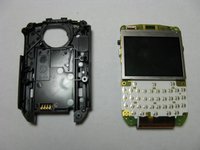
The port protector is shown in the picture and located on the upper left side when looking at the screen of the phone.
-
If the port protector did not fall off when removing the front casing and keyboard components, remove it and set it to the side.
-
-
-
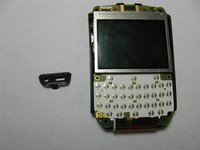
You should be able to easily remove the battery housing from the logic board by simply pulling them apart.
-
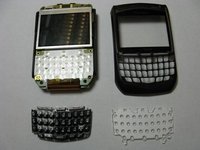
You should now have 7 main components: battery cover, battery, back casing, front casing (including both keyboard pieces), port protector, battery housing and logicboard with screen attached.
-
You should also have 7 screws.
-
-
-
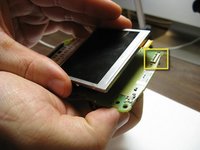
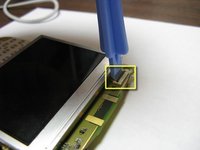
There is a small strip on the upper left of the screen that is connected to the logic board by a small black clip. It is highlighted in the picture.
-
Holding the screen and logic board together, use the plastic opening tool to push the clip into the up position as shown in the picture.
-
With the clip in the up position, remove the screen from the logic board.
-


To reassemble your device, follow these instructions in reverse order.
Annuleren: ik heb deze handleiding niet afgemaakt.
2 andere personen hebben deze handleiding voltooid.
Team

Cal Poly, Team 11-3, Forte Winter 2010 Lid van Cal Poly, Team 11-3, Forte Winter 2010
CPSU-FORTE-W10S11G3
5 Leden
8 handleidingen geschreven