Ga door naar hoofdinhoud

Beats Studio3 Wireless Hinge Replacement

Wat je nodig hebt

  1. Beats Studio3 Wireless Hinge Replacement, Ear Pad: stap 1, afbeelding 1 van 2 Beats Studio3 Wireless Hinge Replacement, Ear Pad: stap 1, afbeelding 2 van 2
    • Find the separation between the headset and ear cushion.

    • Use an opening tool to go underneath the separation site and split the pieces apart.

  2. Beats Studio3 Wireless Hinge Replacement: stap 2, afbeelding 1 van 3 Beats Studio3 Wireless Hinge Replacement: stap 2, afbeelding 2 van 3 Beats Studio3 Wireless Hinge Replacement: stap 2, afbeelding 3 van 3
    • You can also use your hands to remove it completely.

    • Pulling it off can be challenging; make sure to apply enough pressure.

  3. Beats Studio3 Wireless Hinge Replacement, Speaker: stap 3, afbeelding 1 van 2 Beats Studio3 Wireless Hinge Replacement, Speaker: stap 3, afbeelding 2 van 2
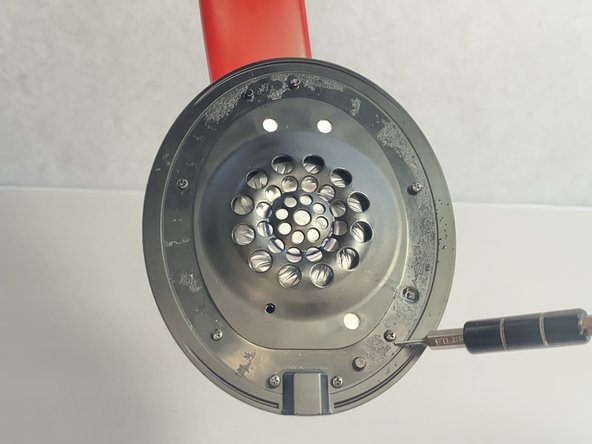
    • Remove seven 3.6 mm screws holding the speaker assembly in place using a Phillips #0 screwdriver.

    • Make sure the screws aren't close to the speaker; due to it being a magnet, the screws could get stuck and damage the speaker.

    • Open the speaker by pulling the top layer of the speaker.

  4. Beats Studio3 Wireless Hinge Replacement: stap 4, afbeelding 1 van 3 Beats Studio3 Wireless Hinge Replacement: stap 4, afbeelding 2 van 3 Beats Studio3 Wireless Hinge Replacement: stap 4, afbeelding 3 van 3
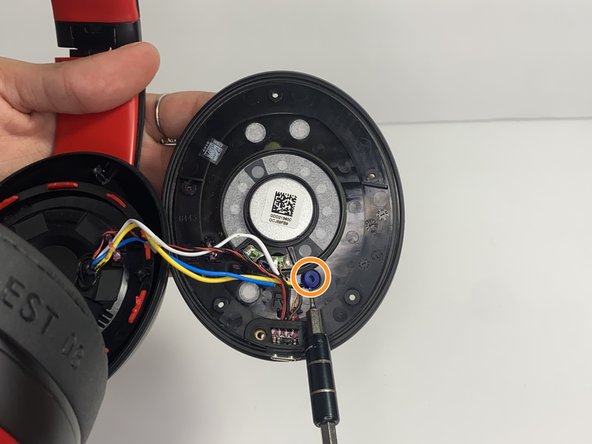
    • With a heat gun or hair dryer, heat the glue that is sticking the wires down until the glue softens.

    • Use a nylon spudger to remove the glue.

    • Pull on the wire to remove it while also removing the blue rubber band.

  5. Beats Studio3 Wireless Hinge Replacement: stap 5, afbeelding 1 van 3 Beats Studio3 Wireless Hinge Replacement: stap 5, afbeelding 2 van 3 Beats Studio3 Wireless Hinge Replacement: stap 5, afbeelding 3 van 3
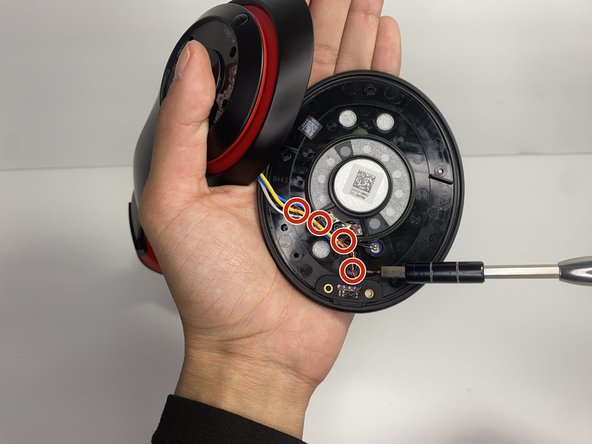
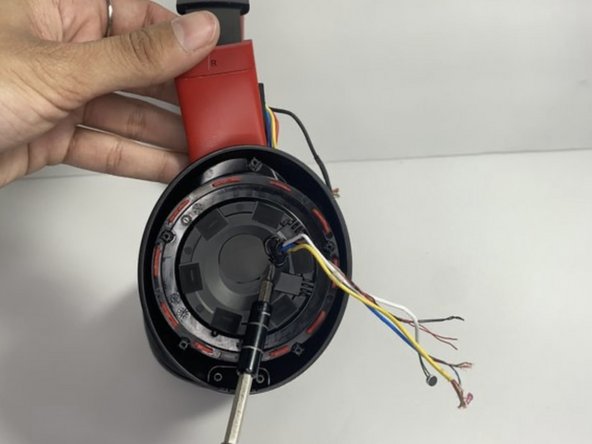
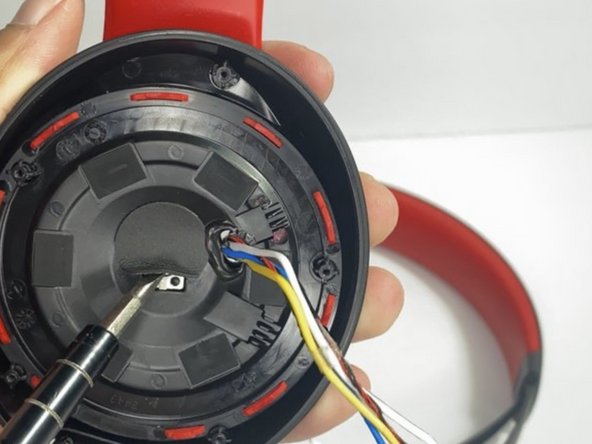
    • Using a soldering iron to remove the cables on the charger port.

    • For help with soldering, check out the How to Solder and Desolder Connections guide.

    • Remove the two wires connected in the middle of the speaker using a soldering iron.

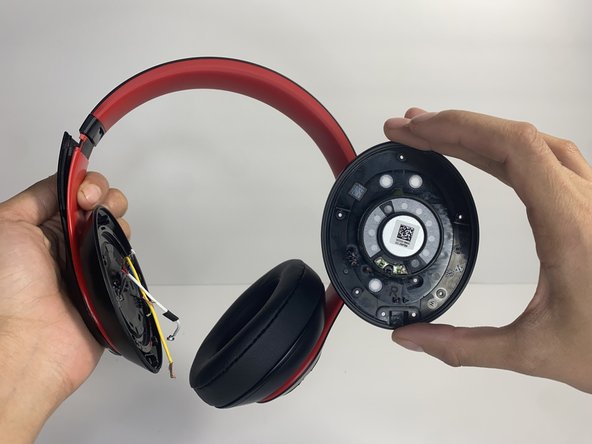
    • Remove the speaker from the headset.

  6. Beats Studio3 Wireless Hinge Replacement, Battery: stap 6, afbeelding 1 van 2 Beats Studio3 Wireless Hinge Replacement, Battery: stap 6, afbeelding 2 van 2
    • Use a pointed nylon spudger to remove the center circular panel on the right side of your device.

    • Be gentle while removing this piece as it is glued on with adhesive.

  7. Beats Studio3 Wireless Hinge Replacement: stap 7, afbeelding 1 van 2 Beats Studio3 Wireless Hinge Replacement: stap 7, afbeelding 2 van 2
    • Remove the four 3.5 mm screws using a Phillips #0 screwdriver.

  8. Beats Studio3 Wireless Hinge Replacement: stap 8, afbeelding 1 van 3 Beats Studio3 Wireless Hinge Replacement: stap 8, afbeelding 2 van 3 Beats Studio3 Wireless Hinge Replacement: stap 8, afbeelding 3 van 3
    • Using a pointed nylon spudger, remove the tab located on the inner part of the headband labeled "R."

    • Place the nylon spudger in between the side panels and push inward going from bottom to top to separate both sides of the panel.

    • The panel will pop open after separating.

  9. Beats Studio3 Wireless Hinge Replacement: stap 9, afbeelding 1 van 1
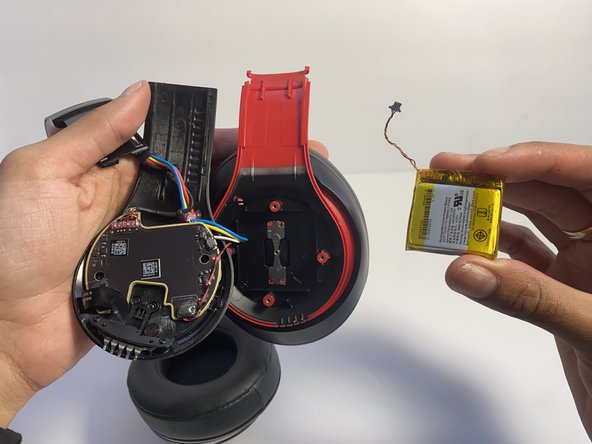
    • Place the nylon spudger underneath the battery, push inward and separate the battery from the inside.

    • Never use sharp tools to pry batteries. Metal spudgers can puncture an unprotected battery, potentially causing a fire.

  10. Beats Studio3 Wireless Hinge Replacement: stap 10, afbeelding 1 van 2 Beats Studio3 Wireless Hinge Replacement: stap 10, afbeelding 2 van 2
    • Use a nylon spudger to lift up the glue sticking the wires down.

    • Use a nylon spudger to lift the connector to disconnect the battery.

  11. Beats Studio3 Wireless Hinge Replacement, Hinge: stap 11, afbeelding 1 van 3 Beats Studio3 Wireless Hinge Replacement, Hinge: stap 11, afbeelding 2 van 3 Beats Studio3 Wireless Hinge Replacement, Hinge: stap 11, afbeelding 3 van 3
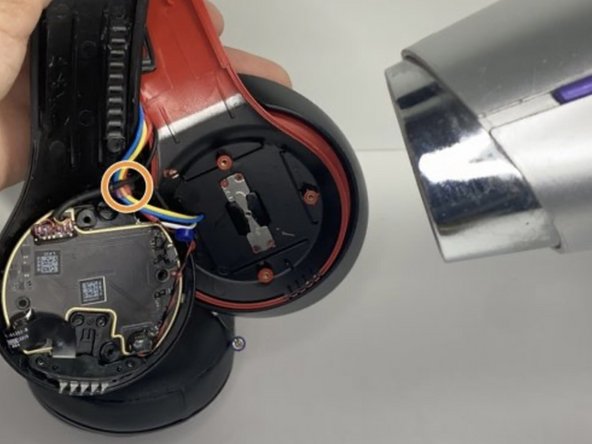
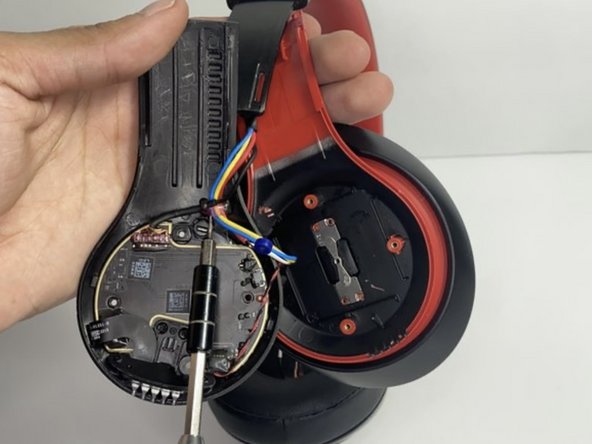
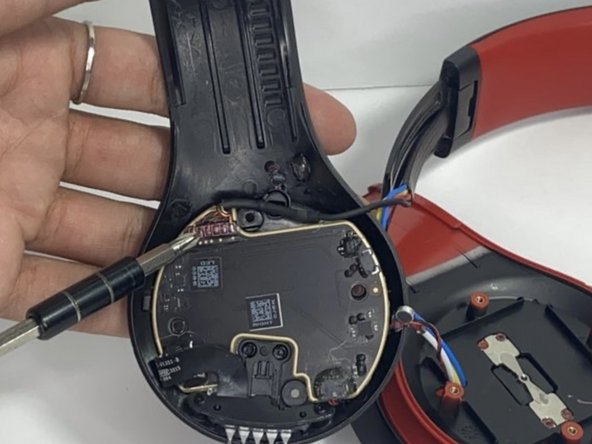
    • Pull the wire making sure that the blue rubber band is off.

    • Heat the glue holding the wires down with a hair dryer or heat gun until the glue softens.

    • Make sure not to overheat any device part, which could cause damage to the sound.

    • With a pointed nylon spudger, remove the glue.

  12. Beats Studio3 Wireless Hinge Replacement: stap 12, afbeelding 1 van 2 Beats Studio3 Wireless Hinge Replacement: stap 12, afbeelding 2 van 2
  13. Beats Studio3 Wireless Hinge Replacement: stap 13, afbeelding 1 van 3 Beats Studio3 Wireless Hinge Replacement: stap 13, afbeelding 2 van 3 Beats Studio3 Wireless Hinge Replacement: stap 13, afbeelding 3 van 3
    • With a hair dryer or heating gun, heat the glue that is sticking the wires down.

    • Use a nylon spudger to remove the softened glue.

    • Remove the circular tape inside of the ear pad.

  14. Beats Studio3 Wireless Hinge Replacement: stap 14, afbeelding 1 van 2 Beats Studio3 Wireless Hinge Replacement: stap 14, afbeelding 2 van 2
    • Remove the single 3.5 mm screw with a Phillips #0 screwdriver.

    • Pull apart the top layer of the earpiece.

  15. Beats Studio3 Wireless Hinge Replacement: stap 15, afbeelding 1 van 2 Beats Studio3 Wireless Hinge Replacement: stap 15, afbeelding 2 van 2
    • Remove the tape holding the wires in place.

    • Pull the wires through the hole with your hand.

  16. Beats Studio3 Wireless Hinge Replacement: stap 16, afbeelding 1 van 1
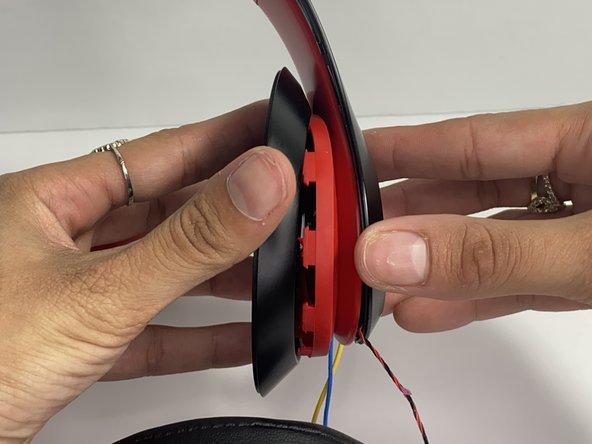
    • Bend the hinge and remove the two 3.5 mm screws with a Phillips #0 screwdriver.

  17. Beats Studio3 Wireless Hinge Replacement: stap 17, afbeelding 1 van 3 Beats Studio3 Wireless Hinge Replacement: stap 17, afbeelding 2 van 3 Beats Studio3 Wireless Hinge Replacement: stap 17, afbeelding 3 van 3
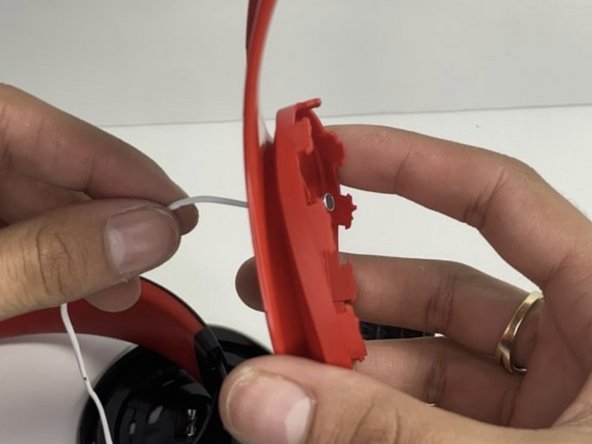
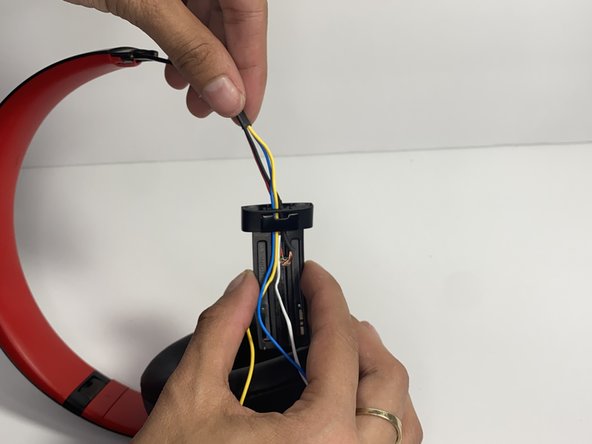
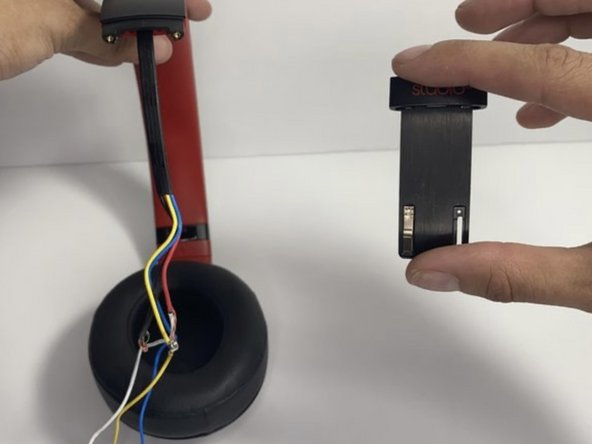
    • Pull the hinge down.

    • Pull on the wires one at a time making sure you don't damage them.

  18. Beats Studio3 Wireless Hinge Replacement: stap 18, afbeelding 1 van 2 Beats Studio3 Wireless Hinge Replacement: stap 18, afbeelding 2 van 2
    Gereedschap gebruikt in deze stap:
    Tweezers
    $4.99
    Koop
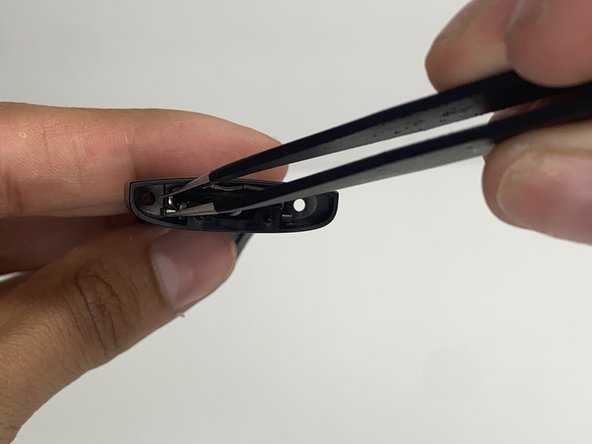
    • With tweezers, remove the pin located inside of the hinge.

Conclusie

To reassemble your device, follow these instructions in reverse order.

Één andere persoon heeft deze handleiding voltooid.

Nayeli watts

Lid sinds: 03/16/23

474 Reputatie

3 handleidingen geschreven

Team

UMass Dartmouth, Team 7-4, Ryckebusch Spring 2023 Lid van UMass Dartmouth, Team 7-4, Ryckebusch Spring 2023

UMASSD-RYCKEBUSCH-S23S7G4

3 Leden

5 handleidingen geschreven

0 opmerkingen

Voeg opmerking toe

Weergavestatistieken:

Afgelopen 24 uren: 8

Afgelopen 7 dagen: 49

Afgelopen 30 dagen: 237

Altijd: 3,540