Ga door naar hoofdinhoud
Word lid van de reparatiegemeenschap - Account aanmaken

Beats Pill XL Battery Replacement

Wat je nodig hebt

    1. Beats Pill XL Battery Replacement, Case: stap 1, afbeelding 1 van 2 Beats Pill XL Battery Replacement, Case: stap 1, afbeelding 2 van 2
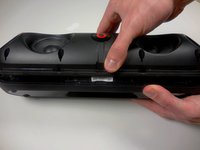
      • Using a plastic opening tool, pry the casing from the rest of the device.

      • Pry all the way around the edge and then pull apart.

      • It should be relatively easy, to pull apart. Don't be afraid to apply a necessary force.

      Vraag FixBot

      Voeg opmerking toe

    2. Beats Pill XL Battery Replacement: stap 2, afbeelding 1 van 1
      • Using your thumb, remove the 8 rubber plugs in order to get to the screws.

      • Simply rub them towards the speakers and they will slide out enough to grip the edge and pull them out.

      • In the picture provided, we labeled four of them on one side of the Beats Pill XL. The other four are symmetrical to these four on the other side of the device.

      Vraag FixBot

      Voeg opmerking toe

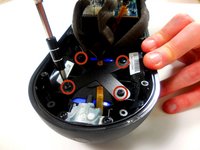
    3. Beats Pill XL Battery Replacement: stap 3, afbeelding 1 van 2 Beats Pill XL Battery Replacement: stap 3, afbeelding 2 van 2
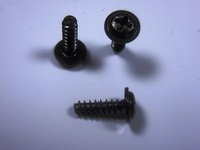
      • Using a Phillips #2 screwdriver, remove the 8 (10mm maxi-loc Phillips #2) screws that hold the casing together.

      Vraag FixBot

      Voeg opmerking toe

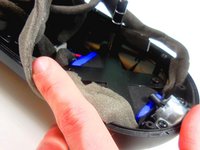
    4. Beats Pill XL Battery Replacement: stap 4, afbeelding 1 van 2 Beats Pill XL Battery Replacement: stap 4, afbeelding 2 van 2
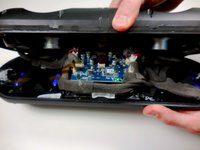
      • Pull apart the front casing from the back casing, slowly. Try to avoid any tension on any of the connected cables.

      • Separate at a slow constant force to avoid damage to the ribbon cables.

      Vraag FixBot

      Voeg opmerking toe

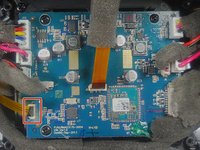
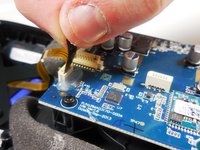
    5. Beats Pill XL Battery Replacement: stap 5, afbeelding 1 van 2 Beats Pill XL Battery Replacement: stap 5, afbeelding 2 van 2
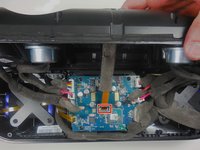
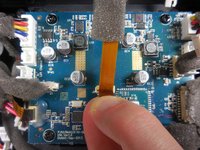
      • Gently pull on the plastic tab at the base of the ribbon cable to remove it from the motherboard.

      • Never pull the cables by the cord, as this could cause damage to the cables and/or motherboard. Always disconnect the cables from the base by the motherboard.

      Vraag FixBot

      Voeg opmerking toe

    6. Beats Pill XL Battery Replacement: stap 6, afbeelding 1 van 2 Beats Pill XL Battery Replacement: stap 6, afbeelding 2 van 2
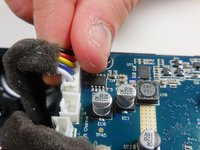
      • Using your thumb and index finger, pull upwards on the base of the the power cable to remove it from the motherboard.

      • Even though there are two batteries, there is only one cable connecting the two to the motherboard.

      Vraag FixBot

      Voeg opmerking toe

    1. Beats Pill XL Battery Replacement, Battery: stap 7, afbeelding 1 van 3 Beats Pill XL Battery Replacement, Battery: stap 7, afbeelding 2 van 3 Beats Pill XL Battery Replacement, Battery: stap 7, afbeelding 3 van 3
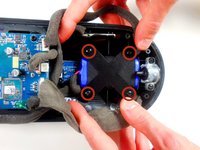
      • Using a Phillips #2 screwdriver, remove the 8 (11mm pan head Phillips #2) screws holding down the the X-clamps.

      • Remove the X-clamps by simply lifting upwards.

      • Save the 8 (11mm pan head Phillips #2) screws for reassembly as these are easy to misplace.

      Vraag FixBot

      Voeg opmerking toe

    2. Beats Pill XL Battery Replacement: stap 8, afbeelding 1 van 2 Beats Pill XL Battery Replacement: stap 8, afbeelding 2 van 2
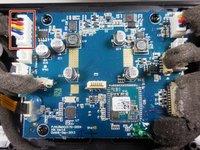
      • Gently pull up on the plastic tab at the base of the ribbon cable to remove it from the motherboard.

      Vraag FixBot

      Voeg opmerking toe

    3. Beats Pill XL Battery Replacement: stap 9, afbeelding 1 van 2 Beats Pill XL Battery Replacement: stap 9, afbeelding 2 van 2
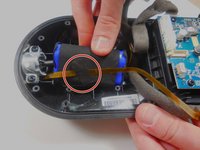
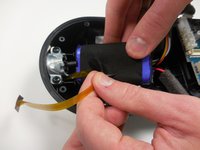
      • Remove the padded sticker holding down the ribbon cable to one of the batteries.

      • Use a slow constant force, as ribbon cables are fragile and could tare.

      Vraag FixBot

      Voeg opmerking toe

    4. Beats Pill XL Battery Replacement: stap 10, afbeelding 1 van 2 Beats Pill XL Battery Replacement: stap 10, afbeelding 2 van 2
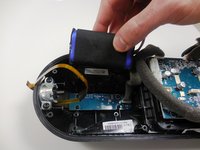
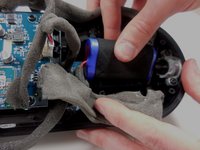
      • Lift straight up from the casing to remove each batteries from their tight spaces.

      Vraag FixBot

      Voeg opmerking toe

Conclusie

To reassemble your device, follow these instructions in reverse order.

Annuleren: ik heb deze handleiding niet afgemaakt.

22 andere personen hebben deze handleiding voltooid.

Nolan

Lid sinds: 03/11/15

882 Reputatie

2 handleidingen geschreven

Team

Colorado Springs, Team 9-2, Panko Spring 2015 Lid van Colorado Springs, Team 9-2, Panko Spring 2015

UCCS-PANKO-S15S9G2

3 Leden

12 handleidingen geschreven

8Gids Commentaar

como saber se o problema da minha caixa e a bateria, ela nao esta carregando nem liga, a bateria porem nao esta dando 12v medicao, uma por sinal esta com carga negativa. no aguardo

marcosallexandre - Antwoord Deel
Where can i buy these replacement batteries?

Edgar Zuniga - Antwoord Deel
From here you can find a replacement battery

http://www.witpow.com/shopdvr/product/4/...

lisi - Antwoord Deel

i think it's better to change a battery than buy a new one. And i was luck to find a replacement battery.lol

Jailene - Antwoord Deel

Voeg opmerking toe

Weergavestatistieken:

Afgelopen 24 uren: 3

Afgelopen 7 dagen: 38

Afgelopen 30 dagen: 207

Altijd: 32,219