Ga door naar hoofdinhoud
Word lid van de reparatiegemeenschap - Account aanmaken

Battery Replacement

Wat je nodig hebt

  1. Battery Replacement, removal of bottom case: stap 1, afbeelding 1 van 2 Battery Replacement, removal of bottom case: stap 1, afbeelding 2 van 2
    • remove the feet with a spudger

  2. Battery Replacement: stap 2, afbeelding 1 van 2 Battery Replacement: stap 2, afbeelding 2 van 2
    • Remove the 11 screw with a PH0 screwdriver.

    • The screws are identical

  3. Battery Replacement: stap 3, afbeelding 1 van 2 Battery Replacement: stap 3, afbeelding 2 van 2
    • Insert a spudger between the bottom cover and the keyboard module, then go around the whole cover to uncip everything.

    • Remove the bottom cover from the computer.

  4. Battery Replacement: stap 4, afbeelding 1 van 1
    • You now have acces to the inside of the machine.

  5. Battery Replacement, Battery: stap 5, afbeelding 1 van 1
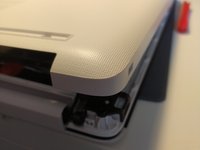
    • Remove the 3 screws that keep the battery in place, using a Phillips screwdriver.

  6. Battery Replacement: stap 6, afbeelding 1 van 1
    • Disconnect the battery by gently lifting it.

    • Don't lift the battery too forcefully! It is held together by notches on the opposite side of the connector.

    • Pull the battery toward the top of the computer to dislodge it.

Conclusie

To put your device back together, follow the instructions in reverse order.

Met dank aan deze vertalers:

fr en

100%

Deze vertalers helpen ons de wereld te repareren! Doe je mee?
Begin met vertalen ›

Léo FRAYSSE

Lid sinds: 09/03/18

1.426 Reputatie

6 handleidingen geschreven

0Gids Commentaar

Voeg opmerking toe

Weergavestatistieken:

Afgelopen 24 uren: 1

Afgelopen 7 dagen: 7

Afgelopen 30 dagen: 37

Altijd: 446