Inleiding
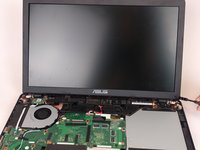
This guide will walk you through the process of replacing a broken or faulty screen on the Asus X751L.
Wat je nodig hebt
-
-
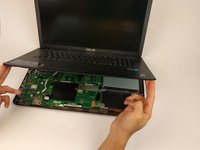
With the screen closed, place your laptop upside-down with the front facing you.
-
Remove the six 14.6mm Phillips #00 screws.
-
Remove the four 6.6mm Phillips #00 screws.
 Vraag FixBot
-
-
-
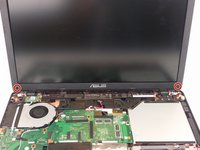
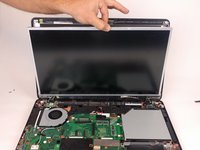
Flip the laptop over and open the lid.
-
Pry around the edges of the laptop base using the plastic opening tool.
-
-
-
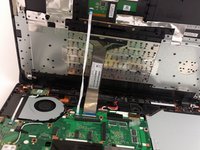
Carefully lift the keyboard up.
-
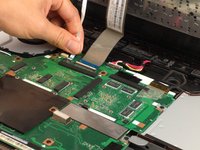
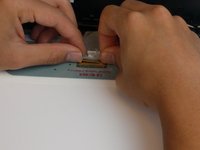
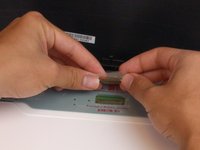
Disconnect the two ZIF connectors from the motherboard using your fingernail to lift the cream-colored tab.
-
-
-
-
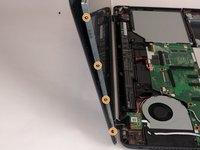
Remove the two rubber screw covers and the Phillips #00 screws beneath them.
-
-
-
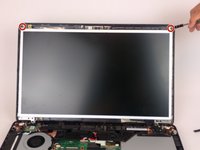
Pry around the edges of the panel using the plastic opening tool.
-
Carefully pull off the screen cover.
-
-
-
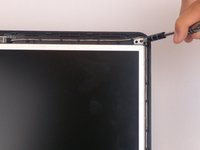
Remove the two 4.7mm Phillips#00 screws to free the screen-holding bracket from the back panel.
-
-
-
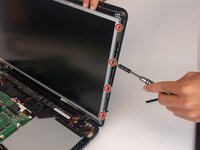
Remove the four 3.6mm Phillips#00 screws on the right side of the screen.
-
Remove the four 3.6mm Phillips#00 screws on the left side of the screen.
-
-
-
Gently lay the screen down to reveal the back side.
-
Remove the tape over top of the display cable connector.
-
Disconnect the display cable connector using your fingers.
-


To reassemble your device, follow these instructions in reverse order.
Annuleren: ik heb deze handleiding niet afgemaakt.
9 andere personen hebben deze handleiding voltooid.
Team

USF Tampa, Team 17-2, Blackwell Spring 2017 Lid van USF Tampa, Team 17-2, Blackwell Spring 2017
USFT-BLACKWELL-S17S17G2
4 Leden
5 handleidingen geschreven
2Gids Commentaar
Great presentation. My screen develops purple and pink vertical lines and no picture but if I adjust screen backward or forwards it clears up…but the problem is getting worse. Another observation is that if I apply a lot of pressure on area between the power button and the left hinge that it will clear up at certain angles of the screen.
Is it possible/probable that I have a loose connection below that pressure point where the screen cable connects with the computer board or is it more likely that the cable has simply worn out and the wires are actually breaking? Or is there another conclusion?
Scott
wscottsnyder@gmail.com
great pictures, how do i solve my screen if it is completely disturbed but gets back to normal if i press the base on the left front corner,
it also helps if i move the screen forward and backward.
does someone has a recommendation what to do, or what the root/cause is? It happens more often every week.