Ga door naar hoofdinhoud
Asus X501A-RH31 Keyboard  Replacement

Asus X501A-RH31 Keyboard Replacement

Romana Hruby

Romana Hruby en 5 andere bijdragers

Voor het laatst geüpdatet op May 7, 2024

10 minuten
Gemiddeld

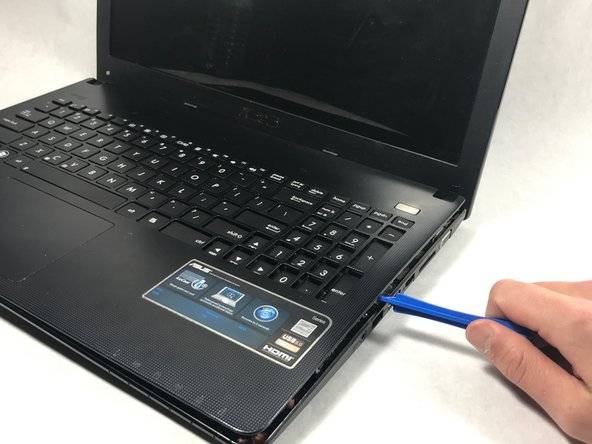
This guide will demonstrate how to properly replace the Asus X501A-RH31 keyboard. Please note that there are parts connecting the keyboard to the motherboard that could easily break if the steps are not executed correctly.

Wat je nodig hebt

Gereedschap

Toon meer…

  1. Asus X501A-RH31 Keyboard  Replacement, Battery: stap 1, afbeelding 1 van 1
    • Turn the laptop over so that the back is facing upwards.

  2. Asus X501A-RH31 Keyboard  Replacement: stap 2, afbeelding 1 van 1
    • To unlock the left tab, make sure the tab on the left has red showing.

  3. Asus X501A-RH31 Keyboard  Replacement: stap 3, afbeelding 1 van 2 Asus X501A-RH31 Keyboard  Replacement: stap 3, afbeelding 2 van 2
    • To unlock the right tab, push the right slider to the left with one hand.

    • Push the battery out with the other hand.

  4. Asus X501A-RH31 Keyboard  Replacement, Keyboard: stap 4, afbeelding 1 van 2 Asus X501A-RH31 Keyboard  Replacement, Keyboard: stap 4, afbeelding 2 van 2
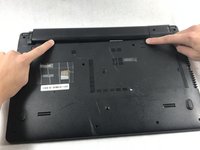
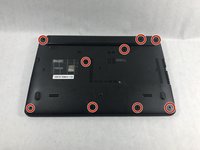
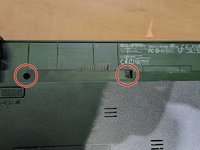
    • Using the Phillips #00 screwdriver unscrew all nine screws from the bottom of the laptop, as well as the additional two screws inside the battery compartment.

    • Nine of the screws are 5 mm long, 4.5 mm in diameter, while two screws closest to the hinges are 7 mm long.

  5. Asus X501A-RH31 Keyboard  Replacement: stap 5, afbeelding 1 van 1
    • Turn the laptop over and open the top so the keyboard is facing you.

  6. Asus X501A-RH31 Keyboard  Replacement: stap 6, afbeelding 1 van 2 Asus X501A-RH31 Keyboard  Replacement: stap 6, afbeelding 2 van 2
    • Pry off the keyboard cover on the edge using the plastic opening tool.

    • Start from one side. Once it is lose, carry out the same procedure on the front and other side.

    • Only do little sections at a time as the keyboard may break if you attempt to take the whole thing off from a single point.

  7. Asus X501A-RH31 Keyboard  Replacement: stap 7, afbeelding 1 van 1
    • Slowly lift the keyboard upward, but do not remove completely.

    • Remove the two data cables that attach the keyboard to the motherboard.

  8. Asus X501A-RH31 Keyboard  Replacement: stap 8, afbeelding 1 van 1
    Gereedschap gebruikt in deze stap:
    Tweezers
    $4.99
    • Use tweezers to pull the white plastic piece up that is attached to the data cable.

    • Repeat this process for the big black cable as well.

    • Use caution when unlatching the data cables from the motherboard. The cables are extremely delicate and can break.

Conclusie

To reassemble your device, follow these instructions in reverse order.

Één andere persoon heeft deze handleiding voltooid.

Romana Hruby

Lid sinds: 10/20/17

596 Reputatie

5 handleidingen geschreven

Team

UMass Dartmouth, Team S3-G3, Bailey Fall 2017 Lid van UMass Dartmouth, Team S3-G3, Bailey Fall 2017

UMASSD-BAILEY-F17S3G3

3 Leden

8 handleidingen geschreven

0 opmerkingen

Voeg opmerking toe

Weergavestatistieken:

Afgelopen 24 uren: 0

Afgelopen 7 dagen: 0

Afgelopen 30 dagen: 3

Altijd: 1,206