Ga door naar hoofdinhoud

Anki Vector LCD Facial Display Replacement

Wat je nodig hebt

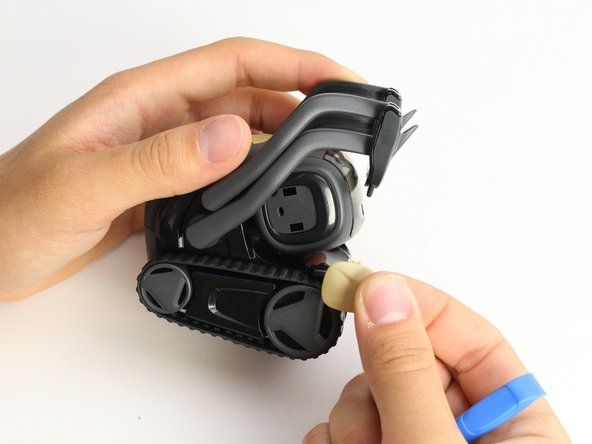
  1. Anki Vector LCD Facial Display Replacement, LCD Facial Display: stap 1, afbeelding 1 van 3 Anki Vector LCD Facial Display Replacement, LCD Facial Display: stap 1, afbeelding 2 van 3 Anki Vector LCD Facial Display Replacement, LCD Facial Display: stap 1, afbeelding 3 van 3
    • Using the iFixit opening tool, insert the corner under Vector's golden side panel and lightly twist.

    • Repeat this step on the other side.

    • The panel should pop off without much force.

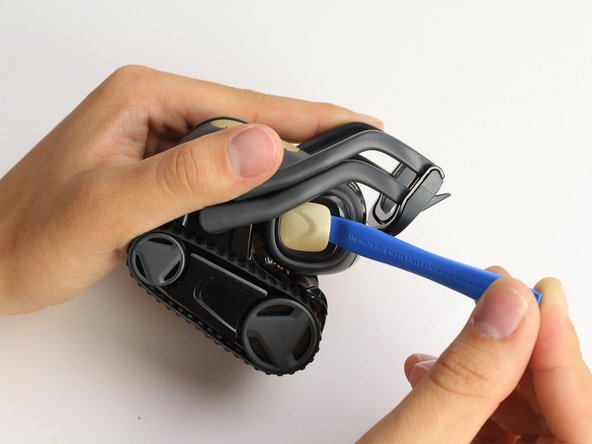
  2. Anki Vector LCD Facial Display Replacement: stap 2, afbeelding 1 van 3 Anki Vector LCD Facial Display Replacement: stap 2, afbeelding 2 van 3 Anki Vector LCD Facial Display Replacement: stap 2, afbeelding 3 van 3
    • Insert the corner of the square end of the spudger under the side plate above the partially visible screw.

    • Lightly turn the spudger to separate the plate from Vector's head.

    • Work the spudger around the plate until it comes off.

    • Repeat this step on the the other side.

  3. Anki Vector LCD Facial Display Replacement: stap 3, afbeelding 1 van 2 Anki Vector LCD Facial Display Replacement: stap 3, afbeelding 2 van 2
    • Using a Phillips #0 screwdriver, unscrew the two 2 mm screws on the side of Vector's head.

    • Repeat this step on the opposite side.

  4. Anki Vector LCD Facial Display Replacement: stap 4, afbeelding 1 van 2 Anki Vector LCD Facial Display Replacement: stap 4, afbeelding 2 van 2
    • Pull apart Vector's head. It should separate down the middle.

    • Remove the screen protector by gently pulling it free from the two face halves.

  5. Anki Vector LCD Facial Display Replacement: stap 5, afbeelding 1 van 3 Anki Vector LCD Facial Display Replacement: stap 5, afbeelding 2 van 3 Anki Vector LCD Facial Display Replacement: stap 5, afbeelding 3 van 3
    • Using your thumb and index finger, unplug the display from the plug in Vector's neck.

    • Pull the LCD and speaker assembly from Vector's head.

    • There is a very thin insulating rubber sheet located at the base of the screen. Be careful not to tear it when removing the display.

Conclusie

To reassemble your device, follow these instructions in reverse order.

8 andere personen hebben deze handleiding voltooid.

Shay Takei

Lid sinds: 04/16/19

1.570 Reputatie

5 handleidingen geschreven

Team

Cal Poly, Team S2-G6, Maness Spring 2019 Lid van Cal Poly, Team S2-G6, Maness Spring 2019

CPSU-MANESS-S19S2G6

4 Leden

10 handleidingen geschreven

26 opmerkingen

Any idea where to get the proper displays ?

Holger Brueckner - Antwoord

Any idea where to get the proper displays ?

xenojin - Antwoord

This is great information, but where can I buy the display?

Jackie Fischvogt - Antwoord

yeah I can’t find it anywhere.

Joel Choi -

Does anyone have a line on display parts source?
warren williams - Antwoord

Voeg opmerking toe

Weergavestatistieken:

Afgelopen 24 uren: 3

Afgelopen 7 dagen: 26

Afgelopen 30 dagen: 71

Altijd: 10,826