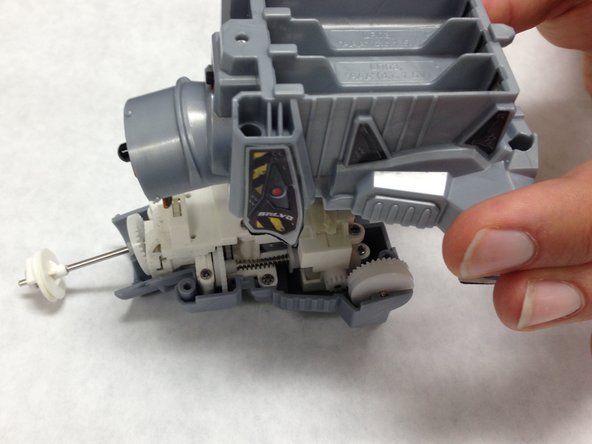
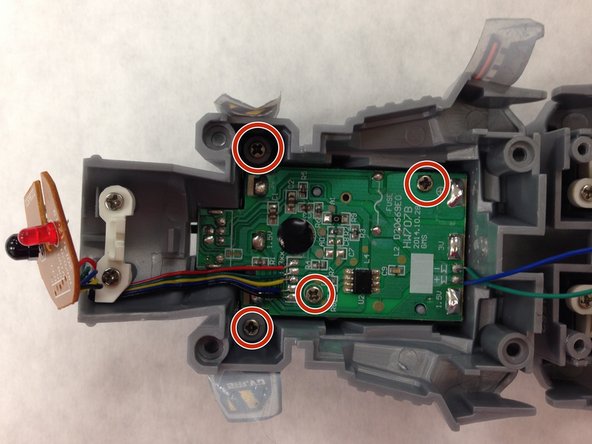
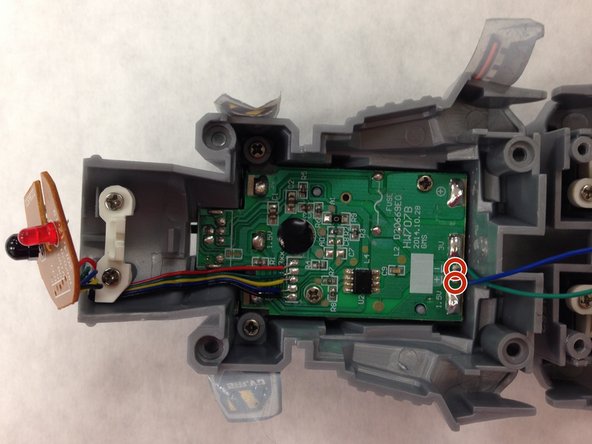
Ga door naar hoofdinhoud

Air Hog Smash Bots Motherboard Replacement

Wat je nodig hebt

  1. Air Hog Smash Bots Motherboard Replacement, Batteries: stap 1, afbeelding 1 van 1
    • Using the Phillips #0 screwdriver to remove the 8 mm screw.

  2. Air Hog Smash Bots Motherboard Replacement: stap 2, afbeelding 1 van 1
    • Lift and slide the batter cover away from the tab holding it in place at the bottom.

  3. Air Hog Smash Bots Motherboard Replacement: stap 3, afbeelding 1 van 1
    • Remove the 3 AAA batteries.

  4. Air Hog Smash Bots Motherboard Replacement, External Casing: stap 4, afbeelding 1 van 2 Air Hog Smash Bots Motherboard Replacement, External Casing: stap 4, afbeelding 2 van 2
    • Using a Phillip #0 screwdriver to remove the eight 8 mm screws.

  5. Air Hog Smash Bots Motherboard Replacement: stap 5, afbeelding 1 van 2 Air Hog Smash Bots Motherboard Replacement: stap 5, afbeelding 2 van 2
    • Remove the upper armor of the Smash Bot.

  6. Air Hog Smash Bots Motherboard Replacement: stap 6, afbeelding 1 van 1
    • Hold the upper body and slide out the bottom half of the Smash Bot.

    • The motor extends from the lower-body into the upper-body. Be careful to not damage the motor.

  7. Air Hog Smash Bots Motherboard Replacement: stap 7, afbeelding 1 van 1
    • Peel back the four decal stickers that hold the front and back of the bot together.

  8. Air Hog Smash Bots Motherboard Replacement: stap 8, afbeelding 1 van 2 Air Hog Smash Bots Motherboard Replacement: stap 8, afbeelding 2 van 2
    • Use the plastic opening tool to pry the front and back of the lower body apart.

    • Carefully remove the back of the bot from the front.

  9. Air Hog Smash Bots Motherboard Replacement, Motherboard: stap 9, afbeelding 1 van 2 Air Hog Smash Bots Motherboard Replacement, Motherboard: stap 9, afbeelding 2 van 2
    • Remove four 4.75mm screws from the motherboard.

  10. Air Hog Smash Bots Motherboard Replacement: stap 10, afbeelding 1 van 2 Air Hog Smash Bots Motherboard Replacement: stap 10, afbeelding 2 van 2
    • Use the soldering iron to remove the two wires from the motherboard. Directions on how to solder can be found here.

  11. Air Hog Smash Bots Motherboard Replacement: stap 11, afbeelding 1 van 1
    • Use the spudger to pry the motherboard away from the robot.

Conclusie

To reassemble your device, follow these instructions in reverse order.

2 andere personen hebben deze handleiding voltooid.

Brittany Frecker

Lid sinds: 02/08/16

542 Reputatie

4 handleidingen geschreven

Team

IUPUI, Team 1-1, Baechle Spring 2016 Lid van IUPUI, Team 1-1, Baechle Spring 2016

IUPUI-BAECHLE-S16S1G1

4 Leden

14 handleidingen geschreven

0 opmerkingen

Voeg opmerking toe

Weergavestatistieken:

Afgelopen 24 uren: 0

Afgelopen 7 dagen: 0

Afgelopen 30 dagen: 10

Altijd: 216