Inleiding
If the hard drive in your Asus Q302L failed or you just want to replace the drive with a larger drive or an SSD (because your current hard drive lacks the space to store your files), this guide will show you how to access the hard drive for replacement. The hard drive is responsible for data storage on your device, and also houses the operating system. If the drive becomes corrupted or damaged, you may see a corrupted files warning or have trouble booting your device. Check out the Asus Q302L Troubleshooting page for more details.
Wat je nodig hebt
-
-
Use a Phillips #0 screw driver to remove all ten 10 mm screws around the back of the laptop.
-
-
-
-
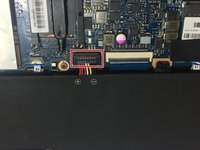
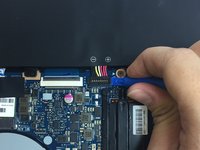
Use a Phillips #0 screwdriver and remove all five 5 mm screws securing the battery.
-
-
-
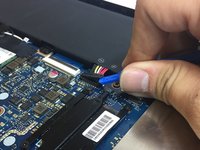
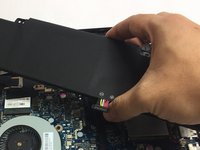
Unplug the hard drive from the connector.
-
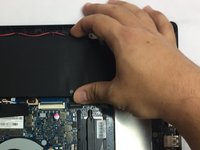
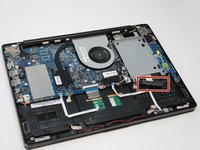
Use a Philips #0 screwdriver to remove all four 5mm screws holding the hard drive metal mounting bracket.
-


To reassemble your device, follow these instructions in reverse order.
To reassemble your device, follow these instructions in reverse order.
Annuleren: ik heb deze handleiding niet afgemaakt.
Één andere persoon heeft deze handleiding voltooid.

Team

The Citadel Military College of South Carolina, Team S2-G5, Eggleston Fall 2019 Lid van The Citadel Military College of South Carolina, Team S2-G5, Eggleston Fall 2019
CMCSC-EGGLESTON-F19S2G5
3 Leden
3 handleidingen geschreven