Ga door naar hoofdinhoud
Gearchiveerde handleiding
Deze handleiding wordt enkel nog bijgehouden voor historische doeleinden. Gebruik de laatste versie van deze gids om uw reparatie uit te voeren.

Wat je nodig hebt

Deze demontage is geen reparatiehandleiding. Om je iPhone 6 te repareren, gebruik onze reparatiehandleidingen.

  1. iPhone 6 Teardown, iPhone 6 Teardown: stap 1, afbeelding 1 van 3 iPhone 6 Teardown, iPhone 6 Teardown: stap 1, afbeelding 2 van 3 iPhone 6 Teardown, iPhone 6 Teardown: stap 1, afbeelding 3 van 3
    • Unboxing the iPhone 6: yup, it's a phone.

  2. iPhone 6 Teardown: stap 2, afbeelding 1 van 1
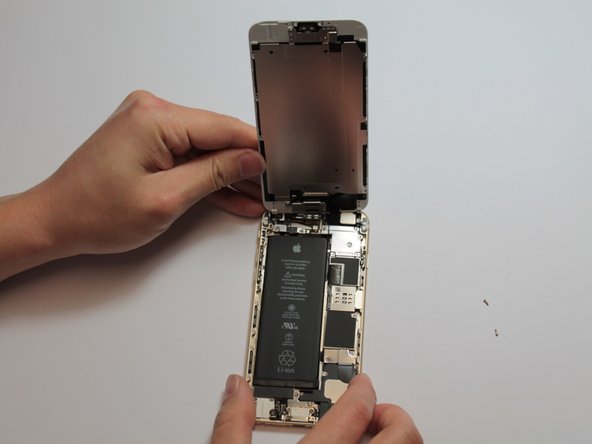
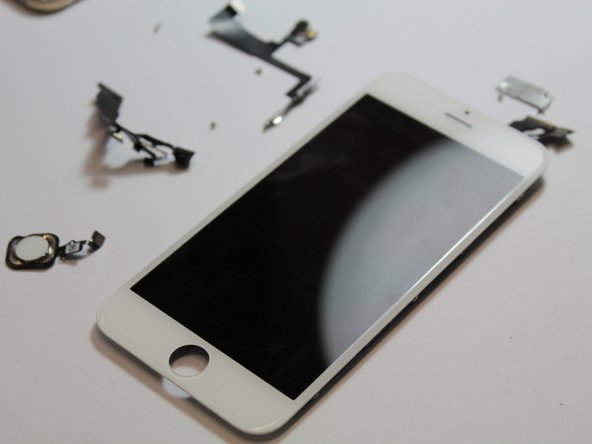
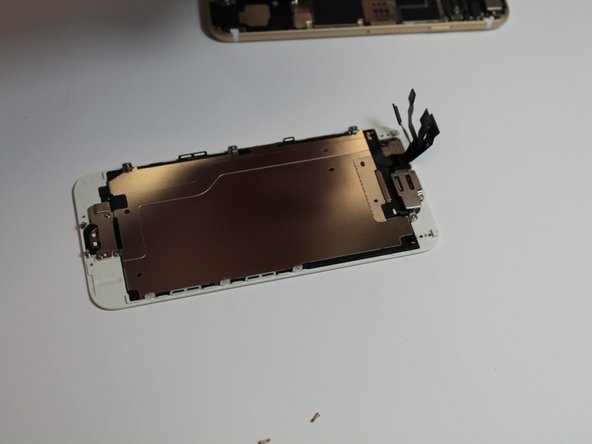
    • After removing the familiar two Pentalobe screws we use a suction cup to carefully lift up the screen to give us enough space to run a plastic tool down the edges to release the screen clips

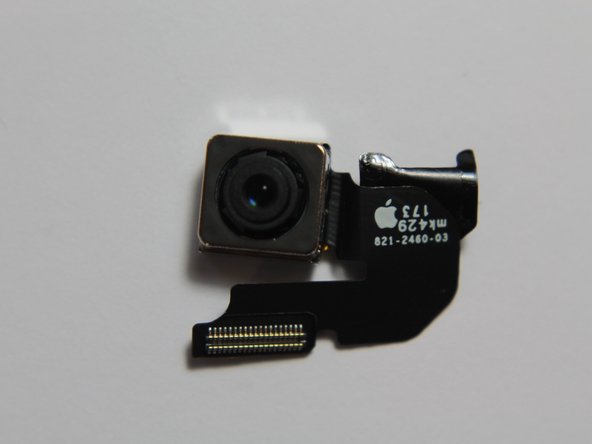
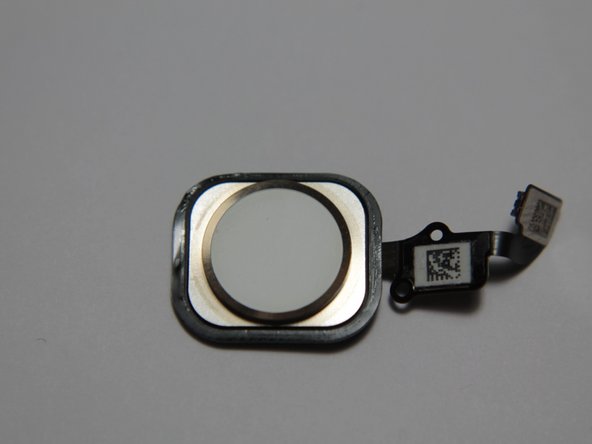
    • Unlike the 5s, The 6 Touch ID cable is now routed up the back of the screen, so we don't have to worry about accidentally ripping the touch ID cable.

  3. iPhone 6 Teardown: stap 3, afbeelding 1 van 2 iPhone 6 Teardown: stap 3, afbeelding 2 van 2
    • The screen connectors are covered by a metal plate, similar to the previous models.

    • This plate is held by 5 screws this time.

    • There are 5 connectors under this plate: LCD/Touch Sensor/Front Camera, Rear Camera and TouchID.

  4. iPhone 6 Teardown: stap 4, afbeelding 1 van 2 iPhone 6 Teardown: stap 4, afbeelding 2 van 2
    • The battery is very well stuck in. With a bit of heat and a little deformation of the battery, we were able to get it out. (There's probably a pull tab to remove the battery, but we didn't find it.)

    • The battery is rated at 3.82V, 6.91Whr.

  5. iPhone 6 Teardown: stap 5, afbeelding 1 van 1
    • Removing the logic board requires the removal of many screws.

    • Fortunately for DIYers, Apple have placed the chips away from most of the screws so there is less risk of tool slip damage.

  6. iPhone 6 Teardown: stap 6, afbeelding 1 van 1
    • The iPhone 6 rear camera: not as big as its optically stabilized brother.

  7. iPhone 6 Teardown: stap 7, afbeelding 1 van 1
    • The iPhone 6 logic board.

  8. iPhone 6 Teardown: stap 8, afbeelding 1 van 1
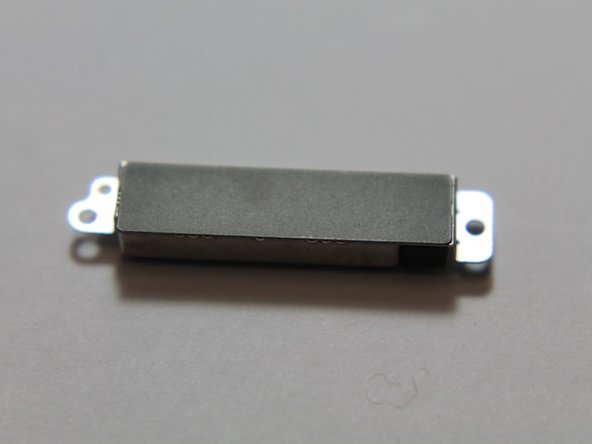
    • The vibration motor is now inside a metal case!

    Is this a linear oscillation vibrator like the 4S? Or the more standard type found in the 5/5s?

    ASheikh - Antwoord

    hi guys i would like to share my experience with all of you , I was android user and using Samsung galaxy S5 , when Iphone 6 has launched in september 2014 i was decided to buy Iphone 6 in Pakistan and sell my S5 android .

    In november i have bought iphone 6 16 GB from Pakistan online store http://www.vmart.pk/apple-iphone-6-16gb-... . My friends are very happy to see my iphone 6 and they are all apple products lover. Everything is going fine with my iphone but when put on my iphone in my stretchable jeans my iphone is bend in curve. i am very upset because of my set is to expansive please help me guys.

    Thanks

    kashif - Antwoord

  9. iPhone 6 Teardown: stap 9, afbeelding 1 van 1
    • The loudspeaker.

  10. iPhone 6 Teardown: stap 10, afbeelding 1 van 1
    • The Lightning port.

  11. iPhone 6 Teardown: stap 11, afbeelding 1 van 1
    • The Touch ID sensor.

  12. iPhone 6 Teardown: stap 12, afbeelding 1 van 1
    • The front camera and proximity sensor flex cable.

  13. iPhone 6 Teardown: stap 13, afbeelding 1 van 3 iPhone 6 Teardown: stap 13, afbeelding 2 van 3 iPhone 6 Teardown: stap 13, afbeelding 3 van 3
    • The iPhone 6 display assembly. It's thinner than the iPhone 5s/5c/5 screen.

    • The Touch ID Cable runs from the home switch to the top of the screen, adding a 4th connector at the top.

  14. iPhone 6 Teardown: stap 14, afbeelding 1 van 3 iPhone 6 Teardown: stap 14, afbeelding 2 van 3 iPhone 6 Teardown: stap 14, afbeelding 3 van 3
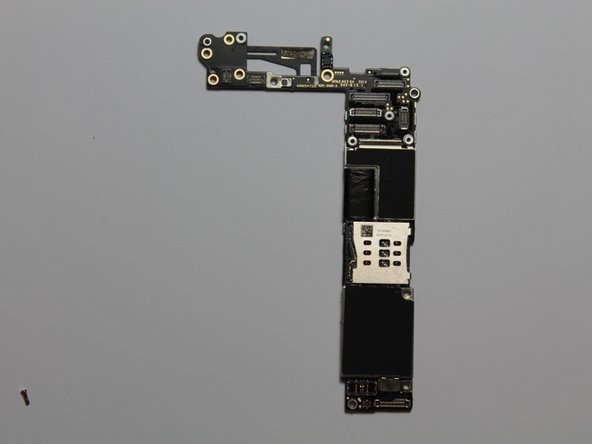
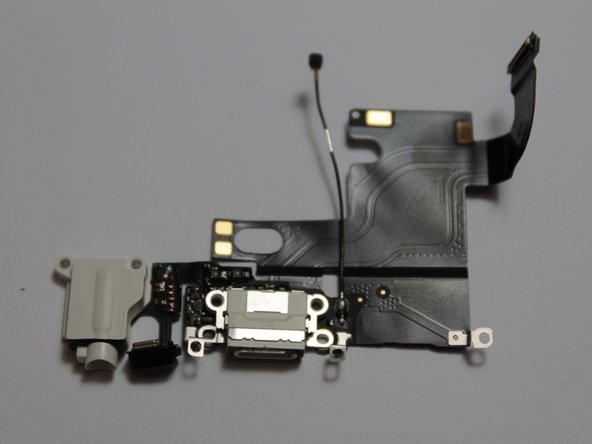
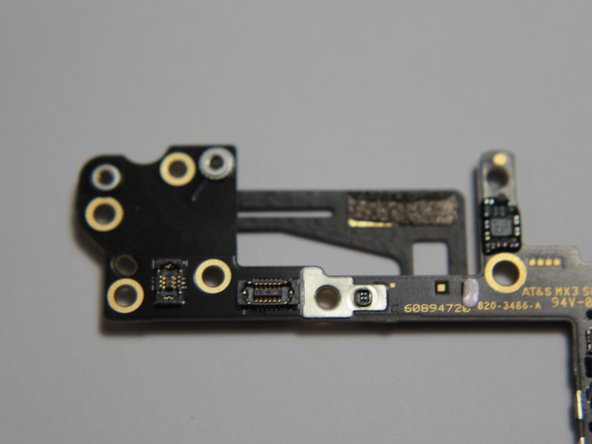
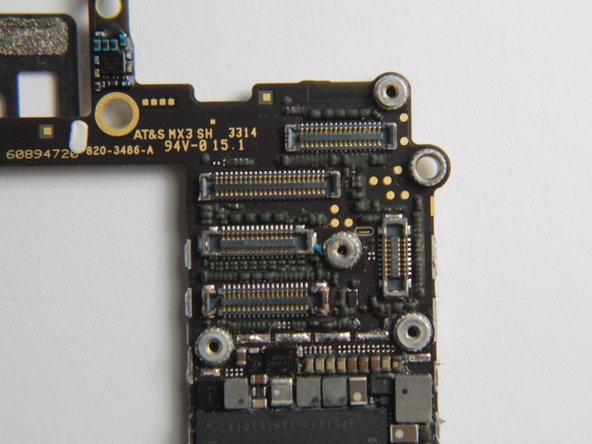
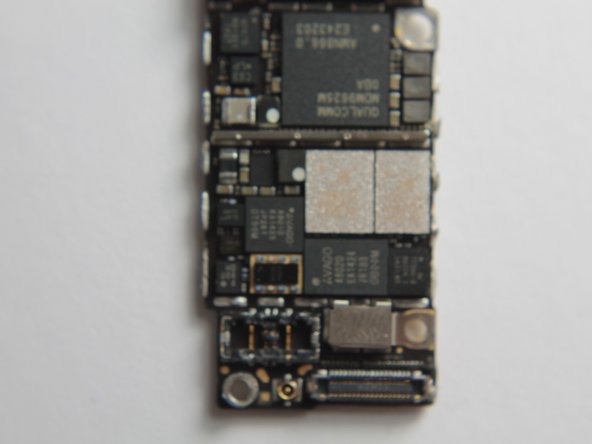
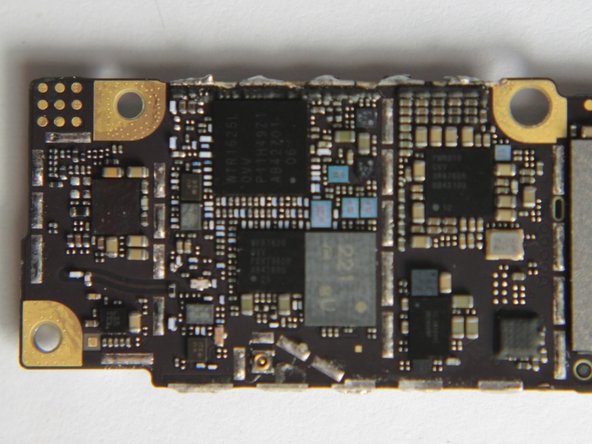
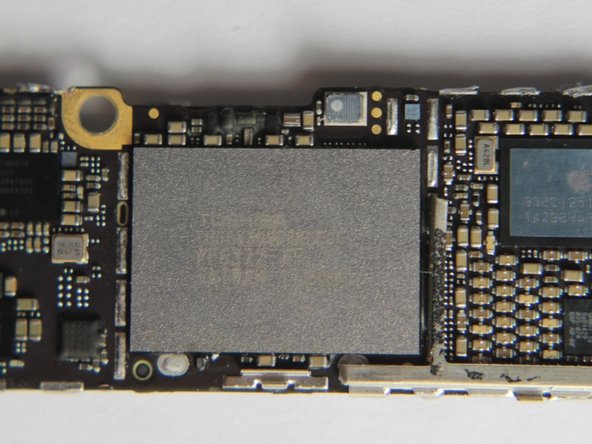
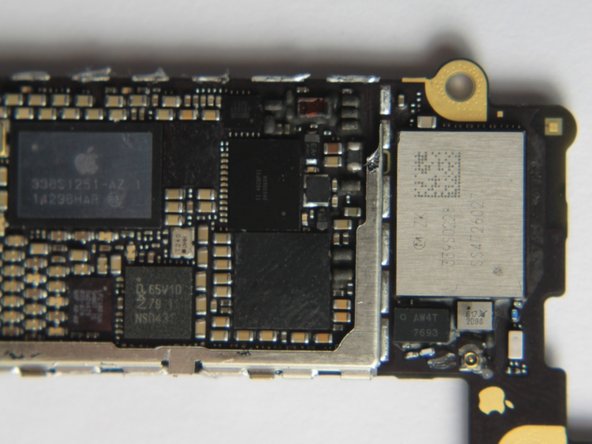
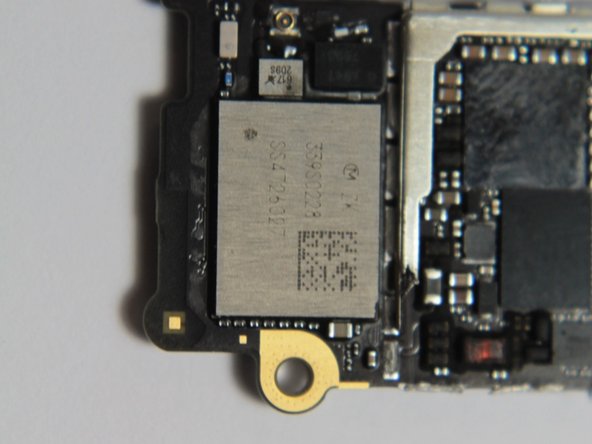
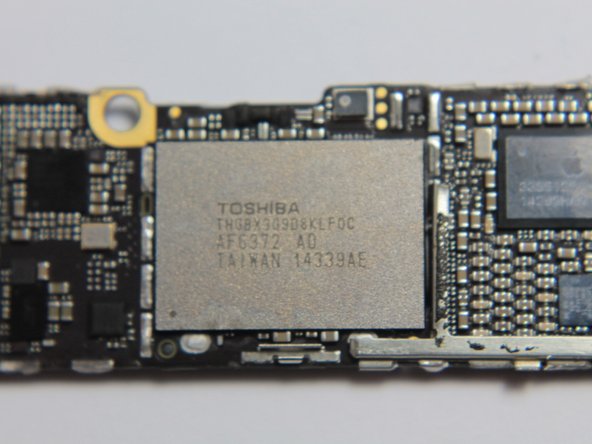
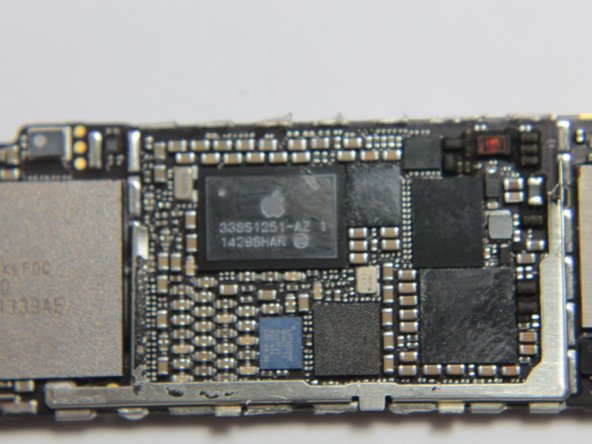
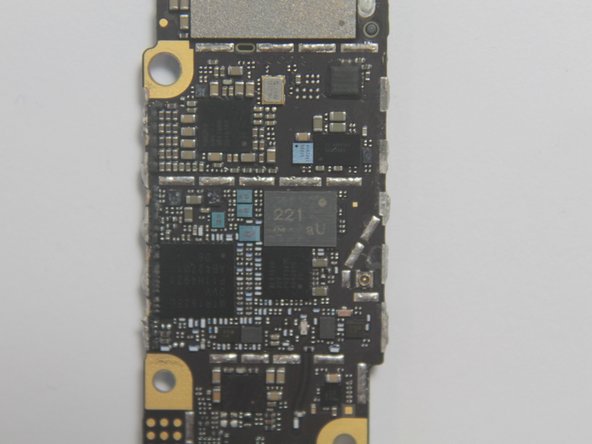
    • After the usual painful desoldering of the shielding, we have the logic board in all its naked glory.

    • Analysis to follow with iFixit's full teardown.

    Somewhere in the teardown around the stage of the antenna area, this small piece came out and I don't know where from. Anyone know what this is?? It says, "00095-A" with a small box thing at the end of the character string. Thanks so much in advance!

    (showing both sides)

    [IMG]http://i61.tinypic.com/30augbc.jpg[/IMG]

    [IMG]http://i58.tinypic.com/2lld838.jpg[/IMG]

    [IMG]http://i60.tinypic.com/21k9kld.jpg[/IMG]

    shauhncy - Antwoord

    Any luck with finding the location of that small piece? Same thing happened here and I am trying to identify where it goes. My piece is same but with 1-00095-A 334 for the number. Thanks!

    Victor -

    its the antenna interconnect i believe..

    https://d3nevzfk7ii3be.cloudfront.net/ig...

    if that link doesn't work or you cant tell from looking where the part fits in then look at the iphone 6 power button tutorial which has all the steps to get to the part properly since it has to be removed to get to the power button.

    iPhone 6 Power Button Replacement

    Hope that helps.

    ynit -

    I came across with the same piece with a mark 00095-A. I don't know where it came from. anyone knows about it?

    kpanmei95 - Antwoord

    antenna interconnect.. see above for links

    ynit -

    I have tried every possible location for that small piece with a character"00095-A" but found no place to fit in that piece. Maybe its just an extra part coz the phone itself is working fine. Anyone with better knowledge about it??????

    kpanmei95 - Antwoord

    its the antenna interconnect.. links posted in reply to original post

    ynit -

  15. iPhone 6 Teardown: stap 15, afbeelding 1 van 3 iPhone 6 Teardown: stap 15, afbeelding 2 van 3 iPhone 6 Teardown: stap 15, afbeelding 3 van 3
    • More chip pics!

  16. iPhone 6 Teardown: stap 16, afbeelding 1 van 3 iPhone 6 Teardown: stap 16, afbeelding 2 van 3 iPhone 6 Teardown: stap 16, afbeelding 3 van 3
    • Even more ICs.

  17. iPhone 6 Teardown: stap 17, afbeelding 1 van 2 iPhone 6 Teardown: stap 17, afbeelding 2 van 2
    • And that's all she wrote! We'll be back soon with a complete teardown and analysis from iFixit with higher resolution photos.

Patrick Lee

Lid sinds: 09/19/13

2.605 Reputatie

1 Handleiding geschreven

Team

iExperts Lid van iExperts

Business

1 Lid

1 handleiding geschreven

Één opmerking

I have 2 small pieces that fell out and I have no idea where they go. One has this code on it 1-00095A 344. And the other looks like a toggle switch, it is black. Can you help.

linda.lloyd - Antwoord

Voeg opmerking toe

Weergavestatistieken:

Afgelopen 24 uren: 0

Afgelopen 7 dagen: 1

Afgelopen 30 dagen: 4

Altijd: 87,133