Inleiding
What are we all searching for in life? Happiness? Money? Bobby Fischer? Samsung sets out to answer that question with their newest in the Galaxy S line. What we all need is no more than a life companion. So ditch the real-life social interactions, and pick up your new life companion: the Samsung Galaxy S4.
Accompany us on all of our latest teardown excursions on Twitter and Facebook!
Wat je nodig hebt
Video overzicht
-
-
With the newest addition to the Galaxy S line, Samsung has decided to ditch the roman numerals. Let's take a look into the specs of the Galaxy S4 (not SIV):
-
5" display with a resolution of 1920 x 1080 at 441 ppi (just shy of the HTC One's 468 ppi)
-
16, 32, or 64 GB of internal storage, expandable with up to 64 GB of external microSDXC storage
-
2 GB RAM
-
13 MP rear-facing camera and 2 MP front-facing camera
-
iFixit Public Service Announcement! Please do not fix things while driving.
-
-
-
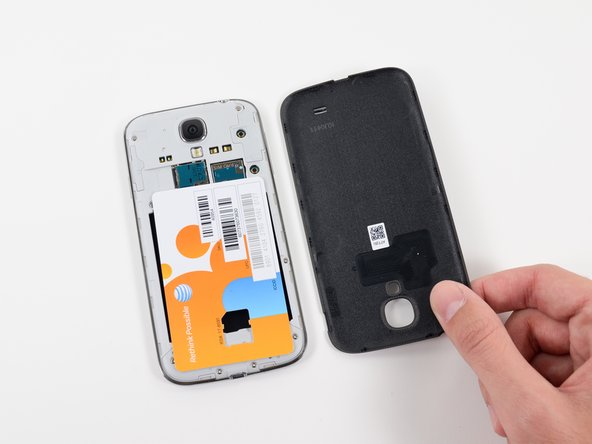
Straight out of the box, we are already sighing with relief…it's a removable battery!
-
This trend makes us oh-so-happy! Samsung is doing the right thing for their customers and the environment.
-
Not only is the battery removable, it even comes removed! The rear panel rests upside-down on the device, so we don't even have to release any clips to open it up.
-
Resting in the battery cavity is our micro-SIM card delivery system: an advanced piece of plastic from whence the micro-SIM card came. It provides super-important numbers for the life of your micro-SIM card, all in one easy-to-lose thin piece of plastic!
-
-
-
We know it may be comparing Apples to Oranges, but we are tempted to see how Samsung's S4 differs from Apple's latest: the iPhone 5.
-
The S4 rocks a 5" full HD Super AMOLED display, compared to the iPhone 5's Retina display, which is a 4" IPS LCD.
-
The Galaxy S4 is considerably larger than the iPhone 5, clocking in at 5.38" x 2.71" x .31" and weighing 4.6 ounces. The iPhone 5, for comparison, measures 4.87" x 2.69" x 0.30" and weighs 3.95 ounces.
-
Both phones are available with 16, 32, or 64 GB of internal storage, but the S4 also offers up to 64 GB of microSDXC storage.
-
-
-
One of the acclaimed new features of the S4 is Smart Pause, which automatically pauses video playback when the user looks away from the screen.
-
Like all good "Life Companions," the S4 wants the attention it deserves—when it's talking to you, you'd better be looking!
-
It wasn't long after we started playing with Smart Pause for ourselves that we knew we'd have to find a way to trick it...
-
-
-
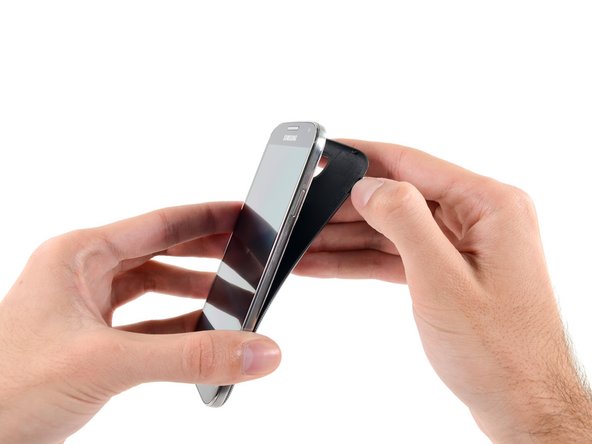
After a quick test drive, it's time to take the battery back out and get to work. New software features are cool, but we're much more interested in getting down to what powers them.
-
The back panel is as easy to remove as they come—a fingernail in the groove is all you need to get this phone open.
-
-
-
You put the battery in, you pull the battery out, you put the battery in…and you shake it all about!
-
The lithium-ion battery is rated at 3.8 V and 2600 mAh (9.88 Wh). Its advertised useful life allows for up to 7 hours of talk time, and up to 12.5 days of standby.
-
-
-
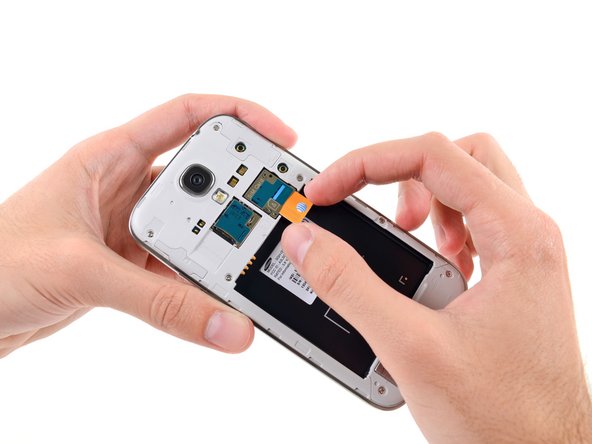
With no time to waste, we slide the pre-installed micro-SIM card out of the way.
-
Just like in the previous iteration, a few screws hold the plastic midframe in place.
-
We were hoping that we'd find a magnesium midframe like in the S4's great-grandparent. Alas, it looks like we won't be playing with fire in this Galaxy.
-
-
-
-
With little effort, we remove the speaker assembly from the midframe.
-
Unlike the dual front-facing speakers in the HTC One, the S4 keeps its primary speaker down at the bottom of the back of the phone.
-
While the sound quality may not be hot and fresh out the kitchen, the speaker does pack quite the punch and can pump out your favorite mashups loud and clear.
-
-
-
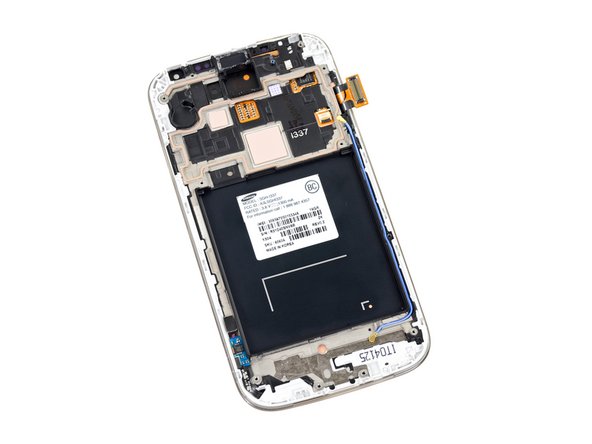
With the midframe off, several connectors and a single screw are all that hold the motherboard in place. Our two favorite tools are all we need to get it out.
-
Just how great does Samsung think their phone is? If you couldn't tell from their unveiling show, an internal stamp informs us this device is straightup 1337.
-
-
-
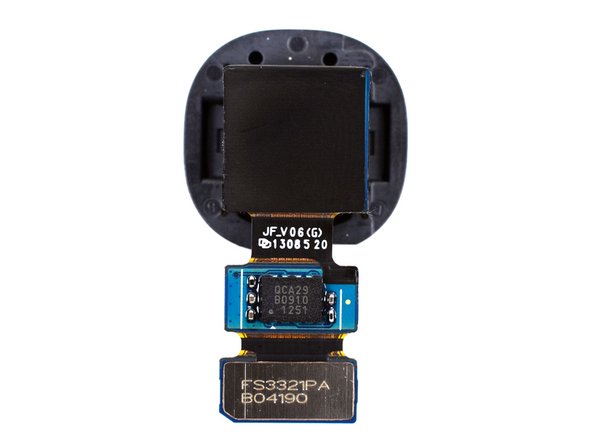
Before we can examine the motherboard, we need to pull off the rear-facing camera.
-
Very much unlike HTC's recent disregard for the megapixel race, Samsung has opted for a rear-facing camera boasting 13 megapixels. It also sports the now-standard LED flash, a back-illuminated sensor, and the ability to record full 1080p HD video at 30 fps.
-
-
-
Resting atop the motherboard is the SIM/microSDXC board.
-
On one hand, the modular design of this component makes it possible to replace if you happen to jam something into one of the two slots—although you will need to replace both at once.
-
On the other hand, the adhesive securing it to the motherboard makes it something you wouldn't replace unless you had to.
-
-
-
Qualcomm MDM9215M 4G GSM/UMTS/LTE modem
-
Qualcomm PM8917 power management
-
ARM Holdings MBG965H (right)
-
Samsung K3QF2F200E 2 GB LPDDR3 RAM (we suspect the Snapdragon 600 APQ8064T 1.9 GHz Quad-Core CPU lurks below)
-
Toshiba THGBM5G7A4JBA4W 16 GB eMMC (eMMC integrates a NAND flash memory and a controller chip in a single package)
-
Qualcomm WCD9310 audio codec
-
Broadcom BCM4335 Single-Chip 5G Wi-Fi MAC/Baseband/Radio (thanks to a tip from a user, and our friends at chipworks, we believe there's something underneath this chip)
-
Bosch Sensortec BMP180 barometric pressure sensor (left) - Samsung outputs the height in meters as second parameter.
-
-
-
Reflowing the Broadcom module off the motherboard reveals a stow-away located beneath it: a Skyworks SKY85303-11 2.4 GHz, 256 QAM WLAN/Bluetooth® Front-End Module.
-
-
-
Moving over to the other side of the Galaxy:
-
Skyworks 77619 power amplifier module for quad-band GSM/EDGE
-
Qualcomm WTR1605L seven-band 4G LTE chip (same one found in the Nexus 4)
-
SWA GNF09
-
Broadcom 20794S1A standalone NFC chip
-
Maxim MAX77803 microcontroller
-
Silicon Image 8240BO MHL 2.0 transmitter
-
Qualcomm PM8821 power management IC
-
-
-
…and we were right! Concealed under the Samsung LPDDR3 IC is the Snapdragon 600 APQ8064T 1.9 GHz Quad-Core CPU.
-
The Qualcomm applications processor package is labeled as APQ8064.
-
Samsung recently came under fire for using tin solder that comes from highly dangerous mines in Indonesia. Friends of the Earth raised the issue with a visible #makeitbetter campaign—including signs in front of Samsung's office.
-
Just last week, Samsung announced they have changed their policy. Good for them! Apple has refused to state whether they are using dangerous mines to produce the iPhone.
-
-
-
With the motherboard out of the way, we can focus our efforts on removing components attached to the front of the device.
-
The first component out is the standard 3.5 mm headphone jack. A swift flick of our trusty spudger, and poof! It's out!
-
Samsung left no useful space un-adorned with extra components—the headphone jack is home to the status LED and the first of a pair of IR sensors.
-
-
-
Some precise tweezing helps us excavate the front-facing camera from the S4.
-
The 2 MP front-facing camera is utilized by the S4's new dual-camera feature, because the only thing better than pictures of food are pictures of people taking pictures of food.
-
-
-
Poke poke, flick flick, tweeeeeze!
-
With all of the easily-removed components out of the way, we get to work peeling up the remaining, slightly-adhered parts filling the Galaxy S4's display assembly.
-
First out is a multi-purpose component that connects the earpiece speaker, IR blaster, and a sensor array hosting the ambient light sensor and a second IR sensor.
-
-
-
The next victim of our anti-adhesive prying campaign is the vibrator motor.
-
The S4 features a linear oscillator vibration motor, similar to those found in its Android brethren, the Nexus 4 and Galaxy Nexus.
-
This particular motor is labeled 53329 34AVCV.
-
-
-
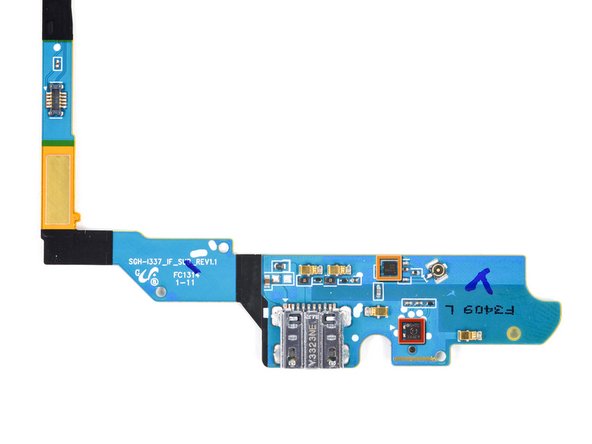
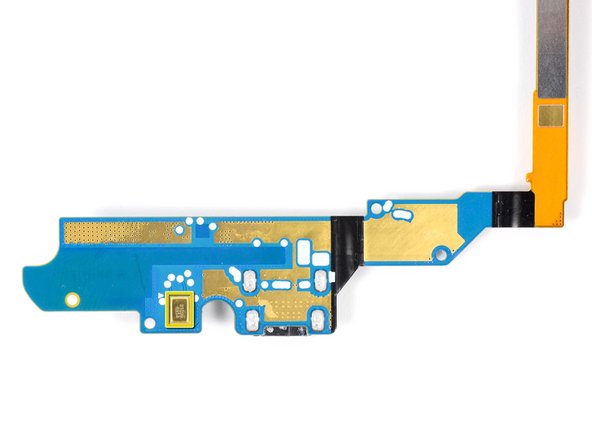
The daughterboard is home to the full-featured micro USB port. With MHL and USB OTG support, users can use this port for HDMI output and USB peripherals in addition to charging and transferring data.
-
Removing the daughterboard from the device, we get a view of some of its secrets.
-
Sensirion SHTC1 humidity and temperature sensor
-
RFMD RF1119 antenna controller
-
S1029 6914 (this one appears to be a voice microphone)
-
-
-
The front panel assembly is the final piece to the puzzle.
-
Getting a look at the second liquid damage indicator on the back of the screen, and—whoa, what's this hiding down there?
-
Looks like we've spotted the touchscreen controller, a Synaptics S5000B.
-
This chip is responsible for the S4's super-sensitive touchscreen, which even works with gloves.
-
-
-
Samsung Galaxy S4 Repairability Score: 8 out of 10 (10 is easiest to repair)
-
The battery can be replaced in seconds, without any tools.
-
Very easy to open and access internal components.
-
There are only 11 screws in the entire device, all standard Phillips #0 (no proprietary or security sizes).
-
Most of the smaller components are modular and can be replaced individually, but several of them are adhered in place, increasing replacement difficulty.
-
The glass is fused to both the display and the display frame, increasing repair costs.
-
You'll have to go through the entire phone in order to replace the front panel, since everything is built into the back of it.
-


11 opmerkingen
where do they hide the gyros and accelerometers?
Hello Richard
You may find all Acceleration and Gyro Sensor related solution on this link probably.
Kindly be advised, this one is not my personal website, but had helped me.
http://free-mobile-solutions.blogspot.in...
Hope this may solve your as mine.
Sorry for so late reply, hope by now you may have rectified your problem, but this one is for someone who requires it.
Have a nice day ahead
Its amazing how much wasted (blank) space there is on the logicboard and "a fingernail in the groove is all you need to get this phone open" literally means it will start falling apart as the phone wears.
Why do people keep comparing junk like this to the iPhone? They are nothing alike. The iPhone is a premium product designed by engineers. The S4 is a low-cost product designed in Korea by kids ("leet"). Seriously, the CPU uses the RAM chip as a heatsink......
http://www.youtube.com/watch?v=S_BadHtLP... THE GLASS IS NOT FUSED TO THE DISPLAY! WATCH THIS VIDEO!
Hi, it wasn't really mentioned in the guide, but I was wondering if you could tell me why the wireless charging prongs changed from the S3 to the S4. Particularly why they changed it from 2 prongs on the S3 to 4 prongs on the S4. Thanks!