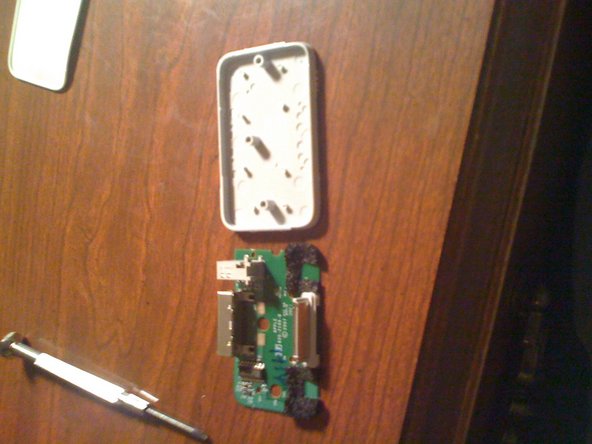
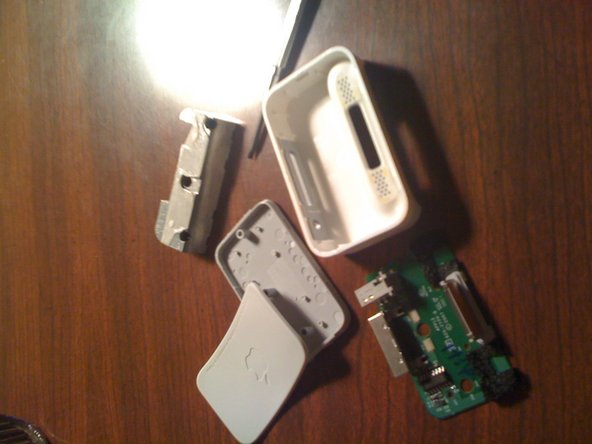
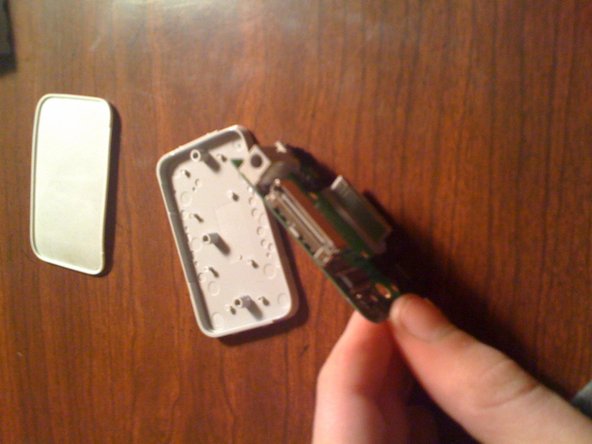
Ga door naar hoofdinhoud

Wat je nodig hebt

Deze demontage is geen reparatiehandleiding. Om je iPhone 1st Generation Dock te repareren, gebruik onze reparatiehandleidingen.

  1. Original iPhone Dock Teardown, Original iPhone Dock Teardown: stap 1, afbeelding 1 van 3 Original iPhone Dock Teardown, Original iPhone Dock Teardown: stap 1, afbeelding 2 van 3 Original iPhone Dock Teardown, Original iPhone Dock Teardown: stap 1, afbeelding 3 van 3
    • The Original iPhone dock!

    • This dock only holds the original iPhone. It will not hold the iPhone 3G/3GS as it is wider and thicker.

  2. Original iPhone Dock Teardown: stap 2, afbeelding 1 van 3 Original iPhone Dock Teardown: stap 2, afbeelding 2 van 3 Original iPhone Dock Teardown: stap 2, afbeelding 3 van 3
    • Use a hair dryer or heat gun to weaken the adhesive holding the rubber foot to the dock.

    • Use a razor blade or flathead screwdriver to pull up part of the rubber foot.

    • While still hot, pull the rubber foot off the dock.

  3. Original iPhone Dock Teardown: stap 3, afbeelding 1 van 2 Original iPhone Dock Teardown: stap 3, afbeelding 2 van 2
    • Using a spudger or a flat head screwdriver, release the 6 clips holding the dock to the white plastic molding.

    • You will need to pry this out as the dock contains a weight that is stuck to the top casing with adhesive.

  4. Original iPhone Dock Teardown: stap 4, afbeelding 1 van 1
    • Heat up the adhesive that covers the three screws, so you can unscrew the screws that hold the weight in the base of the dock.

  5. Original iPhone Dock Teardown: stap 5, afbeelding 1 van 3 Original iPhone Dock Teardown: stap 5, afbeelding 2 van 3 Original iPhone Dock Teardown: stap 5, afbeelding 3 van 3
    • Remove the three screws holding the weight to the bottom plate.

  6. Original iPhone Dock Teardown: stap 6, afbeelding 1 van 1
    • The dock should look like this.

    • If not, go back and see what you did wrong.

  7. Original iPhone Dock Teardown: stap 7, afbeelding 1 van 1
    • Now remove the green logic board from the little plastic pegs on the bottom plate.

    • There is one peg under each black foam padding.

  8. Original iPhone Dock Teardown: stap 8, afbeelding 1 van 2 Original iPhone Dock Teardown: stap 8, afbeelding 2 van 2
    • The little white things are the pegs.

    • Gently use a spudger or flathead screwdriver to pry the logic board from the bottom plate.

    • Be very careful, as you could break the board doing this.

  9. Original iPhone Dock Teardown: stap 9, afbeelding 1 van 2 Original iPhone Dock Teardown: stap 9, afbeelding 2 van 2
    • Once done separating the logic board from the bottom plate, you should have 2 parts.

  10. Original iPhone Dock Teardown: stap 10, afbeelding 1 van 3 Original iPhone Dock Teardown: stap 10, afbeelding 2 van 3 Original iPhone Dock Teardown: stap 10, afbeelding 3 van 3
    • Disassembly is now complete. You will have five separate parts as shown in the picture.

  11. Original iPhone Dock Teardown: stap 11, afbeelding 1 van 3 Original iPhone Dock Teardown: stap 11, afbeelding 2 van 3 Original iPhone Dock Teardown: stap 11, afbeelding 3 van 3
    • Boom! Your done. It took me 32 minutes to figure this out with out damaging the dock.

    • I can do it in 3 minutes now that I've mastered the process.

    • If you don't replace the white top cover of the dock when reassembling, you will have a universal dock, that can also be used with an iPhone 3G/3GS.

    • It will also work with any iPod with a 30 pin connector.

Nicholas Ouimet

Lid sinds: 10/16/09

3.476 Reputatie

12 handleidingen geschreven

0 opmerkingen

Voeg opmerking toe

Weergavestatistieken:

Afgelopen 24 uren: 3

Afgelopen 7 dagen: 8

Afgelopen 30 dagen: 33

Altijd: 32,860