Ga door naar hoofdinhoud

Wat je nodig hebt

Deze demontage is geen reparatiehandleiding. Om je Nokia 8 Sirocco te repareren, gebruik onze reparatiehandleidingen.

  1. Nokia 8 Sirocco Teardown, Back glass removal: stap 1, afbeelding 1 van 3 Nokia 8 Sirocco Teardown, Back glass removal: stap 1, afbeelding 2 van 3 Nokia 8 Sirocco Teardown, Back glass removal: stap 1, afbeelding 3 van 3
    Gereedschap gebruikt in deze stap:
    Plastic Cards
    $2.99
    Koop
    • Start by heating up the back glass. Ifixit's iOpener kit is very useful here. You can also use heating pad or heat gun

    • Take off the SIM tray, and start there. Use suction cup if avaliable

    • After you have made room for plastic card, finish the work by going around the glass with card

  2. Nokia 8 Sirocco Teardown, Midframe: stap 2, afbeelding 1 van 3 Nokia 8 Sirocco Teardown, Midframe: stap 2, afbeelding 2 van 3 Nokia 8 Sirocco Teardown, Midframe: stap 2, afbeelding 3 van 3
    • Start by screwing off all screws. There are 3 type of different screws.

    • 11 pcs of longer black painted screws

    • 10 pcs of shorter black painted screws

    • 1 shiny metallic screw

    • After that, pop off bottom piece and then midframe

  3. Nokia 8 Sirocco Teardown, Battery: stap 3, afbeelding 1 van 3 Nokia 8 Sirocco Teardown, Battery: stap 3, afbeelding 2 van 3 Nokia 8 Sirocco Teardown, Battery: stap 3, afbeelding 3 van 3
    • Remeber to disconnect battery connector first

    • Battery has pull tabs, so you should try this first

    • If pull tab breaks, you have to commit a pry of shame

  4. Nokia 8 Sirocco Teardown, Daughter board: stap 4, afbeelding 1 van 3 Nokia 8 Sirocco Teardown, Daughter board: stap 4, afbeelding 2 van 3 Nokia 8 Sirocco Teardown, Daughter board: stap 4, afbeelding 3 van 3
    • Disconnect volume and power button connector

    • Disconnect connector on motherboard

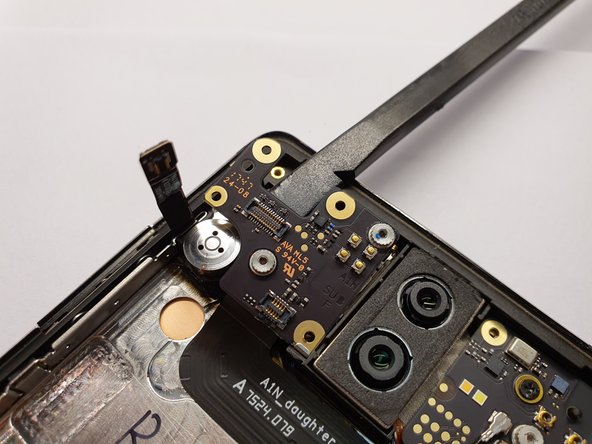
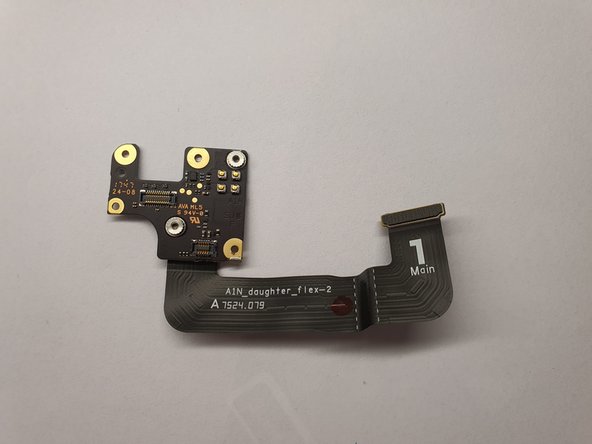
    • Pry off the daughter board

  5. Nokia 8 Sirocco Teardown, Motherboard: stap 5, afbeelding 1 van 3 Nokia 8 Sirocco Teardown, Motherboard: stap 5, afbeelding 2 van 3 Nokia 8 Sirocco Teardown, Motherboard: stap 5, afbeelding 3 van 3
    • There are 2 screws

    • 1 longer black screw

    • 1 standoff screw

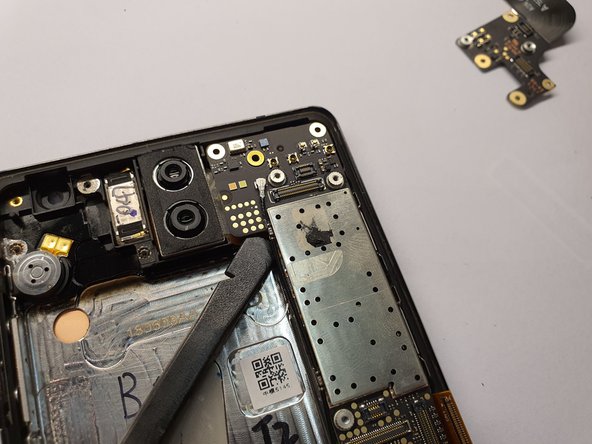
    • After taking the screws off, you can disconnect antenna coaxial cables

    • Now you can take motherboard off

    • Make sure to push SIM-eject pin out first

  6. Nokia 8 Sirocco Teardown, Charging board: stap 6, afbeelding 1 van 2 Nokia 8 Sirocco Teardown, Charging board: stap 6, afbeelding 2 van 2
    • Charging board is held down with 2 screws

    • 1 black screw

    • 1 golden screw

    • After taking the screws off, charging board is free

    • And now you are done, repeat steps backward to put everything back together

Mobile Partners

Lid sinds: 02/22/20

204 Reputatie

1 Handleiding geschreven

2 opmerkingen

Mannaia Dio, mi ruvinasti!

Giuseppe Barbieri - Antwoord

Mannaia God, You ruined me!

Giuseppe Barbieri - Antwoord

Voeg opmerking toe

Weergavestatistieken:

Afgelopen 24 uren: 0

Afgelopen 7 dagen: 2

Afgelopen 30 dagen: 30

Altijd: 3,247