Wat je nodig hebt
-
-
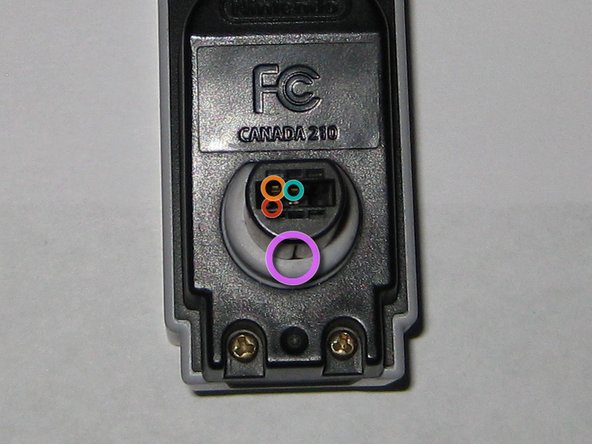
This is the connector side of the WaveBird receiver.
-
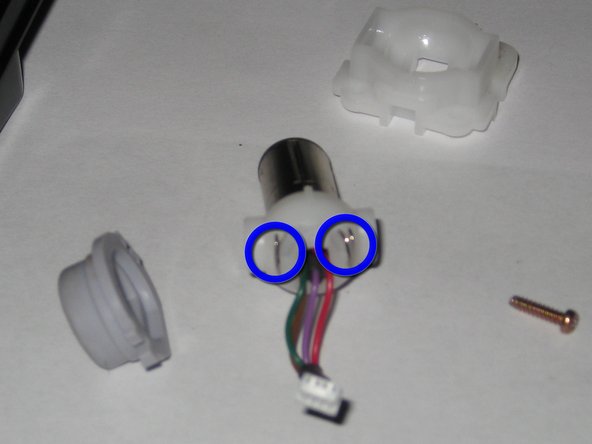
Remove two tri-wing screws, and separate the black and gray halves of the receiver.
-
-
-
-
Red: 3.43V logic supply (pin 1 on cable)
-
Brown: Ground (pin 3 on cable)
-
Green: Data (pin 2 on cable, recessed by 2mm into connector)
-
Violet: Shield (pin 4 on cable)
-
-
-
The IC is a custom (or relabeled) Nintendo chip marked "WCRX-DOL / T2.7488K1". ("Wireless Controller Receiver - Dolphin"). It is presumably a microcontroller that decodes signals from the radio and sends them to the console.
-
This 4-pin connector goes to the joypad connector on the GameCube.
-
Desolder these four points to remove the shield and expose the radio on the other side.
-
-
-
The bottom side has all the RF circuitry -- the chip is a Nintendo chip marked "WR-DOL / H2102 / CG2710 / 02", presumably the radio.
-
EPCOS X6882 custom bandpass filter
-
Trim-pot for adjustment at the factory -- could be a frequency tweak or gain adjustment.
-
The rotary switch allows the user to choose a frequency to avoid interference with other devices.
-
The antenna is mounted directly on the PCB, inside the device.
-


7 opmerkingen
Hello. I have 2 receivers that only have three pins. Just below the Data pin there is nothing there...not as your pictures show. I bought a wavebird on ebay and it wont work. How can both of my receivers be missing a pin? I treat them like gold because I know these are not manufactured by Nintendo anymore. So it looks like the 2mm into connectors are missing. What? How?
The Wavebird receiver only needs 3.3volts, data and ground to operate so that's why there is only 3 pins.
If you gave more details on whats happening it would be much easier to diagnose the problem.
Ivan -
My receiver is dead I think. The controller is perfectly fine but the receiver light won't even come on. Any suggestions how to resurrect this receiver?
Hello Stan!
I have opened the receiver and scratched the antena (in step 7) with a screwdriver because I saw it was very dark and some black dust came off. Now it works like new.
I also have found that some receivers won't work on the first port if they're on high frequencies and have no trouble if you dial down to the first five positions. I have no idea why but it works.
All the best!!
Fer -
So i was playing some games with my wavebird controller and went the morning after that for a couple of day on vacation. As soon as i came back i turned my gamecube on, but the Wavebird isnt working anymore. Tried out all the channels and ports, but the Receiver light wont light up anymore when i press a button. How do i fix this?
Fer mentioned earlier i need to scratch around my antenna in step 7. Does this really work?
I ended up to here to look more information about wavebird. My problem is that my controller cant keep buttons down for some time. I guess that the receiver miss the connection with the controller. Is this typical function and can that be fixed? I tied different pairing numbers but didnt have effect..