Wat je nodig hebt
-
-
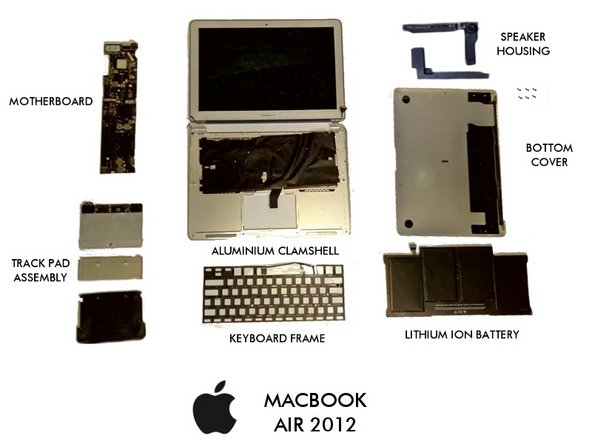
This guide serves as a step-by-step tutorial on the teardown of a mid-2012 model Macbook Air. Please be aware that Apple has not designed their products to be disassembled outside of their services. You will require special tools and components are easily damaged. Take caution.
-
Tools Featured in this Teardown: Apple uses several different types of screws and fasteners in their products. These are the tools you’ll need to disassemble this device. P5 Pentalobe Screwdriver, Phillips #00 Screwdriver, T5 Torx Screwdriver, T8 Torx Screwdriver
-
The 2012 MacBook Air features: Intel Ivy Bridge Core i5 processor with Turbo Boost Intel HD Graphics 4000, 128 GB flash memory, 4 GB 1600 MHz DDR3L RAM, USB 3.0 MagSafe 2
-
-
-
Flip the laptop on its back.
-
Apple utilises pentalobe screws, not commonly found in the market.
-
Using the P5 Pentalobe Screwdriver, remove the ten pentalobe screws. Pentalobe screws are easily damaged and/or stripped so be careful in applying pressure while unscrewing them.
-
(Note: Apple uses two different screw lengths [short and long]. Be sure to remember which screws belong to which location, i.e. the long screws screw into the back of the device)
-
-
-
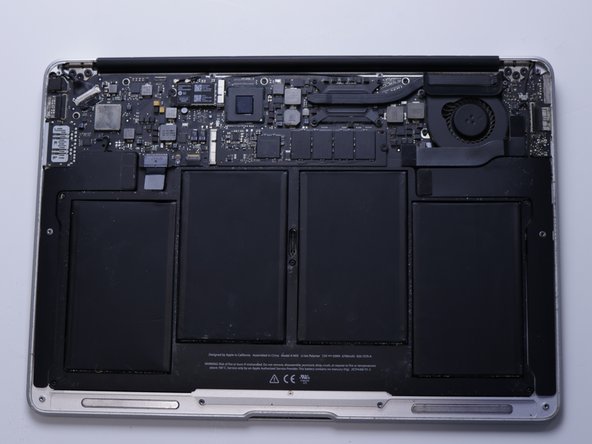
With the screws removed and kept in a safe location, remove the base plate which easily comes off.
-
You’ll see that the majority of the space is taken up by the four lithium ion batteries on the bottom of the frame. The motherboard and other components sit at the top.
-
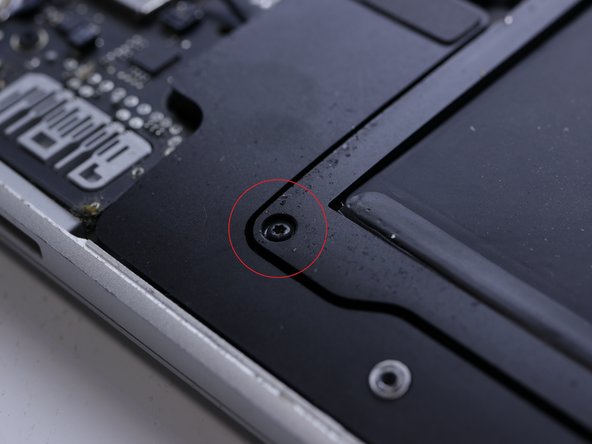
To remove the batteries, use the T5 Screwdriver to remove the T5 screws located on the frame holding the batteries. (Note: The screws are small and hard to see).
-
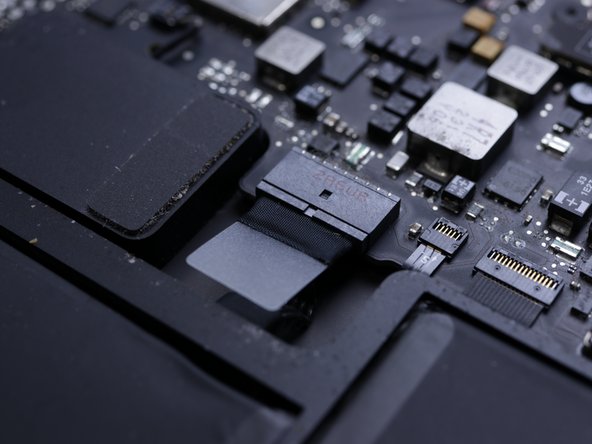
Remove the ribbon connector connecting the batteries to the motherboard, located on the upper right side of the furthest left battery.
-
The battery frame can now be lifted out of the casing.
-
-
-
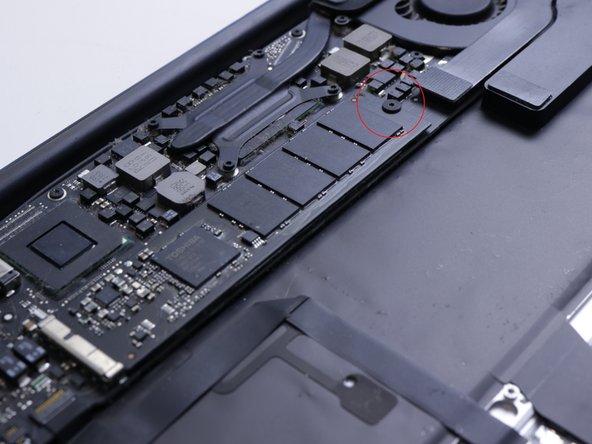
Next, look for the 128 GB SSD.
-
Unscrew the screw with the T5 Torx Screwdriver to be able to remove the SSD
-
Carefully slide the SSD out of its connection port.
-
(Note: Again, be careful in applying pressure as the screw easily strips because it’s tightly screwed by the factory)
-
-
-
-
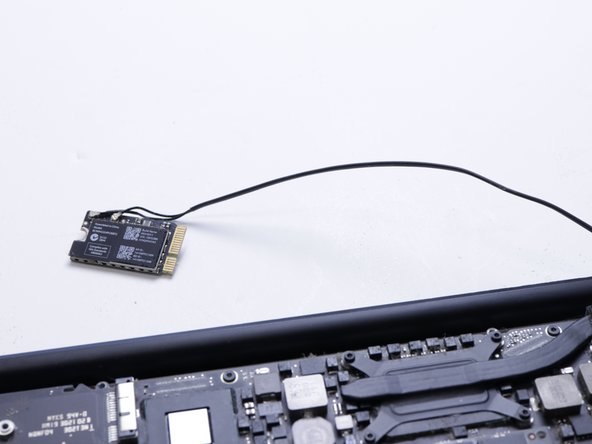
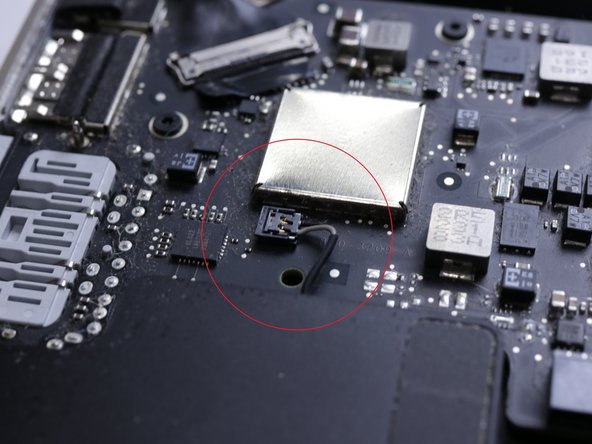
Look for the Broadcom Module (Wi-Fi, bluetooth receiver) located on the upper left side of the motherboard.
-
It’s secured by a Torx T5 screw. Use the T5 Torx Screwdriver to remove this.
-
Upon removing the screw, gently lift and slide the Module out of its socket.
-
The module will still be attached to a wire that is attached to the screen. This can not be removed.
-
-
-
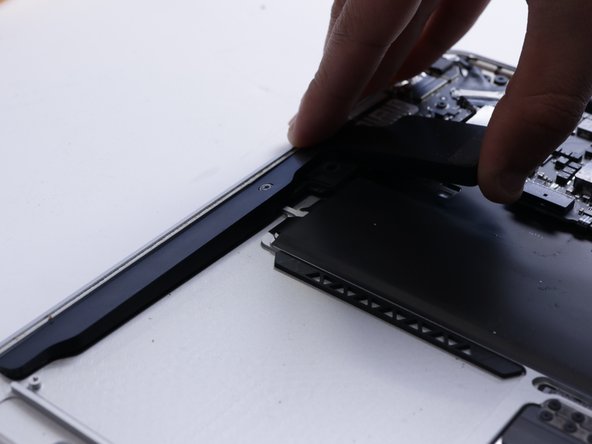
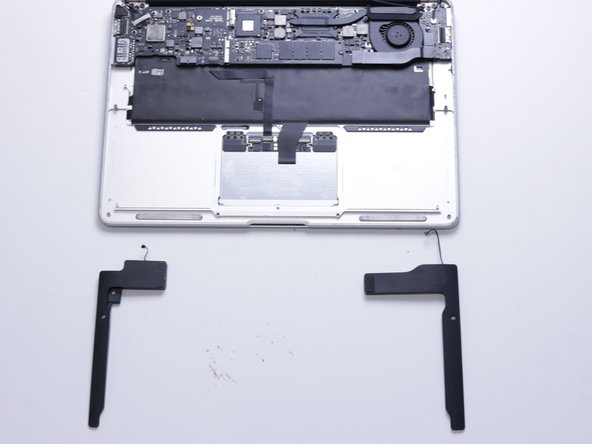
Next up are the speakers held in by adhesives and are located on either ends of the MacBook. They are connected to the motherboard with small pins. Carefully unpin them.
-
Gently lever up the speaker housing to detach it from the MacBook casing.
-
(Note: These are constructed with ABS Plastic and are quite sturdy).
-
Remove the remaining double-sided tape. You’ll need to replace this when reassembling the device.
-
(Note: The process is the same for both sides).
-
-
-
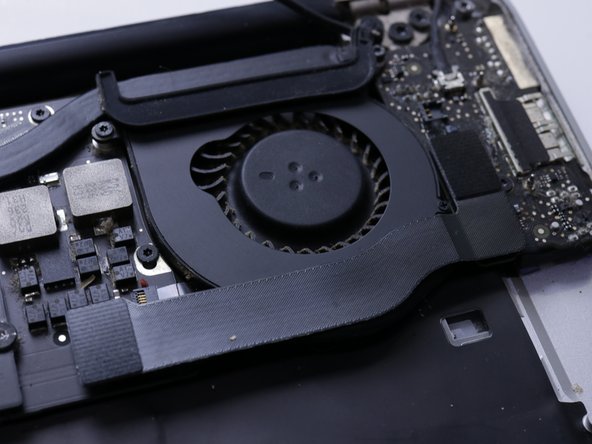
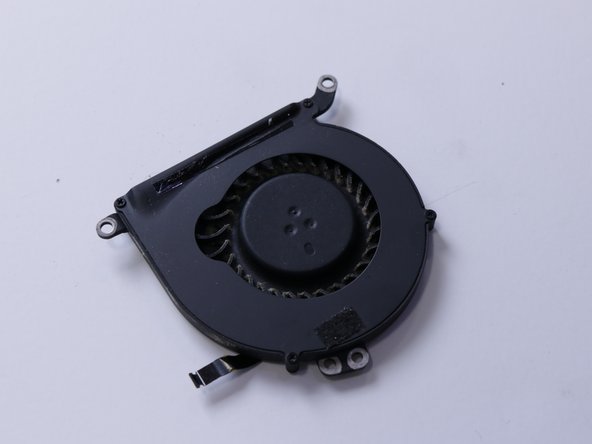
To remove the fan, you’ll need to use the T5 Screwdriver to remove the four screws holding the fan casing in place.
-
The fan casing is not connected to the heat sink. Lift it off the motherboard upon removing the screws and unplugging it from its connector.
-
-
-
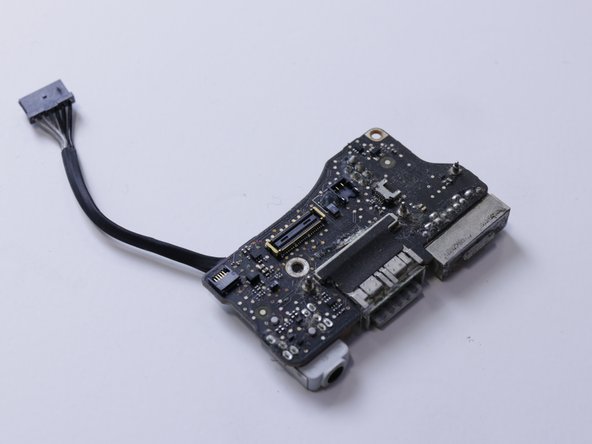
Now that we have removed the fan casing, we have access to the I/O board.
-
The board is secured with one Torx T5 screw and three cables which you’ll need to remove.
-
-
-
To remove the trackpad, use the Phillips #00 Screwdriver to remove the screws holding it in place.
-
Unscrew only the top layers of screws. [in the picture] 6 screws in total.
-
Remove the ribbons from the small PCB
-
(Note: Be careful as the ribbons and the material under the keyboard are easily ripped)
-
The trackpad can now be lifted out
-
-
-
Use the T8 Torx Screwdriver to remove the screws holding the LCD in place. There are six in total.
-
-
-
Apple makes it nearly impossible to open up the display without professional applecare support. If you don't want to go through apple support you will need to purchase a replacement LCD assembly, which will include the clam shell top.
-
Note: Because Apple tightly controls the circulation of its spare parts, finding genuine Apple parts can mean paying a high price.
-