Ga door naar hoofdinhoud

Wat je nodig hebt

Deze demontage is geen reparatiehandleiding. Om je JUSTFOG Q16 Pro te repareren, gebruik onze reparatiehandleidingen.

  1. JUSTFOG Q16 Pro Teardown, Start: stap 1, afbeelding 1 van 1
    • This guide does not show the disassemble of the clearomizer (highlighted in the picture), as in more recent versions it is monolithic and can't be disassembled, and focuses on the cigarette body.

  2. JUSTFOG Q16 Pro Teardown, Removing the clearomizer: stap 2, afbeelding 1 van 1
    • Unscrew the clearomizer, rotating it counterclockwise.

    • 'Be careful not to damage the Pyrex (glass) tank.'

  3. JUSTFOG Q16 Pro Teardown, Screws: stap 3, afbeelding 1 van 2 JUSTFOG Q16 Pro Teardown, Screws: stap 3, afbeelding 2 van 2
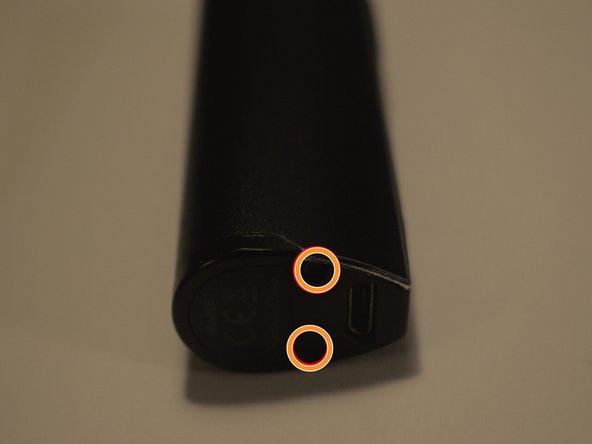
    • Remove the four screws holding the plastic covers to the metal frame:

    • Two Torx T4 screws on the top of the cigarette body, near the clearomizer plug

    • Two Torx T4 screws on the bottom of the cigarette body, near the USB port

  4. JUSTFOG Q16 Pro Teardown, Plastic covers: stap 4, afbeelding 1 van 3 JUSTFOG Q16 Pro Teardown, Plastic covers: stap 4, afbeelding 2 van 3 JUSTFOG Q16 Pro Teardown, Plastic covers: stap 4, afbeelding 3 van 3
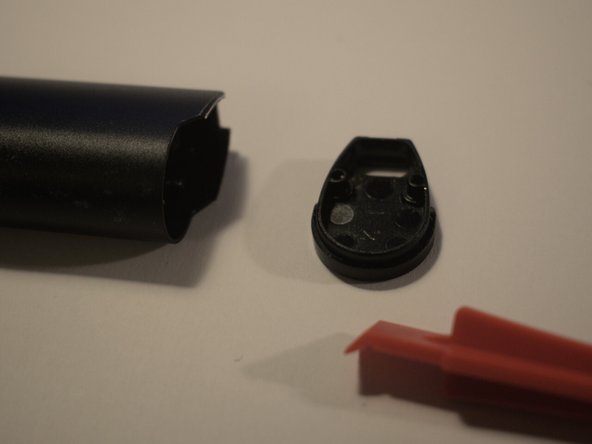
    • Remove the bottom lid with a plastic spudger

    • Be careful and do not use a metal screwdriver: the bottom cover is just near the battery, "stabbing" it with a conductive object is dangerous.

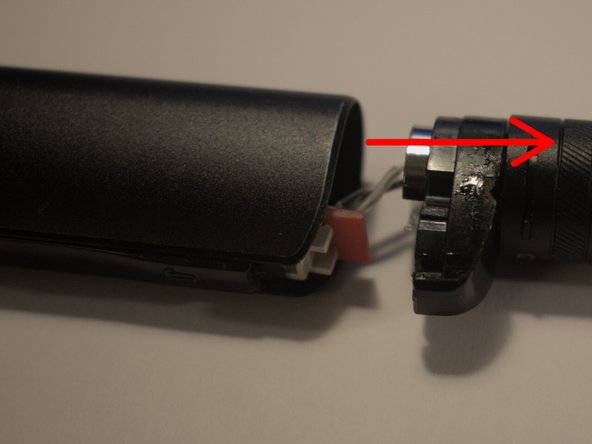
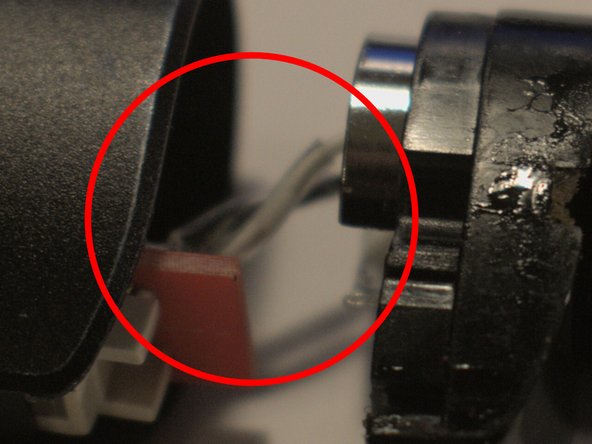
    • Remove the top plastic lid with a plastic spudger. If it is stuck, due to debris, mount the clearomizer lower part and use it to pull the top cover.

    • The clearomizer connector is wired to the cigarette board with two short wires, be careful not to cut them!

  5. JUSTFOG Q16 Pro Teardown, Front panel: stap 5, afbeelding 1 van 3 JUSTFOG Q16 Pro Teardown, Front panel: stap 5, afbeelding 2 van 3 JUSTFOG Q16 Pro Teardown, Front panel: stap 5, afbeelding 3 van 3
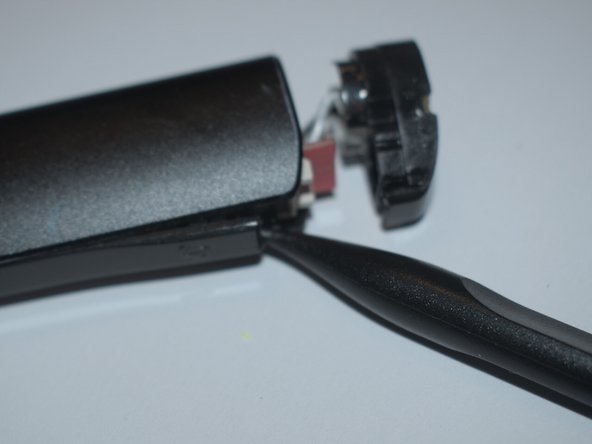
    • Time to remove the front panel:

    • It is not glued, only hooked with plastic clips

    • Insert a plastic spudger in the top part and start lifting it

    • Continue removing the front plate with a plastic opening pick

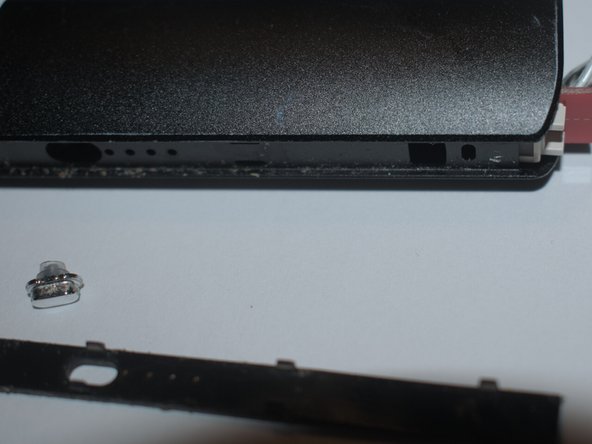
    • The frontal button should fall outside, as it is only laid inside the specific hole, not glued. If it is stuck, use a pair of ESD tweezers to remove it.

  6. JUSTFOG Q16 Pro Teardown, Inside the cigarette: stap 6, afbeelding 1 van 3 JUSTFOG Q16 Pro Teardown, Inside the cigarette: stap 6, afbeelding 2 van 3 JUSTFOG Q16 Pro Teardown, Inside the cigarette: stap 6, afbeelding 3 van 3
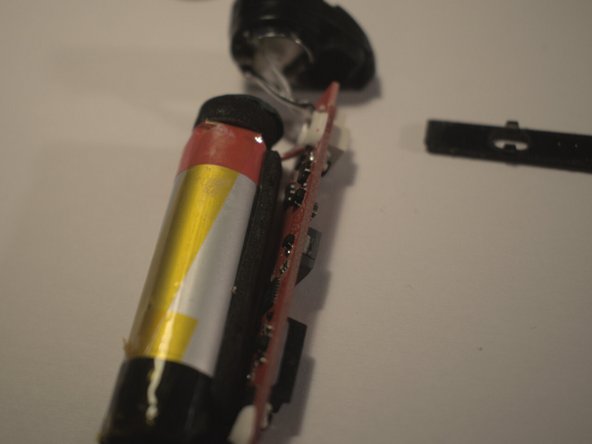
    • Extract the board and the battery, using a tweezer to pull the top of the board and/or pushing gently the lower part of the battery, with a round plastic spudger.

    • The battery is protected by three foam pads, the side one is glued both to the battery and to the board

    • The solder joints of the battery and of the clearomizer connector are covered in glue (vinylic glue?), to check their status you have to remove the glue first with a spudger

    • The battery is a 14500 lithium battery. This one in particular is made by EVE, nominally it has a 3.7V voltage, has a 900 Mah capacity and can supply 3.33 Wh.

    • Avoid messing with the battery pack, lithium batteries can be dangerous.

dinoo_fixit

Lid sinds: 03/22/22

963 Reputatie

2 handleidingen geschreven

2 opmerkingen

Hi,

I tried cleaning Q16 FF, and since then, it only shows blinking lights whenever powered up. This occurs regardless of whether the tank is plugged in or not. The battery is charged. Is there anything I can do about this?

Vape_Noob - Antwoord

How did you clean it? Did you use water or another conductive liquid?

dinoo_fixit -

Voeg opmerking toe

Weergavestatistieken:

Afgelopen 24 uren: 2

Afgelopen 7 dagen: 29

Afgelopen 30 dagen: 102

Altijd: 1,424