Ga door naar hoofdinhoud

Wat je nodig hebt

Deze demontage is geen reparatiehandleiding. Om je HP G61 te repareren, gebruik onze reparatiehandleidingen.

  1. HP G61-430SB Teardown, HP G61-430SB Teardown: stap 1, afbeelding 1 van 1
    • Turn the device over and remove the screws from the battery. Remove the black panels holding the HDD, ram, and wifi.

  2. HP G61-430SB Teardown: stap 2, afbeelding 1 van 3 HP G61-430SB Teardown: stap 2, afbeelding 2 van 3 HP G61-430SB Teardown: stap 2, afbeelding 3 van 3
    • Remove the RAM modules and the HDD as shown in the pictures.

  3. HP G61-430SB Teardown: stap 3, afbeelding 1 van 2 HP G61-430SB Teardown: stap 3, afbeelding 2 van 2
    • Locate the screw for the DVD player and remove it. Then remove the DVD player with a thin spudger.

  4. HP G61-430SB Teardown: stap 4, afbeelding 1 van 2 HP G61-430SB Teardown: stap 4, afbeelding 2 van 2
    • Remove the screws to remove the keyboard.

  5. HP G61-430SB Teardown: stap 5, afbeelding 1 van 2 HP G61-430SB Teardown: stap 5, afbeelding 2 van 2
    • Remove the screws that are circled in the picture. These screws hold the case of the laptop.

  6. HP G61-430SB Teardown: stap 6, afbeelding 1 van 1
    • Remove the WIFI antenna cables from WIFI card.

    • Then remove the screws of the WIFI card and remove the card.

  7. HP G61-430SB Teardown: stap 7, afbeelding 1 van 2 HP G61-430SB Teardown: stap 7, afbeelding 2 van 2
    • Flip the laptop around and gently remove the keyboard with your fingers.

    • Start with the corners of the keyboard.

    • Gently loosen the keyboard with a flat head screwdriver or a thin spudger.

  8. HP G61-430SB Teardown: stap 8, afbeelding 1 van 2 HP G61-430SB Teardown: stap 8, afbeelding 2 van 2
    • After removing the keyboard, find the other screws located in the grey panel.

    • Remove the black plastic. Be careful with the white flat cable.

  9. HP G61-430SB Teardown: stap 9, afbeelding 1 van 1
    • Remove the black flat wire of the LCD screen from the motherboard.

  10. HP G61-430SB Teardown: stap 10, afbeelding 1 van 1
    • Remove the hinge screws with the screwdriver from the left side to the right side.

    • Under one of the two hinges, there is a hidden screw (case)

  11. HP G61-430SB Teardown: stap 11, afbeelding 1 van 2 HP G61-430SB Teardown: stap 11, afbeelding 2 van 2
    • Remove the black plastic.

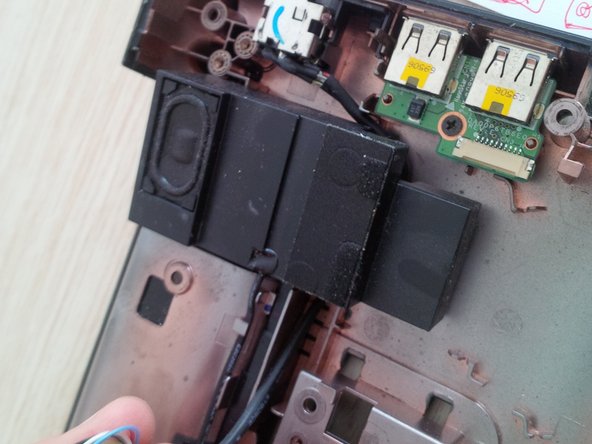
    • Remove the audio boxes.

    • Remove all the other wires and cables.

    • Then gently separate the screen from the case.

  12. HP G61-430SB Teardown: stap 12, afbeelding 1 van 2 HP G61-430SB Teardown: stap 12, afbeelding 2 van 2
    • Use an iOpener to separate the grey case from the bottom case.

    • Careful: the battery compartment is together with the grey panel.

    • Tip: "slide" the iOpener while opening until you hear clicks. It is easy if you slide.

  13. HP G61-430SB Teardown: stap 13, afbeelding 1 van 3 HP G61-430SB Teardown: stap 13, afbeelding 2 van 3 HP G61-430SB Teardown: stap 13, afbeelding 3 van 3
    • Remove the motherboard by removing the screws first. Be careful with the cables and the wires.

    • Be careful with the connector of the DC power jack. You can replace the USB drivers on that side as well.

  14. HP G61-430SB Teardown: stap 14, afbeelding 1 van 3 HP G61-430SB Teardown: stap 14, afbeelding 2 van 3 HP G61-430SB Teardown: stap 14, afbeelding 3 van 3
    • Remove the cooler.

  15. HP G61-430SB Teardown: stap 15, afbeelding 1 van 1
    • To remove the Processor, unlock the processor socket with a flat screwdriver.

    • Then gently remove the Processor.

Kevin D

Lid sinds: 05/02/14

7.276 Reputatie

21 handleidingen geschreven

2 opmerkingen

Thanks a bunch this helped a whole lot!!!!

Teresa halley - Antwoord

Thank you very much. Very well explained :)

a.thorne.987 - Antwoord

Voeg opmerking toe

Weergavestatistieken:

Afgelopen 24 uren: 1

Afgelopen 7 dagen: 4

Afgelopen 30 dagen: 19

Altijd: 8,899