Inleiding
One of the latest phones from RIM, dubbed the Blackberry Bold 2, the 9700 is the first Blackberry to sport a trackpad. This very welcome new addition will replace the much maligned trackball of old. Infamous for acquiring dirt and other gunk the old trackball would quickly become difficult or irritating to use.
Other notable features new in this phone are a built-in threaded SMS app, an autofocus camera and an LED flash.
Onyx is RIM's Codename for the Bold2
Wat je nodig hebt
-
-
Well there it is, the Blackberry 9700. Other than the trackpad there aren't many notable features, but hey it's a Blackberry! It's also smaller and cheaper than it's predecessor the 9000.
-
Well let's get to work, make sure to turn the phone off first!
-
-
-
Slide the backplate down and lift it off. This is frustratingly easy, so much so that the backplate will sometimes come off just pulling the phone out of its holster!
-
Use your thumb to pull the battery up from the bottom of the phone and slide it out. Nothing too tricky. You can handle that, right?
-
-
-
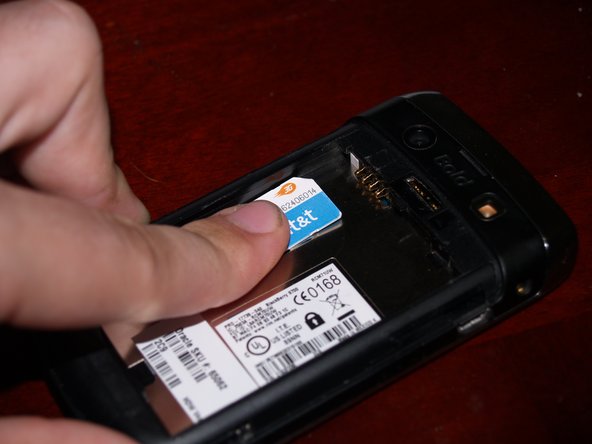
The memory card can be annoyingly difficult to get out, but I find the trick is to push it down and slide your fingernail off quickly to allow the springs to do half of the work for you. Once the tiny card is within reach grasp it with your thumb and index finger and slide it out.
-
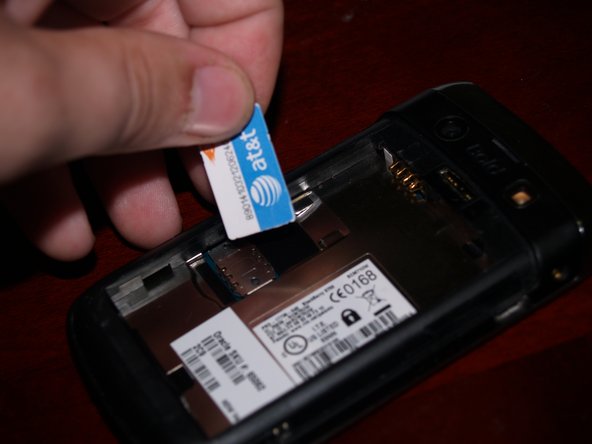
Push your sim card up to slide it out from under the slot and then pull the card out and set it aside.
-
-
-
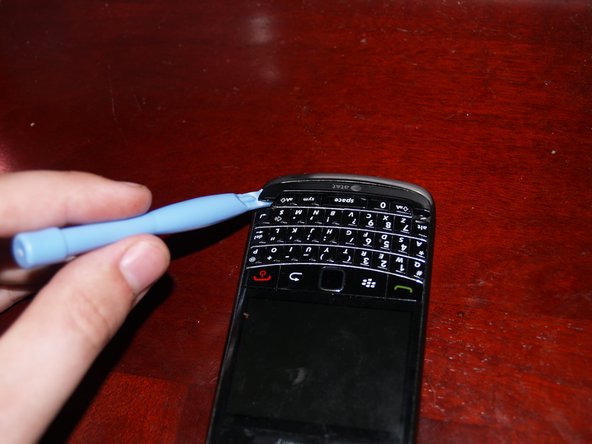
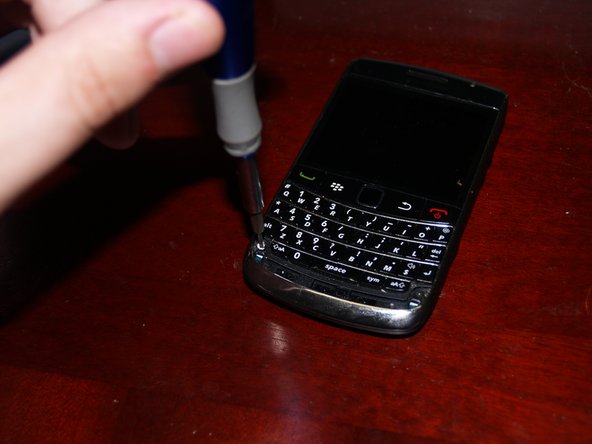
Alright, the basics are out of the way, let's tear this sucker apart! First step is to pull off the small plastic strip that rests under the keyboard. Take your plastic spudger or plastic opening tool of choice and work your way under either side of the plastic. Once it is loose enough grab it with your fingers and pull it up towards the top of the phone and set it aside.
-
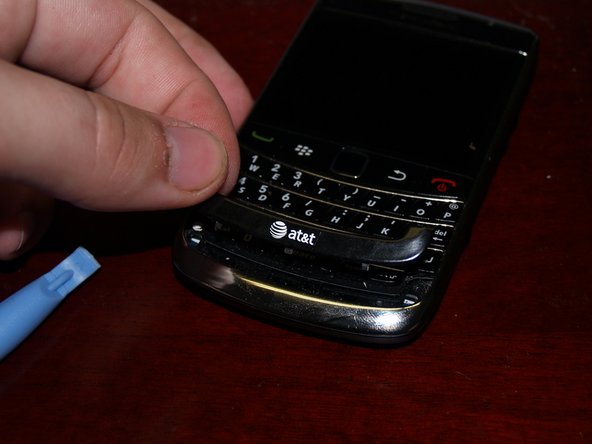
Go figure that the cell companies would pick the very first and easiest piece to remove to stick their ugly corporate branding on. Oh well! If you'd like, feel free to take a bit of fine grit sand paper to the logo on this piece now that you've got it removed!
-
-
-
-
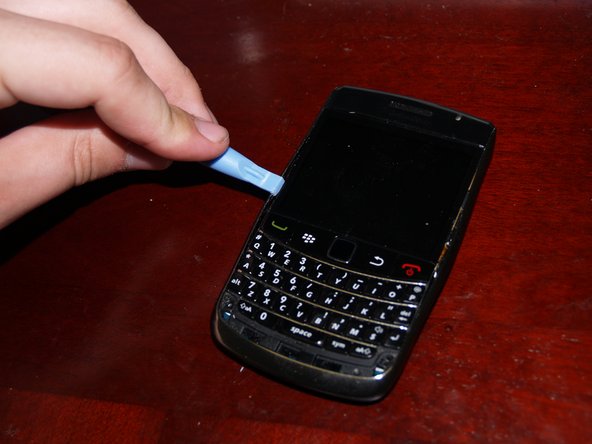
There are only a few tabs to release to get the trim off. Take your pry tool and insert it between the lcd and silver trim. It shouldn't take much pressure as the plastic is very flexible. Then slide it down to about where the keys meet the screen and pry it out a bit. You should hear the tab pop out.
-
There is another tab on the opposite side in the same location, centered near where the keys and screen meet.
-
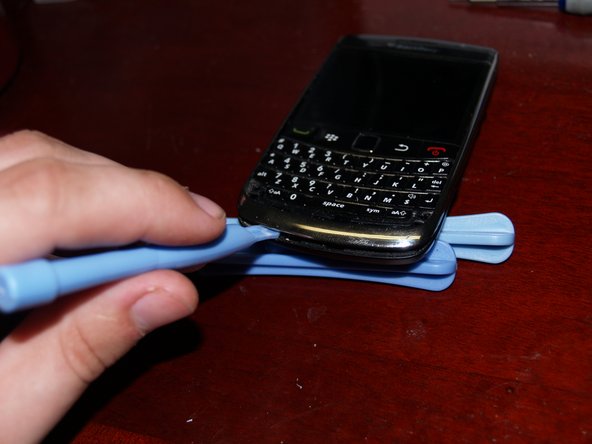
Lastly, you'll need to pop a couple more tabs up from under the trim at the bottom of the phone. Don't mind my photography here, I didn't have an assistant so I used a couple extra iPod tools to prop up the phone!
-
-
-
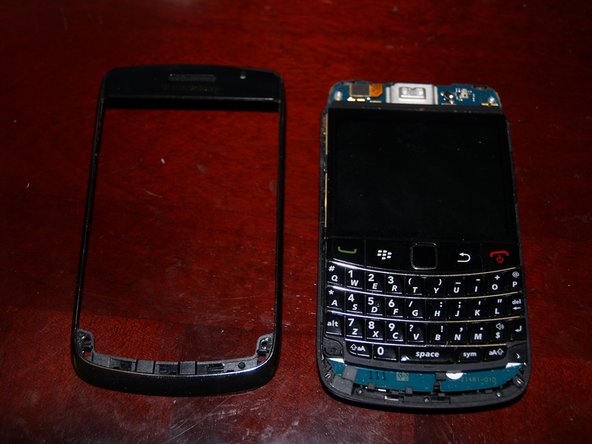
Once you've got the tabs from the sides and bottom released lift the trim up from the bottom of the phone and push the whole piece up towards the top of the phone. The section covering the lock and mute buttons should slide off of the section of the phone above the lcd and the whole piece will come off.
-
This phone is remarkably easy to take apart, and all of the sudden the guts are all exposed and stuff!
-
-
-
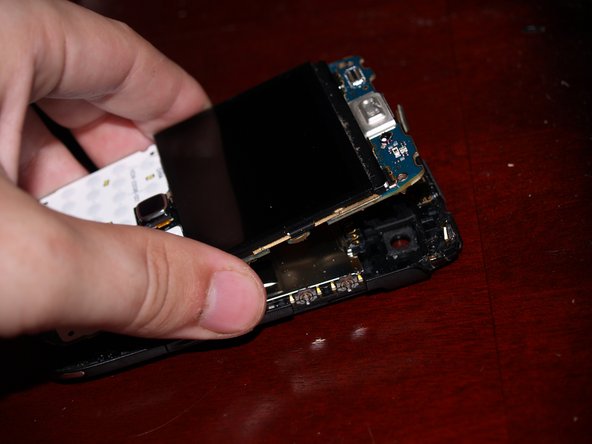
The next step is to remove the keypad. There's really nothing holding it on but friction at this point, and it may have fallen off when you removed the trim. But if it's still sitting there go ahead and grab it and pull it off. The trackpad will remain, we will get to that in a minute.
-
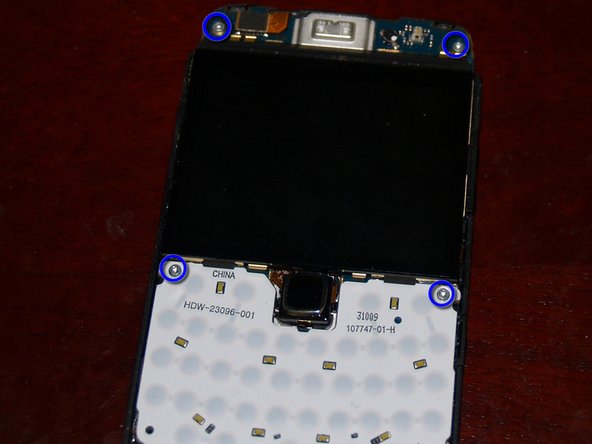
With the trim and keypad removed we now have 4 more T5 screws revealed surrounding the LCD. These screws are holding in the mainboard. Go ahead and remove them.
-
-
-
The next step is to remove the trackpad. Flip the mainboard over and disconnect the large ribbon connector from the center.
-
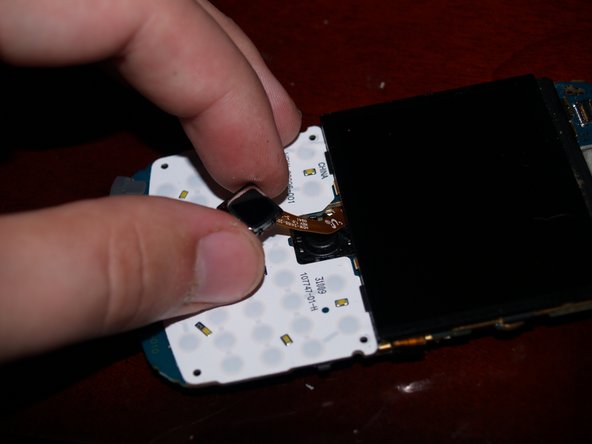
Flip the mainboard back over and simply lift the trackpad up and carefully slide the ribbon connector through the opening.
-
Yup, that's all there is to this unique little part. Makes you wonder what took them so long!
-
-
-
I noticed there are a couple of connectors where it appears an external antenna could be connected, but they aren't accessible once the board is inserted into the lower case. Perhaps there were additional plans or a larger antenna planned that didn't pan out?
-
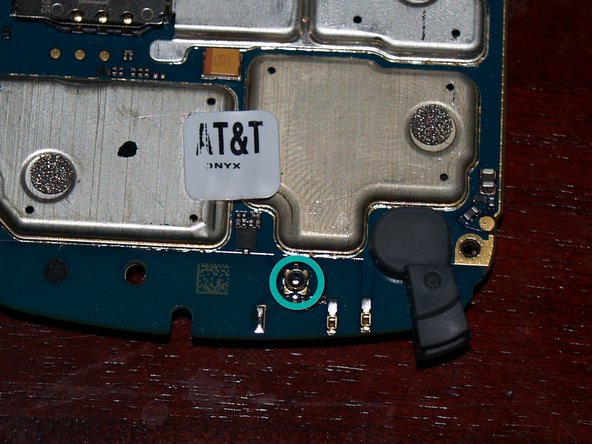
And yes, AT&T has even managed to slap their name inside the phone, and no I didn't mess up that sticker, it was already scratched up like that when I got the phone open!
-
Anyone have any idea what 'ONYX' means? Leave a comment if you think you know!
-
ONYX is the RIM Blackberry codename for the 9700
-


2 opmerkingen
ONYX is indicating which phone it is. In this case you have the AT&T ONYX Blackberry Bold 9700 2.
Do you know where the default antenna is? For some reason after taking it apart (no breakage) and putting it back together the reception has decreased considerably. any thoughts?