Inleiding
Apple Pro Mouse (Black M5769)
Take apart guide:
Wat je nodig hebt
-
-
Step 1: The tools needed to open up an Apple Pro Mouse (Black) will be [1] Exacto Knife and [2] Spudger with one Flat end and Pointed end.
-
-
-
Step 2: Where to cut the glue points shown in RED to remove the Clear Top of the mouse.
-
-
-
Step 3: Cut the Cable Reinforcement lengthwise as shown in the picture. This will allow the reuse of this piece when you have completed the repair.
-
-
-
-
Step 3: You need to detach the Black Ring from the bottom up past midway. This will allow access to remove the Clear Mouse Tray.
-
-
-
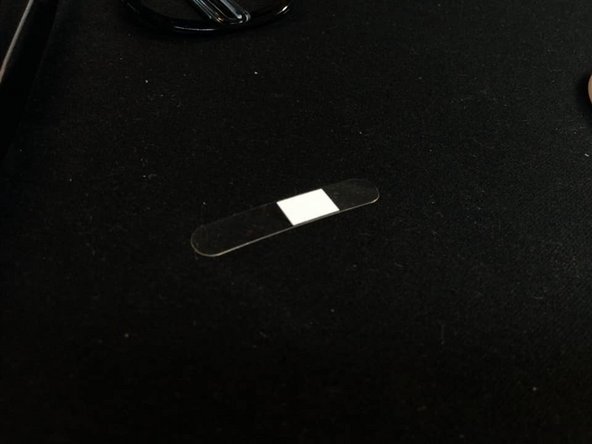
Step 6: Remove the Black Cage off the two nubs carefully. This cage covers the Red Laser and hides a clear plastic film with a rectangular white square. The white side facing the laser has a textured surface which I was unable to capture. If you lift the lower bottom edge of the PCB board you can slip it out from the Clear Tray.
-
-
-
Final Step: After reassembly this is the Apple Pro Mouse being tested showing it's Red Laser light working. Be mindful that the when reinserting the assembled Clear Tray back into the Semi-Transparent Black Case that the top lip must sit properly into a ledge/nook in the Black Case or the click will not work.
-