2009 iMac HDD replacement -- original went all clickety clickety on me

Mijn probleem
Original Seagate HDD failed. Yes, I got a recall notice in 2012, and put off the repair until it was too late to get it done for free in early 2013. So ... it had been working fine anyway. What's to worry about?
Nevertheless, I reviewed the iFixit EMC 2308 HDD replacement guide a year ago and printed it out.
On a Monday morning, bootup failed -- no disk recognized, etc. It's dead, Jim.
Called my loyal son, who did time as a repair tech, to confirm my diagnosis and to ask about the possibility there were other things wrong. Don't worry about those other things, he said -- the odds are astronomical. Time to order a replacement drive and the tools to resurrect the computer.
Mijn oplossing
The repair went pretty much as described in the replacement guide. An easy hour's work at a deliberately slow pace to triple-check every step.
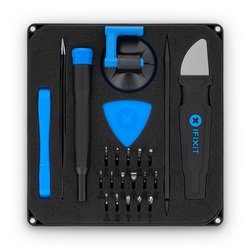
1) Placed the suction cups and tugged a little with no release of the magnets. I took one of the guitar picks and used it to pry a little in tandem with the suction cups, and it let go easily. Placed the glass on sheets of waxed paper in hopes of avoiding the dreaded dust issues.
2) Removing the display's hold-downs went smoothy. Pulling the screws and having some of them fly straight to the magnets presaged challenges with re-assembly.
3) It's nice to have small hands. Clearances for disconnecting four cables are quite tight, even for me.
4) Removing the drive itself was a piece of cake. Marked the thermal sensor cable, though on this drive it can only be inserted one way.
5) Putting in the new drive was also a piece of cake.
6) Re-assembly was also smooth.
7) Buttoning things up? Not so smooth. Replacing the display's hold-down screws was like trying to control a live Ouija Board -- the magnets pulled both screw and Torx driver every which way. Braced right hand against case to control the driver, and held screws with braced left hand and tweezers: success!
8) Worked, like, really really hard to clear dust from display and glass.
9) Reinstalled glass, powered up, restored from 36-hour-old Time Machine backup. It's alive!
Mijn advies
Even if you rent a clean room, it may be well-nigh impossible to completely avoid annoying dust. (I'm told Apple's repair centers aren't successful at preventing this.) I wound up with an eyebrow hair in the void between display and glass -- must have frowned too much while doing the work.
Don't be shy about attempting this repair: Despite having done drive and other component swaps on a number of previous computers (dating back to XT clones in the early 1990s, running through four previous Apple boxes, a Toshiba laptop -- nightmare install -- and a simple Dell laptop), this one intimidated me. I guess the machined aluminum and glass shell makes things look all high tech and complicated. The guide was clear, and the process had no major hard spots other than magnetic pull on screws and tools.
Do regular backups! I've been religious about weekly backups in recent years, and it made my life better this past week. Now I'll be running them daily.
Keep serial numbers: Most everything restored perfectly from Time Machine, but MS Office demanded fresh authorization. Grrr.
Be patient: Once all is running, it seems like forever before the software and file restoration is finished. Read a book or something. The first Time Machine backup after restoration looks like it will take weeks, but somewhere in the process it wakes up and finishes quickly.


0 opmerkingen