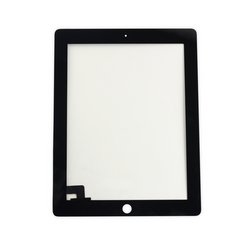
Mijn probleem
My dad dropped his iPad while he was on a metro and cracked the screen into a small, intense spiderweb right where the guide said to try to gain access with a larger crack extending from the web to the bottom left of the display.
Mijn oplossing
Overall, not as cleanly and the guide showed because of the location of the crack. The initial entry point wound up creating more cracks which continued to happen as I went around the front panel, but eventually I was able to get all the now-small pieces off and removed the screen.
I wasn't able to use the plastic tools in the repair kit to fit between the bezel and the panel or, one I had removed a chunk of the spider web, under the panel and the body beneath. A small metal screwdriver sharpened on a whetstone for about 15 second gave a nice small chisel that was perfectly willing to get under the panel (glass) and lift up so I could insert the guitar picks.
Through a combination of not being sure where exactly the wifi antenna was (10%) and being impatient and not paying full attention (90%) I ripped the antenna, but I was able to order a new one and have it arrive much much sooner than I thought I would. Installing this was part was ridiculously easy since the glass panel was already off and everything under that is just philips head screws.
Putting the adhesives on the new front panel was rather difficult because the only guide I had for the placement of the strips was the pictures, but I managed to more or less get it save for a spot at the top where it'll sort of click in and out if you press on it. I'm not sure why the adhesives need to be put on the clean new front panel that doesn't have any guides on it. If you could put the adhesives on the inside of the iPad where you can apply it directly to the structures that you want the front panel to adhere to, it would be a whole lot easier.
I didn't time how long it took me to get the front panel off because I got frustrated and took a couple of breaks, but reassembling took about 4 hours because I put it all together without any of the adhesives to make sure everything worked before it got sealed up, then stripped it again down to the wifi antenna (which has its own adhesives front and back) to do it for real.
Mijn advies
DO A TEST FIT before you seal it all up in case something isn't working. I didn't have any problems and it took me quite a bit longer because I did the test fit, but if something had been wrong and I'd sealed it up, I would be quite irritated with myself. Also, the ribbon connoting the new front panel to the logic board is flat and it needs to be bent in order for it to fit as close to flush as possible, so if you seal it up without doing this, you're gonna have a bad time.
WEAR GLOVES WHEN HANDLING THE NEW FRONT PANEL. I didn't and tried my best to clean off my finger smudges on the inside/back of the new panel but there are three small ones that I missed. You have to look closely to see them, but they're still there and that annoys me.
BE AWARE OF WHERE THE WIFI ANTENNA IS. It's stuck to the front panel with an adhesive and it's about as thin as a piece of tin foil and just as easily ripped.
and of course, IF THE GLASS IS CRACKED, DO THE SURGERY SOMEWHERE YOU CAN VACUUM UP ALL THE SMALL PIECES OF GLASS THAT WILL FLY OFF WITHOUT PERMISSION. This will happen and it will not please you. Also beware small glass splinters. They hurt but can be pulled without problem with some tweezers or a well placed thumb and pointer finger. Use tape to pick up the small bits of glass that fall down inside the iPad.

0 opmerkingen