Mijn probleem
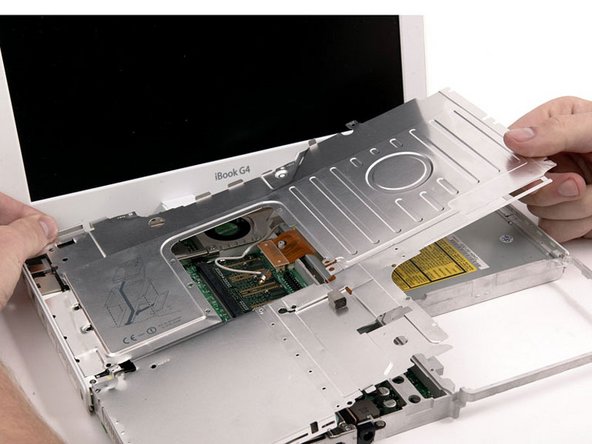
I replaced the old spinning 30gb hdd with a new ssd. I'm installing Linux onto the ssd. I decided to install an ssd for speed boosts. And mostly power savings. Less power from the hdd=more battery life.
Mijn oplossing
Went great. It's not hard, just time consuming. Well it not hard provided you have all the tools you need and take the time to make sure all the screws are put up in a manner which they cannot be lost or placed into the wrong spot. I used a sheet of cardboard for that. Poking holes into the cardboard in the same pattern as the came out provides a very easy to follow way of keeping screws in the right place. I then after each step placed masking tape of my new set of screws to hold them. I wrote with a sharpie onto the tape the step number. Doing it this way makes sure as long as you're careful you should have no problems. It took me less then two hours following every step and not trying to cheat past an item. Cheating will only cause problems as you move the computer about.
Mijn advies
Make sure you have all your tools and instructions right next to before you begin. Having to get up to find parts is not only frustrating but takes a lot of time. I used a sheet of cardboard to hold my screws. I poked holes into it in the same pattern as they came out. That way you have a quick visual identifier for where they go along with the instructions. I placed tape over each set when I was done removing the screws to hold them in place. I then marked the step number onto the tape so I know which set came from where. I also placed all pieces to be removed out of the way to continue working. Doing it this way only took me slightly less then two hours. And don't force anything that doesn't want to go. If it doesn't move look first to see why. Last thing you want to do is rip tiny wires or parts off the motherboard.
Now with SMD connectors like those used for the power button, speaker, hdd cable and DC power board. Don't be afraid of them. Just be careful. Take a small flat blade screwdriver and very gently pry one side of the connector between the motherboard side and the detectable side and alternate between the two sides. This way will not rip the connector from the board if done right(it doesn't remove the board side connector because you're not pulling on the connector. All you're doing is pushing the connectors apart). It's a safe, easy way to disconnect them without damage. When putting back make sure it going in correct and use the small screw driver to lightly press each side back in. Alternating until it's in. I've never had a problem with these connectors and this method. It might help to use two screw drivers, one on each side to very lightly pry up/twist, if it wants to push the other side back in when disconnecting it.
And of course the most important. Have yourself a good set of instructions that are easy to follow BEFORE you begin. And make sure you can also follow it backwards for reassembly. It's not hard. Just take your time and make sure you're doing it correct and you should be fine. Remember. It's not hard, it just takes awhile if you're doing it in a safe manner. If it's hard you must be doing it wrong. Take a moment to look at the instructions and your computer before continuing. Try to find why it's not going. And then take step to fix that. You don't want to break your computer while trying to fix it!
0 opmerkingen