Successfully Replaced Lightning Connector and Battery
Mijn probleem
My lightning connector had stopped responding to the charger unless I plugged it in, stood it up on end, and then balanced a stack of objects on it to keep weight on it at the correct angle. Not only was this frustrating, but it also became less and less effective. I also decided to replace the battery since my phone is a couple of years old and had to be charged frequently.
Mijn oplossing
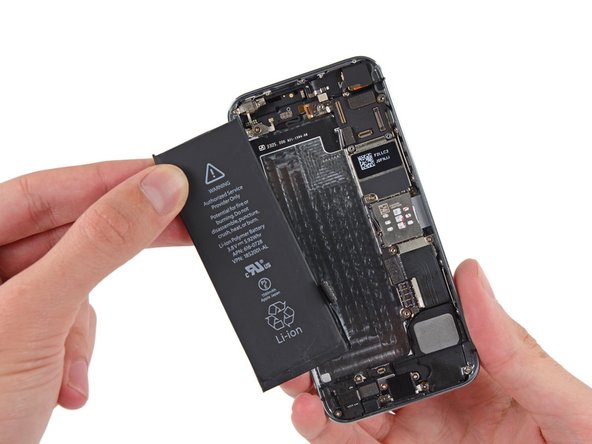
In general, the repair went pretty well. It took all afternoon, but I wasn't in a hurry. The adhesive strips holding down the battery ripped when I tried to remove them, so I found it nearly impossible to get the old battery up. I accidentally punctured it in the process, which caused it to get very hot and loosen up the adhesive. Stressful, but luckily it didn't damage my phone. Replacing the lightning port consisted of separating a lot of connectors and replacing a lot of screws, so it wasn't very technically challenging. Having said that, the first time I reassembled my phone the Touch ID didn't work and neither did the speaker. I took the phone apart and went through all the steps again and now everything works perfectly. I have no idea what the problem was, since I didn't consciously do anything differently. I'm very glad it worked, though, and am very satisfied with the whole process. Thanks, iFixit!
Mijn advies
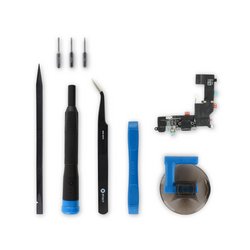
1. As some users have mentioned, there are three pieces that you'll have to remove from your phone's old lightning connector and transfer to the new one, and this doesn't seem to be mentioned in the guide. They are: the rubber boot from the headphone jack, the metal grounding cable that runs along the top and left side of the headphone jack (incidentally, these two things are mentioned in the mobile version of the guide but not the desktop version), and the connector for the home button. This last part is very tricky, because not only is it folded and oriented in a difficult position, but it's also held down by adhesive that has to be reused from the old connector, which is nearly impossible. Please note that it is very important, though, so take care in transferring it.
2. Similarly, be careful when opening the phone initially, because the wire that connects the home button to the connector is very thin and fairly short and, as the guide suggests, will be damaged or broken if you open the phone too wide without disconnecting it. The guide also states that if this cable is damaged, replacing the home button will not restore functionality of Touch ID, as this only works with the original home button.
3. It's important to keep track of the screws, as they are not interchangeable. I did this by drawing a series of diagrams on a piece of paper with designated spaces for each screw.
4. When you position the logic board for reassembly, be sure that none of the tabs for the connectors are tucked underneath it.
5. Take your time and pay attention to each piece you detach, as the guide only shows you how to disassemble the phone, and you're on your own when it comes to reversing the steps to reassemble it.
6. The majority of the process is unscrewing screws and separating connectors, which is fairly straightforward, and as long as you take care when doing so shouldn't cause you too much trouble.
7. Again, take your time. I suggest watching the video and reading each step of the guide carefully before attempting it, to make sure you don't miss a key piece of information.

0 opmerkingen