Ga door naar hoofdinhoud

why! W670SZQ1 Replacement RAM Memory Extension

Wat je nodig hebt

  1. why! W670SZQ1 Replacement RAM Memory Extension, The Batteries: stap 1, afbeelding 1 van 3 why! W670SZQ1 Replacement RAM Memory Extension, The Batteries: stap 1, afbeelding 2 van 3 why! W670SZQ1 Replacement RAM Memory Extension, The Batteries: stap 1, afbeelding 3 van 3
    • Unlock the lock latch on the left.

    • Unlock the lock latch on the right.

    • Remove the battery while holding the lock latch unlocked.

  2. why! W670SZQ1 Replacement RAM Memory Extension, Access to Major Components: stap 2, afbeelding 1 van 3 why! W670SZQ1 Replacement RAM Memory Extension, Access to Major Components: stap 2, afbeelding 2 van 3 why! W670SZQ1 Replacement RAM Memory Extension, Access to Major Components: stap 2, afbeelding 3 van 3
    • Using the Philips # 0 screwdriver, unscrew the 2 screws from the bottom cover.

    • Lift the bottom right cover with the iFixit Opening Tool.

    • Lift the lower left cover with the iFixit Opening Tool.

    • Finally clear the bottom cover completely to access the main components.

  3. why! W670SZQ1 Replacement RAM Memory Extension, RAM Memory: stap 3, afbeelding 1 van 3 why! W670SZQ1 Replacement RAM Memory Extension, RAM Memory: stap 3, afbeelding 2 van 3 why! W670SZQ1 Replacement RAM Memory Extension, RAM Memory: stap 3, afbeelding 3 van 3
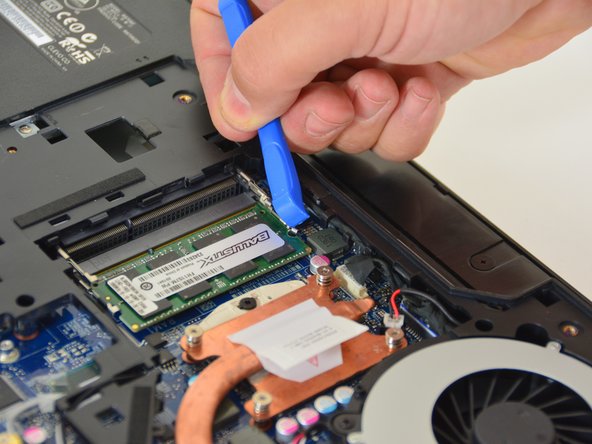
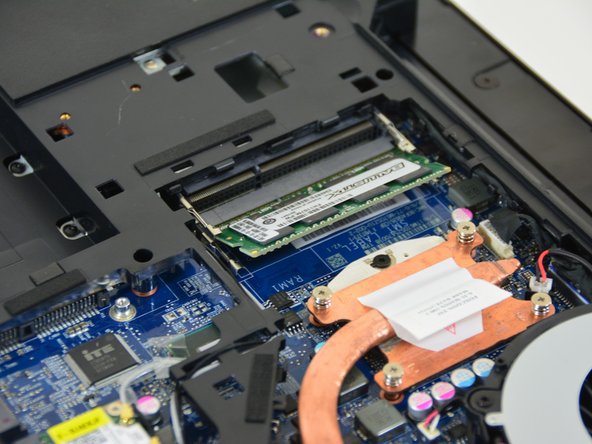
    • Locate the RAM card in its slot.

    • Spread the leaf springs that hold the memory module in place (left and right).

    • Remove the memory module (RAM) from its connector.

Conclusie

To reassemble your device, Follow these instructions in reverse order.

Met dank aan deze vertalers:

fr en

100%

irlanda helpt ons de wereld te herstellen! Wil je bijdragen?
Begin met vertalen ›

Felice Suglia

Lid sinds: 06/15/13

31.100 Reputatie

264 handleidingen geschreven

0 opmerkingen

Voeg opmerking toe

Weergavestatistieken:

Afgelopen 24 uren: 3

Afgelopen 7 dagen: 3

Afgelopen 30 dagen: 10

Altijd: 124