Ga door naar hoofdinhoud

Lenovo Yoga Tab 3 8 LCD Replacement

Engels
Nederlands
Stap 2
Lenovo Yoga Tab 3 8 LCD Replacement: stap 0, afbeelding 1 van 3 Lenovo Yoga Tab 3 8 LCD Replacement: stap 0, afbeelding 2 van 3 Lenovo Yoga Tab 3 8 LCD Replacement: stap 0, afbeelding 3 van 3
  • Heat the iOpener and lay it flat along an edge of the LCD for 2-5 minutes to loosen the screen adhesive.

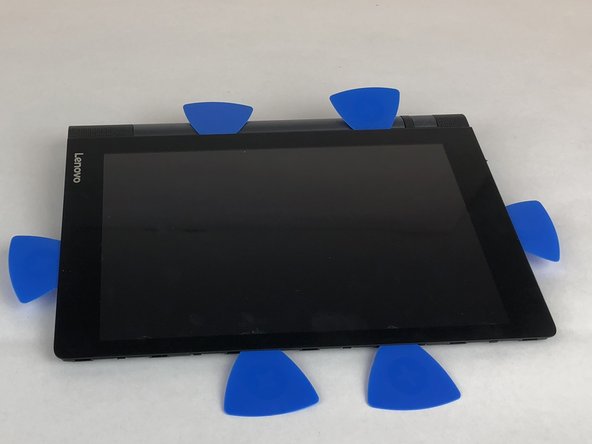
  • Insert a plastic opening tool under the LCD and gently pry it away from the adhesive. Place opening picks as you go along all four edges to keep the adhesive from sticking again.

  • Do not insert the opening picks too far or it might damage the LCD

  • Do not force the LCD while prying or it may shatter. Reheat and reapply your iOpener if the adhesive does not separate easily.

Vertaling hier toevoegen

Vertaling hier toevoegen

Vertaling hier toevoegen

Vertaling hier toevoegen

Je bijdragen zijn gelicentieerd onder de open source Creative Commons-licentie.