Ga door naar hoofdinhoud

Desmontaje del Motorola Droid Bionic

Stap 13
Motorola Droid Bionic Teardown: stap 0, afbeelding 1 van 2 Motorola Droid Bionic Teardown: stap 0, afbeelding 2 van 2
  • There's tons of chips on the front of the board. Other chips of interest include:

  • Texas Instruments WL1271 chip that supports WiFi (802.11 b/g/n), Bluetooth 2.1, FM and GPS technologies (thanks Chipworks!)

  • Kionix KXTF9 accelerometer

  • ST Micro AGD8 2040 S6NBF gyroscope

  • Avago ACPM-7868 quad-band power amplifier

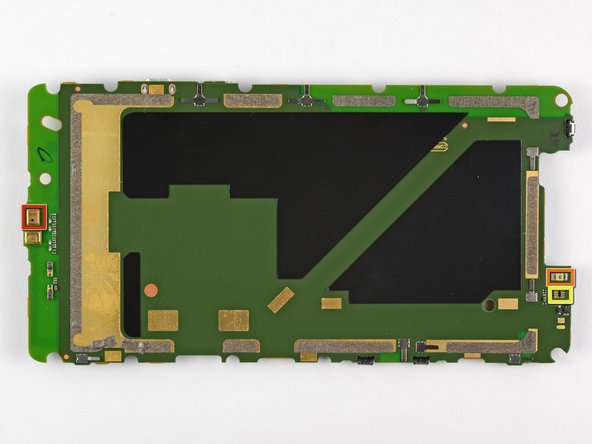
  • What's this? Did we use Content Aware to remove all of the chips from the back of the motherboard? The answer is no; there just isn't much going on with the backside of the board.

  • We find a microphone (red), proximity sensor (orange), ambient light sensor (yellow) on the back.

  • It is possible that Motorola placed all of the chips on one side of the board to keep the thickness of the device to a minimum.

Hay toneladas de chips en el frente del tablero. Otros chips de interés incluyen:

Chip Texas Instruments WL1271 compatible con WiFi (802.11 b / g / n), Bluetooth 2.1, FM y tecnologías GPS (¡Gracias Chipworks!)

Acelerómetro Kionix KXTF9

Giroscopio ST Micro AGD8 2040 S6NBF

Amplificador de potencia de banda cuádruple Avago ACPM-7868

¿Qué es esto? ¿Utilizamos Content Aware para eliminar todos los chips de la parte posterior de la placa madre? La respuesta es no; simplemente no hay mucho que hacer con la parte posterior de la placa.

Encontramos un micrófono (rojo), sensor de proximidad (naranja), sensor de luz ambiental (amarillo) en la parte posterior.

Es posible que Motorola haya colocado todos los chips en un lado de la placa para mantener el grosor del dispositivo al mínimo.

Je bijdragen zijn gelicentieerd onder de open source Creative Commons-licentie.