Waarschuwing: Je bewerkt een vooraf vereiste handleiding. Alle wijzigingen die je hierin maakt, beïnvloeden alle 8 handleidingen die deze stap bevatten.
Stap 20 vertalen
Stap 20
-
Lift the hard drive up with one hand so you can access the headphone jack ribbon beneath.
-
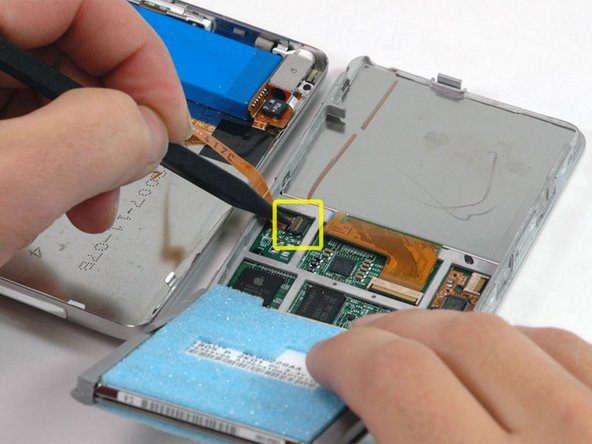
Use a spudger to flip up the plastic tab holding the headphone jack ribbon in place. The tab will rotate up 90 degrees, releasing the ribbon cable.
-
Slide the orange headphone jack ribbon out of its connector.
-
The rear panel is now free from the iPod.
Je bijdragen zijn gelicentieerd onder de open source Creative Commons-licentie.