Ga door naar hoofdinhoud

Kindle Fire HD Display Assembly (Front Glass and LCD) Replacement

Engels
Nederlands
Stap 3
Kindle Fire HD Display Assembly (Front Glass and LCD) Replacement, Remove battery: stap 0, afbeelding 1 van 3 Kindle Fire HD Display Assembly (Front Glass and LCD) Replacement, Remove battery: stap 0, afbeelding 2 van 3 Kindle Fire HD Display Assembly (Front Glass and LCD) Replacement, Remove battery: stap 0, afbeelding 3 van 3
Remove battery
  • Tip: keep track of all your screws so reassembly will be simple and easy. One easy method is to take a small piece of tape, stick the head of each screw (in that step) to the tape, and then attach a scrap of paper (with the name/location written on it) to the tape.

  • Remove four Phillips #00 screws and one T5 Torx screw which secure the battery in place.

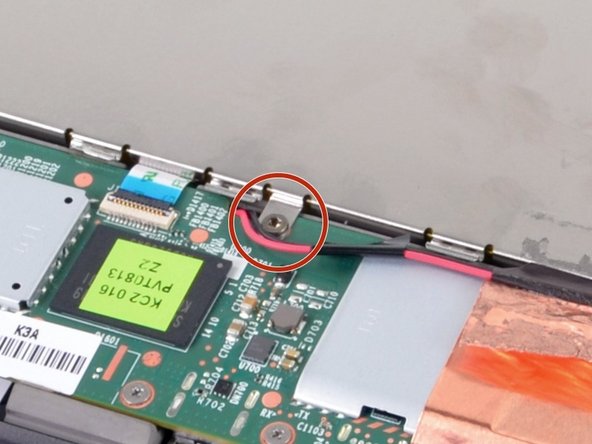
  • The T5 Torx screw is located on the motherboard near the antenna clip. Remove it using a special T5 Torx screwdriver.

  • If you aren't equipped with the T5 Torx screwdriver, you could try using your fingers, but it will be very difficult to remove it.

  • To remove battery, lift battery up and away from Kindle, and pull cable out of motherboard.

Vertaling hier toevoegen

Vertaling hier toevoegen

Vertaling hier toevoegen

Vertaling hier toevoegen

Vertaling hier toevoegen

Je bijdragen zijn gelicentieerd onder de open source Creative Commons-licentie.