Ga door naar hoofdinhoud

Canon PowerShot SD750 LCD Screen Replacement

Waarschuwing: Je bewerkt nu een vooraf vereiste handleiding van de handleiding die je net bekeek. Alle wijzigingen die je hierin maakt, beïnvloeden alle 3 handleidingen die deze stap bevatten.

Engels
Nederlands

Stap 4 vertalen

Stap 4
Canon PowerShot SD750 LCD Screen Replacement: stap 0, afbeelding 1 van 2 Canon PowerShot SD750 LCD Screen Replacement: stap 0, afbeelding 2 van 2
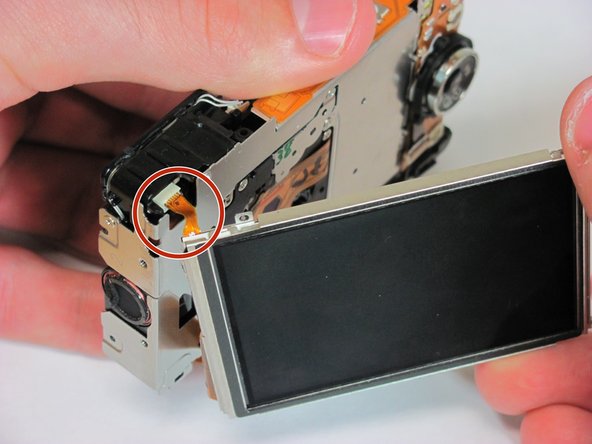
  • Locate the two ribbons connected to the camera and the LCD screen. (One is red and small and the other is wide and orange)

  • Remove the top left red ribbon by gripping the connector on the camera and sliding it straight out.

  • Remove the side orange ribbon by gripping the connector on the camera and sliding it straight out.

  • Note: It may be helpful to use tweezers when removing the connectors. (Pay close attention to how the ribbons are disconnected as this will help in replacing the screen later)

  • Note: When reassembling, use tweezers to reconnect the small red connector on the top left of the screen.

Vertaling hier toevoegen

Vertaling hier toevoegen

Vertaling hier toevoegen

Vertaling hier toevoegen

Vertaling hier toevoegen

Je bijdragen zijn gelicentieerd onder de open source Creative Commons-licentie.