Ga door naar hoofdinhoud

Samsung Galaxy Tab 2 10.1 Charger Port Replacement

Waarschuwing: Je bewerkt een vooraf vereiste handleiding. Alle wijzigingen die je hierin maakt, beïnvloeden de handleiding die deze stap bevat.

Engels
Nederlands
Stap 5
Samsung Galaxy Tab 2 10.1 Charger Port Replacement: stap 0, afbeelding 1 van 3 Samsung Galaxy Tab 2 10.1 Charger Port Replacement: stap 0, afbeelding 2 van 3 Samsung Galaxy Tab 2 10.1 Charger Port Replacement: stap 0, afbeelding 3 van 3
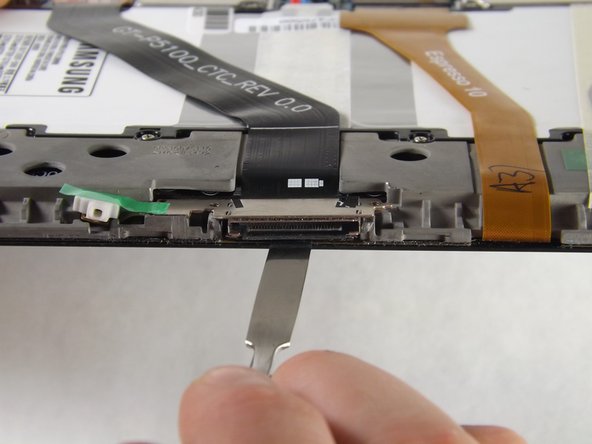
  • Be sure to insert the spudger underneath the charger port and not inside the charger port to avoid damaging the component

  • Slide the flat end of the heavy-duty spudger under the charger port.

  • Make sure the spudger is all the way to the back of the cavity and slide horizontally across the bottom to break the adhesive.

Vertaling hier toevoegen

Vertaling hier toevoegen

Vertaling hier toevoegen

Je bijdragen zijn gelicentieerd onder de open source Creative Commons-licentie.