Stap 16 vertalen


-
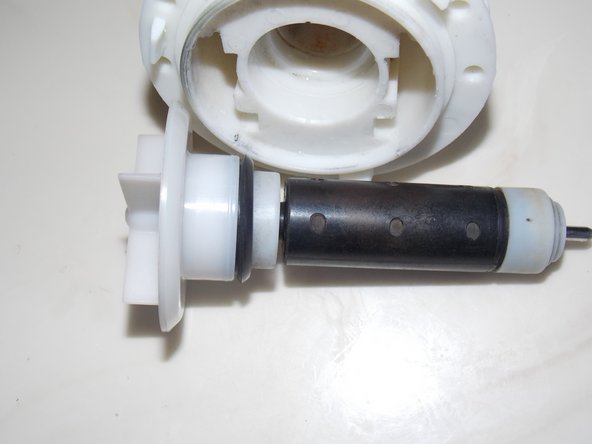
For this discussion the core comprises of the following as one unit: rotary blade, lid, rubber seal, spindle and magnet. To remove the core, gently pry with a flat head screw driver all around the top edge and gently lift the core out of the case housing.
-
The location to pry is NOT directly under the rotary blade, but under the cover piece which resides directly BELOW the rotary blade. If you look at the picture for this step, you see the pump standing upright.
-
Going from top to bottom, first is the rotary blade, then below the rotary blade is the lid (which covers the pump case housing), then there is a small gap between the lid and the case housing and then the black o-ring and then the rest of the case housing. Gently pry in the small gap between the lid and the case housing to remove the core.
-
The core is only being held in place by the rubber stopper and the magnetic forces. One advantage to removing the core, is that you will have full access to clean the junk out of the side chambers in the pump and it will be easier to clean out.
-
However, if you do decide to do this step, you need to realize that you may compromise the integrity of the pump by introducing water and other foreign material into the center chamber. So, only do this step if you are prepared to replace your pump or are handy and able to refurbish it.
-
Once I removed the core from my pump, I could clearly see that the center chamber was also full of putrid water and I surmised that the rubber seal was warn out and no longer doing it’s job to keep the water out and I replaced my pump.
-
I am not a mechanical engineer, but I guess if you wanted to try and refurbish the pump, you would have to fully clean and dry it, add new grease to the core, and apply some silicone sealant to the rubber stopper to try and re-seal the stopper when you put it back into the pump.
-
Then let the sealant fully dry before re-installing the pump into the washer and testing it.
Je bijdragen zijn gelicentieerd onder de open source Creative Commons-licentie.