Waarschuwing: Je bewerkt een vooraf vereiste handleiding. Alle wijzigingen die je hierin maakt, beïnvloeden alle 21 handleidingen die deze stap bevatten.
Stap 6 vertalen
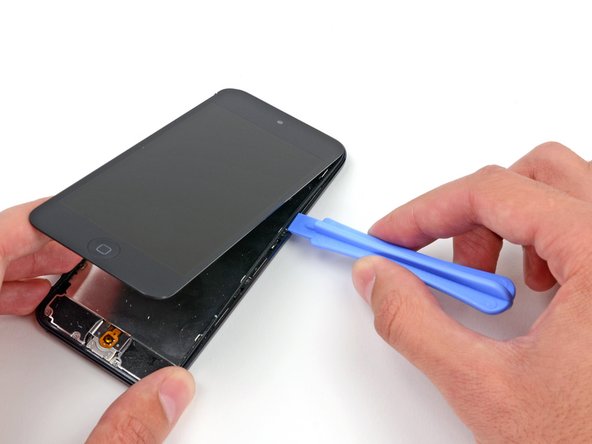
Stap 6


-
Insert the plastic opening tool between the frame and the rear case behind the first clip.
-
Rock the tool sideways, to spread the gap behind the clip and separate it from the rear case.
-
This may not free the clip initially, but repeating the procedure for each clip will begin to loosen the piece.
Je bijdragen zijn gelicentieerd onder de open source Creative Commons-licentie.