Ga door naar hoofdinhoud

Mac Mini Mid 2011 Hard Drive Replacement

Waarschuwing: Je bewerkt nu een vooraf vereiste handleiding van de handleiding die je net bekeek. Alle wijzigingen die je hierin maakt, beïnvloeden alle 9 handleidingen die deze stap bevatten.

Engels
Nederlands

Stap 1 vertalen

Stap 1
Mac Mini Mid 2011 Hard Drive Replacement: stap 0, afbeelding 1 van 2 Mac Mini Mid 2011 Hard Drive Replacement: stap 0, afbeelding 2 van 2
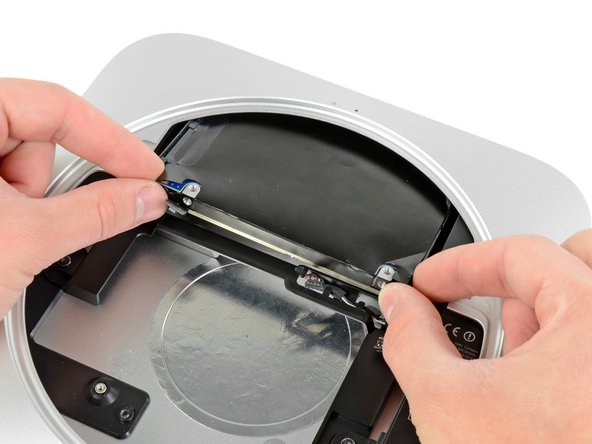
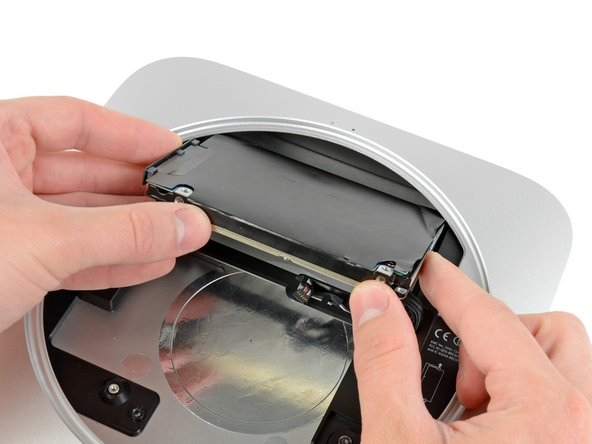
  • Pull the hard drive away from the front edge of the mini and remove it from the outer case.

  • During reassembly, there are two pins on the inside edge of the hard drive that fit into the case. The holes have rubber grommets around them, so it may be difficult to tell when you have seated the hard drive correctly.

  • There are two pairs of holes in the case. Insert the pins into the holes closest to the bottom of the case.

Vertaling hier toevoegen

Vertaling hier toevoegen

Vertaling hier toevoegen

Je bijdragen zijn gelicentieerd onder de open source Creative Commons-licentie.